Supplements
Lost Mine of Phandelver
Starter Set
1–5
Jul 15th, 2014
[+]
Introduction
Running the Adventure
Background
Overview
Adventure Hook
The Forgotten Realms
Part 1 — Goblin Arrows
Goblin Ambush
Cragmaw Hideout
Part 2 — Phandalin
Encounters in Phandalin
Important NPCs
Town Description
Redbrand Ruffians
Redbrand Hideout
Part 3 — The Spider's Web
Triboar Trail
Conyberry and Agatha's Lair
Old Owl Well
Ruins of Thundertree
Wyvern Tor
Cragmaw Castle
Part 4 — Wave Echo Cave
Character Level
Experience Point Awards
Wandering Monsters
General Features
Keyed Encounters
Conclusion
App. A: Magic Items
App. B: Monsters
Supplements
Hoard of the Dragon Queen
Tyranny of Dragons
1–7
Aug 19th, 2014
[+]
Campaign Overview
Hoard of the Dragon Queen
The Rise of Tiamat
Running the Adventure
Campaign Villains
Campaign Allies
Ch. 1: Greenest in Flames
Character Hooks
The Approach
General Features
Wandering Encounters
Missions
Ch. 2: Raiders' Camp
Tracking the Raiders
The Camp
Rewards
Ch. 3: Dragon Hatchery
Abandoned Camp
Dragon Hatchery
–1. Cave Entrance
–2. Concealed Passage
–3. Fungus Garden
–4. Stirge Lair
–5. Troglodyte Incursion
–6. Meat Locker
–7. Drake Nursery
–8. Kobold Barracks
–9. Dragon Shrine
–10. Dragon Hatchery
–10A. Black Dragon Eggs
–10B. Kobolds in Hiding
–11. Frulam Mondath's Chamber
–12. Guard Barracks
–13. Treasure Storage
Rewards
Ch. 4: On the Road
Elturel
Baldur's Gate
Fellow Travelers
Life on the Road
Random Road Events
Planned Road Events
Ch. 5: Construction Ahead
Waterdeep
Northbound, Again
Carnath Roadhouse
–1. Courtyard
–2. Stables
–3. Warehouse
–4. Strong Room
–5. Rooms
–6. Bog Luck's Room
–7. Ardred Briferhew's Room
–8. Kitchen
Tracking the Load
Grudge Match
Ch. 6: Castle Naerytar
Traveling to the Castle
Castle Naerytar
Squaring Off Against the Cult of the Dragon
Approaching Castle Naerytar
Outside Castle Naerytar
–1. Landing
–2. Animal Stockade
–3. Longhouses
–4. Huts
–5. Moat
–6. Main Gate
Inside Castle Naerytar
Ground Floor
–1A. Barbican
–1B. Causeway
–1C. Outer Ward
–1D. Inner Ward
–1E. Northwest Tower
–1F. Stables
–1G. Lower Barracks
–1H. Forge and Armory
–1I. Lizardfolk Ready Room
–1J. Lizardfolk Sleeping Room
–1K. Lizardfolk Sleeping Room
–1L. Chapel
–1M. Storeroom
–1N. Rectory
–1O. Archer's Gallery
–1P. Kitchen
–1Q. Great Hall
–1R. Southwest Tower Antechamber
–1S. Subterranean Entrance
–1T. Unused Chamber
–1U. Keep Entrance
–1V. West Guest Rooms
Second Floor
–2A. Upper Barbican
–2E. Rotted Floor
–2F. Stables Loft
–2G. Upper Barracks
–2H. Arsenal
–2I, J, K. Vacant Rooms
–2L. Outer Library
–2M. Reading Room
–2N. Library
–2P. Kitchen Storage
–2R. Cultists' Sleeping Chamber
–2T. Cultists' Sleeping Chamber
–2U. Dralmorrer Borngray's Common Room
–2V, W. Borngray's Sleeping and Dressing Rooms
Third Floor
–3E. Specters' Sanctum
–3G. Unused Chamber
–3H, I, J. Spiders' Lair
–3L. Rezmir's Office
–3M. Rezmir's Sitting Room
–3N. Rezmir's Sleeping Chamber
–3O. Rezmir's Sanctuary
–3P. Kitchen Storage
–3R. Cultists' Sleeping Chamber
–3S. Unused Room
–3T. Cultists' Study
–3U. Observatory
Beneath the Castle
–1. Entry Cavern
–2. Gray Ooze Lair
–3. Mud Room
–4. Centipede Lair
–5. Empty Chamber
–6. Frog Lake
–7. Frog Landing
–8. Tadpole Hatchery
–9. Crane
–10. Misty Room
–11. Frog Shrine
–12. Pharblex's Sanctum
–13. To the Graypeak Mountains
Rewards
Ch. 7: Hunting Lodge
General Features
Important Nonplayer Characters
Through the Gate
Outside the Lodge
–1. Portal Stones
–2. Hunting Kennel
–3. Stables and Well
Lodge Ground Floor
–4. Cloak Room and Guard Post
–5. Small Hall
–6. Three Hounds Parlor
–7. Kitchen
–8. Pantry
–9. Basement
–10. Guest Chamber
–11. White Stag Parlor
–12. Kobold Servants
–13. Human Servants
–14. Bath
–15. Linens
Lodge Upper Floor
–16. Talis's Hall
–17. Armory
–18. Talis's Bedchamber
–19. Bodyguards' Chamber
–20. Queen of Dragons Chamber
–21. Trophy Room
–22. Peryton Roost
Traveling to Parnast
Ch. 8: Castle in the Clouds
Parnast
–1. Village of Parnast
–2. The Golden Tankard
–3. The Stable
–4. Shrine of Axes
–5. Village Well and Square
Skyreach Castle
Areas of the Castle (6-15)
–6. Main Gate
–6A. Gateway and Golems
–6B. Gate Towers
–7. Lower Courtyard
–8. Stables
–9. Cultist Barracks
–10. Stone Giants' Chamber
–11. Rezmir's Chamber
–12. Red Wizards' Room
–13. Storeroom
–14. Guest Chamber
–15. Kitchen
Areas of the Castle (16-25)
–16. Upper Courtyard
–17. High Blue Tower
–18. Crumbling Tower
–19. Steering Tower
–20. Ogre Barracks
–21. Esclarotta's Tomb
–22. Cloud Giant Tower
–23. Giant Guest Chambers
–24. Servant Barracks
–25. Main Vault
Concluding the Adventure
App. A: Backgrounds
Background Template
Optional Features
App. B: Council Scorecard
First Council (Hoard of the Dragon Queen)
Second Council
Third Council
Fourth Council
Final Tally
App. C: Magic Items
Dragon Masks
App. D: Monsters
Monsters (A-G)
Monsters (H-Z)
App. E: Concept Gallery
Invasion of Icewind Dale
Attack on Luskan
Siege of Neverwinter
Assassination in Waterdeep
Battle at Tiamat's Temple
Coup at Dragonspear Castle
Factions
Cult of the Dragon
Areas of Faerûn
Dragons
Supplements
Rise of Tiamat
Tyranny of Dragons
8–15
Nov 4th, 2014
[+]
Campaign Overview
Hoard of the Dragon Queen
The Rise of Tiamat
Running the Adventure
Campaign Villains
Campaign Allies
Ch. 9: Council of Waterdeep
Starting the Adventure
Back in Waterdeep
Gathering Allies
Sessions of the Council
Scoring the Sessions
Ch. 10: The Sea of Moving Ice
Introduction
The Sea of Moving Ice
Oyaviggaton
Ice Caves
–1. Entrance from Hut
–2. Entrance from the Village Hall
–3. Larder
–4. Kobolds' Den
–5. Junk Room
–6. The Chute
–7. Hall of Giants
–8. Trophy Hall
–9. Unused Chamber
–10. Maccath the Crimson
–11. Scriptorium
–12. Ice Trolls
–13. Ice Toad Workplace
–14. Ice Toad Lair
Arauthator's Lair
–15. Scrags' Lair
–16. Ice Pillars
–17. The Icewolf's Spine
–18a. The Gullet
–18b. The Throat
–19. The Perch
–20. Arauthator's Abyss
Developments
Leaving Oyaviggaton
Arauthator's Treasure
Conclusion
Chapters 11 and 12: Death to the Wyrmspeakers
Varram the White
Tomb of Diderius
–1. Entrance Plaza
–2. Antechamber
–3. Watchful Statues
–4. Mosaic Chamber
–5. Well Chamber
–6. Hallway
–7. Throne Room Antechamber
–8. Throne Room
–9. Study and Library
–10. Dining Hall
–11. Treasure Vault
–12. Divination Pool
–13. Crypt of Diderius
Ss'tck'al
–14. Entryway
–15. Bridge
–16. Meditation Chamber
–17. Yuan-ti Quarters
–18. Long Hallway
–19. Hatchery
–20. Lizardfolk Den
–21. Prison
–22. Temple
Conclusion
Neronvain
The Misty Forest
Neronvain's Stronghold
–1. Pool
–2. Island Chamber
–3. Ettin Lair
–4. Elf Quarters
–5. Cultist Common Room
–6. Cultist Quarters
–7. Storeroom
–8. Neronvain's Chambers
–9. Secret Passage
–10. Chuth's Lair
Conclusion
Ch. 13: The Cult Strikes Back
First Attack
Second Attack
Third Attack
Sequence of Events
Ch. 14: Metallic Dragons, Arise
Unlikely Ambassadors
Council of Dragons
Conclusion
Ch. 15: Xonthal's Tower
An Unexpected Message
The Maze
–1. The Sundial
–2. Chuul Pool
–3. Cyclopes' Pasture
–4. Carnivorous Garden
–5. Pagoda
–6. Statue Gallery
–7. Gorgon Maze
The Tower
–8. Audience Chamber
–9. Closed Chambers
–10. Shrine
–11. Lounge
–12. Observatory
–13. Bedroom
Dungeon
–14. Dungeon Teleporter
–15. Elemental Checkpoint
–16. Laboratory
–17. Cosmic Hallway
–18. Study
–19. Observation Room
–20. Spellbook Study
–21. Storage Closet
–22. Taraz the Fair
–23. Time Chamber
Exiting Xonthal's Tower
Conclusion
Ch. 16: Mission to Thay
The Enemy of My Enemy
Conclusion
Ch. 17: Tiamat's Return
The Final Battle
The Well of Dragons
–3. Forgotten Entrance
–4. Naergoth Bladelord
–5. Unused Chamber
–6. Main Treasure Chamber
–7. Secondary Treasure Chamber
–8. The Draakhorn
–9. Planning Room
–10. Leaders' Quarters
–11. Severin's Quarters
–14. Prisoners' Effects
–15. Low-Ranking Cultists' Chamber
–19. Drake Pens
–22. Sinkhole
–23. Northern Exits
–24. Temple Exit
Tiamat's Temple
Enemies and Allies
Victory or Defeat
App. A: Backgrounds
Background Template
Optional Features
App. B: Council Scorecard
First Council (Hoard of the Dragon Queen)
Second Council
Third Council
Fourth Council
Final Tally
App. C: Magic Items
App. D: Monsters
App. E: Concept Gallery
Invasion of Icewind Dale
Attack on Luskan
Siege of Neverwinter
Assassination in Waterdeep
Battle at Tiamat's Temple
Coup at Dragonspear Castle
Factions
Cult of the Dragon
Areas of Faerûn
Dragons
Supplements
Princes of the Apocalypse
Elemental Evil
1–15
Apr 7th, 2015
[+]
Ch. 1: Rise of Elemental Evil
Using This Source
Adventure Background
Adventure Synopsis
Elemental Cults
Running the Adventure
Ch. 2: The Dessarin Valley
History
Current Events
Red Larch
–1. Allfaiths Shrine
–2. The Swinging Sword
–3. The Helm at Highsun
–4. Mother Yalantha's
–5. Thelorn's Safe Journeys
–6. Chansyrl Fine Harness
–7. Helvur Tarnlar, Clothier
–8. Lorren's Bakery
–9. Tantur Smithy
–10. Drouth Fine Poultry
–11. Jalessa Ornra, Butcher
–12. Dornen Finestone
–13. Ironhead Arms
–14. Mhandyvver's Poultry
–15. Haeleeya's
–16. Waelvur's Wagonworks
–17. Gaelkur's
–18. Mellikho Stoneworks
–19. Luruth's Tannery
–20. Bethendur's Storage
–21. The Market
–22. Vallivoe's Sundries
Exploring the Valley
Valley Sites
The Uthgardt Tribes
Ch. 3: Secret of the Sumber Hills
The Missing Delegation
Early Investigations
Cult Reprisals
Feathergale Spire
–S1. Stable Level
–S2. Front Hall
–S3. Weapons Locker
–S4. Central Stairs
–S5. Initiate Dormitory
–S6. Kitchen
–S7. Solarium
–S8. Great Hall
–S9. Knights' Cells
–S10. Merosska's Apartment
–S11. Pinnacle
Knights' Quest
Sighing Valley
–V1. Feathergale Spire
–V2. Dead Rocks
–V3. Knifepoint Gully
–V4. The Lost River
–V5. Howling Plateau
–V6. The Lost River
–V7. Griffon Roost
–V8. Aarakocra Camp
–V9. Manticore Lair
Rivergard Keep
–K1. Front Gate
–K2. Gatehouse
–K3. Gatehouse Upper Floor
–K4. Castle Yard
–K5. Ruined Stable
–K6. Armory
–K7. Bathhouse
–K8. Barracks
–K9. Water Tower
–K10. Landing
–K11. Water Gate
–K12. Moored Keelboat
–K13. Dark Stream
–K14. North Tower
–K15. Chapel
–K16. Great Hall
–K17. Servants' Quarters
–K18. Kitchens
–K19. Old Library
–K20. Keep Guardroom
–K21. Lord's Chambers
–K22. Secret Landing
Sacred Stone Monastery
–M1. Passage of Stone
–M2. Basalt Hall
–M3. South Dormitory
–M4. Guest Quarters
–M5. West Dormitory
–M6. Refectory
–M7. Kitchen
–M8. Sandstone Court
–M9. Shrine of Stone
–M10. Scriptorium
–M11. Stairs
–M12. Abbess's Chambers
–M13. Distilling Room
–M14. Garden of Stone
–M15. Dojo
–M16. Renwick's Tower
–M17. Lich's Quarters
–M18. Mine Guardroom
–M19. Slave Pens
–M20. The Haunted Crypt
–M21. Hall of Thirsting Stone
–M22. Mines
–M23. Hidden Tunnel
–M24. The Ancient Stair
Scarlet Moon Hall
–H1. Courtyard
–H2. Wicker Giant
–H3. Kennel
–H4. Scaffolding
–H5. Upper Entry Chamber
–H6. The Downward Path
–H7. Cultist Barracks
–H8. Elizar's Chamber
–H9. Bats in the Attic
Ch. 4: Air, Earth, Fire, and Water
Rooting Out Evil
Cult Retaliation
Temple of Howling Hatred
–A1. Palace Quarter Entrance
–A2. Gatehouse
–A3. Machine Chamber
–A4. Plaza of the Muses
–A5. Tyar-Besil Shops
–A6. Plaza of Vergadain
–A7. Plaza of Moradin
–A8. Ruined Villa
–A9. Tombs
–A10. Palace Plaza
–A11. Moat
–A12. Moradin's Shrine
–A13. Vergadain's Hall
–A14. Living Quarters
–A15. Plaza of Fallen Spires
–A16. Obelisk Row
–A17. The Palace Way
–A18. Grand Hall
–A19. Temple of Elemental Air
–A20. Worm's Tunnel
Temple of the Crushing Wave
–C1. Lake Landing
–C2. Canals
–C3. Whisper Lake
–C4. Drowning Chambers
–C5. Gaol
–C6. Victory Bridge
–C7. Reaver Barracks
–C8. Ancient Silos
–C9. North Guard Post
–C10. Gargoyle Fountain
–C11. Court of the Merfolk
–C12. Troll Hole
–C13. Blackmaw Den
–C14. Hag Lair
–C15. Dragon Bridge
–C16. Thunderhammer Brewery
–C17. Morbeoth's Workshop
–C18. West Guard Post
–C19. Cavern Lakeshore
–C20. Gated Passage
–C21. Starry Lake
–C22. Market Hall
–C23. Galley
–C24. Bridge of Heroes
–C25. Temple of Elemental Water
–C26. Vault
–C27. Priests' Quarters
–C28. Caravan Stairs
Temple of Black Earth
–B1. Gargoyle Chasm
–B2. North Chasm
–B3. Ruined Gates
–B4. Hall of the Gate
–B5. East Guardroom
–B6. Yarsha's Burrow
–B7. Gatewarden's Quarters
–B8. Mud Sorcerer's Lab
–B9. Broken Hall
–B10. Long Chasm
–B11. South Passage
–B12. Broog-Norb's Lair
–B13. Hunting Hall
–B14. Torture Chamber
–B15. Stone Forge
–B16. Armory
–B17. Chasm Staircase
–B18. Barracks
–B19. Statue of Ogrémoch
–B20. Mess Hall
–B21. Screaming Statues
–B22. Earth Prophet's Sanctum
–B23. Shrine of Bleeding Stone
–B24. Sentinel's Hall
Temple of Eternal Flame
–E1. Entrance
–E2. Columned Chamber
–E3. Niche Hall
–E4. Hidden Vault
–E5. Crumbling Barricades
–E6. Bastian's Quarters
–E7. Barracks
–E8. Priests' Room
–E9. Ogre Den
–E10. Hobgoblin Lair
–E11. Cellblock
–E12. Lava Chasm
–E13. Foundry
–E14. Shaft to the Fire Node
–E15. Ancient Armory
–E16. Well
–E17. Mechanical Room
–E18. Library
–E19. Kennel
–E22. Display Hall
–E23. Barracks
–E24. Ignatia's Abode
–E25. Supplicants' Room
–E26. Fire Temple
–E27. Barricades
–E28. Barracks
–E29. Lyzzie's Quarters
–E30. Chimera Lair
–E31. Vanifer's Chamber
Ch. 5: Temple of the Elder Elemental Eye
Wrath of the Elements
Fighting the Prophets
Saving the Delegates
Fane of the Eye
–F1. Worm's Stair
–F2. Howling Pit
–F3. Wind Prison
–F4. Harpy Nest
–F5. Rust Monster Pit
–F6. Swift Stream
–F7. Blackmaw Throne
–F8. The Plunge
–F9. Fungal Swamp
–F10. Foebreaker's Crypt
–F11. Foot of the Obelisk
–F12. Abandoned Mine
–F13. Hall of Black Crystal
–F14. Zegdar's Lair
–F15. Fiery Throat
–F16. Emberhorn Den
–F17. Ancient Conjury
–F18. Drow Tomb
–F19. That Which Lurks
–F20. Hall of Battle
–F21. Temple of the Elder Elemental Eye
The Howling Caves
–N1. Entrance
–N2. Deadly Pool
–N3. Oubliette
–N4. Storm Chasm
–N5. Svirfneblin Settlement
–N6. Breathless Cave
–N7. The Floating Ones
–N8. Wind Chorus
–N9. Mushroom Forest
–N10. Stalagmite Garden
–N11. Hero's Tomb
–N12. Glowing Mere
–N14. Air Node's Doorstep
–N15. Windhuggers
–N16. Tortured Cavern
–N17. Sacrifices
–N18. Royal Guard
–N19. Air Portal
The Plunging Torrents
–P1. Waterfall Basin
–P2. Plunging Passage
–P3. Nets
–P4. Temple Entrance
–P5. Shrine of Yngukulub
–P6. Yngukulub the Devourer
–P7. Quipper Pit
–P8. Sloping Cave
–P9. Crushing Wave Outpost
–P10. Trial by Water
–P11. Hunter's Den
–P12. Feeding Cave
–P13. The Hungry
–P14. Eye of Anguish
–P15. Reflection Chamber
–P16. Hut of the Dark Tide
–P17. Elemental Guardian
–P18. Wrecks
–P20. Water Portal
The Black Geode
–G1. Hall of the Guardians
–G2. Keltar and Gorx
–G3. Roper Den
–G4. Bewildering Crystals
–G5. Underdark Entrance
–G6. Mudflow Falls
–G7. Empty Cave
–G8. Cavern of the Lost Crown
–G9. Narrow Stone Bridge
–G10. Clickety Clack
–G11. Elemental Mud Pool
–G12. Hall of Meditation
–G13. Bulette Kennels
–G14. Rorgrin's Cave
–G15. Arcane Foundry
–G16. Cathedral of Stone
–G17. Earth Portal
The Weeping Colossus
–W1. Volcanic Shaft
–W2. Sentry Chamber
–W3. Causeway
–W4. Pool of Lava
–W5. Chamber of Skulls
–W6. Prison
–W7. Breeding Chamber
–W8. Fire Shrine
–W9. Efreeti Lair
–W10. Vanifer's Chamber
–W11. Flowing Lava
–W12. Fire Portal
Concluding the Campaign
Ch. 6: Alarums and Excursions
Trouble in Red Larch
Into the Wilderness
Necromancer's Cave
–L1. Entry Cave
–L2. Guard Cave
–L3. Corpse Cave
–L4. Dancing Dead
–L5. Workshop
–L6. Study
Tomb of Moving Stones
–T1. Entry Cavern
–T2. Stone Sentinels
–T3. Cage Trap
–T4. Antechamber
–T5. Charnel Chamber
–T6. Hovering Stone
–T7. Dwarf Statue
–T8. Approach
–T9. Chamber of Moving Stones
Side Treks
New Management
Iceshield Orcs
The Long Road
Curse of the Fire Witch
Vale of Dancing Waters
–D1. Switchbacks
–D2. Shrine Entrance
–D3. Courtyard
–D4. Dormitory
–D5. Chapel
–D6. Hall of Vows
–D7. Temple
Dark Dealings in Yartar
Rundreth Manor
Halls of the Hunting Axe
The Ruins
–X1. Owlbear Greetings
–X2. Crumbling Arch
–X3. Watchtower
–X4. Ancient Hall
–X5. Cistern
–X6. Amphitheater
–X7. Entrance to the Crypts
–X8. Hall of the Fallen
–X9. False Crypt
–X10. False Tomb
–X11. The True Tomb of King Torhild Flametongue
Ch. 7: Monsters and Magic Items
Monsters
Princes of Elemental Evil
Magic Items
App. A: Genasi
Heirs to Elemental Power
Wild and Confident
Genasi Lands
Genasi Names
Genasi Traits
App. B: Spells
Spell Lists
Spell Descriptions
App. C: Adapting to Other Worlds
Dark Sun
Dragonlance
Greyhawk
Eberron
Your Own World
Afterword
Supplements
Out of the Abyss
Rage of Demons
1–15
Sep 15th, 2015
[+]
Ch. 1: Prisoners of the Drow
Escape!
The Adventure Begins
In the Slave Pen
The Drow
Velkynvelve
–1. Southern Watch Post
–2. Barracks
–3. Main Hall
–4. Elite Barracks
–5. Lift
–6. Shrine to Lolth
–7. Ilvara's Quarters
–8. Shoor's Quarters
–9. Waterfall
–10. Guard Tower
–11. Slave Pen
–12. Quaggoth Den
–13. Northern Watch Post
–14. Pool
Means of Escape
Leaving Velkynvelve
XP Awards
Ch. 2: Into Darkness
Where to Go?
Underdark Travel
Equipment
Madness
Death
Fungi of the Underdark
Narrating the Journey
Drow Pursuit
Random Encounters
Summarizing Travel
Set Encounters
The Silken Paths
Hook Horror Hunt
–1. Hook Horrors
–2A. Gnoll Hunters
–2B. Gnoll Hunters
–3. Cornered
–4. Hook Horror Nest
–5. Gnoll Camp
The Oozing Temple
–1. Boxed In
–2. Dripping Death
–3. Glabbagool
–4. Pudding Pits
–5. Fountain of Madness
–6. Water Chamber
Lost Tomb of Khaem
–1. Entrance Room
–2. Shrine
–3. Servants' Sarcophagi
–4. False Tomb
–5. True Tomb
Ch. 3: The Darklake
Traversing the Darklake
Random Encounters
Sloobludop
XP Awards
Ch. 4: Gracklstugh
Going to Gracklstugh
Gracklstugh
Darklake District
Laduguer's Furrow
West Cleft and East Cleft Districts
Halls of Sacred Spells
Cairngorm Cavern
Themberchaud's Lair
Whorlstone Tunnels
–1. Entrance
–1a. Pool Bypass
–1b. Buppido's Lair
–2. Diseased Pool
–3. Parade of Fools
–4. Fungi Thicket
–5. Raucous Mesa
–6. Dire Den
–7. Gray Ghost Garden
–8. Gray Alchemist
–9. Fountain of Evil
–10. Cultist Pens
–11. Quasit Playground
–12. Cultist Hideout
–13. Dumping Pit
–14. Obelisk
–14a. Fungi-Covered Doors
Leaving Gracklstugh
Hold of the Deepking
Ch. 5: Neverlight Grove
Going to Neverlight Grove
Arriving at the Grove
Neverlight Grove
Yggmorgus
Leaving Neverlight Grove
Ch. 6: Blingdenstone
Going to Blingdenstone
Blingdenstone Outskirts
Outer Blingdenstone
–1. Stairs
–1a. Cart Lift
–2. Main Gate
–3. Maze
–4. Gauntlet
Inner Blingdenstone
–5. Reception Hall
–6. Barracks
–7. Traders' Grotto
–8. The Ruby in the Rough
–9. Cultivation Cave
–10. Staging Area
–11. Caves of Clatter
–12. Residential Caves
–13. Speaking Stones
–14. Diggermattock Hall
–15. Singing Stones
–16. The Foaming Mug
Rockblight
–17. Abandoned Residences
–18. Overlook
–19. Crystal Garden
–20. Neheedra's Lair
–21. Drow Statues
–22. Steadfast Stone
Goldwhisker Warrens
–23. Main Entrance
–24. Refuse Pile
–25. Hall of Miners
–26. Chipgrin's Rise
–27. Secret Tunnel
The Pudding Court
–28. House Center
–29. Ruined Stockade
–30. Throne Room
Battle for Blingdenstone
Leaving Blingdenstone
Ch. 7: Escape from the Underdark
The Way Out
Bidding Farewell
Confronting the Drow
Further Adventures
Ch. 8: Audience in Gauntlgrym
Summoned by Bruenor
Gauntlgrym
Events in Gauntlgrym
Forging an Alliance
The Way Ahead
Ch. 9: Mantol-Derith
Fraz-Urb'luu's Gem
Reaching Mantol-Derith
Mantol-Derith
Leaving Mantol-Derith
Ch. 10: Descent into the Depths
Fellow Travelers
In Command
Random Events
Underdark Outposts
Retracing Steps
Ch. 11: Gravenhollow
Going to Gravenhollow
The Stone Library
The Enemy of Our Enemy
Stonespeaker Crystals
Returning to Vizeran
Leaving Gravenhollow
Ch. 12: The Tower of Vengeance
Reaching the Tower
Araj: Vizeran's Tower
Ch. 13: The Wormwrithings
The Worm Tunnels
Troglodyte Lair
–1. Entrance Tunnel
–2. Cave Floor
–3. Rise
–4. Basin
–5. Supplies and Captives
–6. Steam Vent
–7. Troglodyte Outpost
–8. Roper Lair
–9. Sunken Pool
–10. Ruins
–11. Spawning Pool
–12. Geothermic Vents
–13. Empty Cave
–14. Rally Point
–15. Exit Tunnel
Voice in the Dark
Worm Nursery
–1. Entry Cavern
–2. Fungus Cave
–3. Ossuary
–4. Chasm
–5. Echo Chambers
–6. Caretaker's Quarters
–7. Entry Chamber
–8. Egg Chamber
–9. Bat Cave
–10. Slop Cave
–11. Spider Nest
–12. Chasm
–13. Exit Tunnel
The Dark Hunters
The Vast Oblivium
Ch. 14: The Labyrinth
Labyrinth Encounters
Adamantine Tower
Spiral of the Horned King
Filthriddens
March to Nowhere
Yeenoghu's Hunt
Gallery of Angels
The Maze Engine
Ch. 15: The City of Spiders
Goals
Going to Menzoberranzan
Menzoberranzan
City Locations
Unexpected Allies
Private Meetings
A Change of Heart
Sorcere
Developments
Ch. 16: The Fetid Wedding
Wedding Invitation
Myconid March
Araumycos
Enter the Groom
Into the Gray Dream
Let Them Speak Now...
Fighting the Faceless Lord
Victory or Defeat
Developments
Ch. 17: Against the Demon Lords
Readying the Plan
Enacting the Plan
Rage of Demons
Against Demogorgon
Loose Threads
App. A: Modifying Backgrounds
Substitute Features
Substitute Bonds
App. B: Magic Items
App. C: Creatures
App. D: Demon Lords
Afterword
Supplements
Curse of Strahd
Ravenloft
1–10
Mar 15th, 2016
[+]
Foreword: Ravenloft Revisited
Introduction
Running the Adventure
Marks of Horror
Ch. 1: Into the Mists
Strahd von Zarovich
Fortunes of Ravenloft
–1. The Tome of Strahd
–2. The Holy Symbol of Ravenkind
–3. The Sunsword
–4. Strahd's Enemy
–5. Strahd
Adventure Hooks
Ch. 2: The Lands of Barovia
Lay of the Land
Alterations to Magic
Barovians
Vistani
Random Encounters
Areas of Barovia
Ch. 3: The Village of Barovia
Approaching the Village
Areas of the Village
–E1. Bildrath's Mercantile
–E2. Blood of the Vine Tavern
–E3. Mad Mary's Townhouse
–E4. Burgomaster's Mansion
–E5. Church
–E6. Cemetery
–E7. Haunted House
Special Events
Ch. 4: Castle Ravenloft
Random Encounters
Walls of Ravenloft
–K1. Front Courtyard
–K2. Center Court Gate
–K3. Servants' Courtyard
–K4. Carriage House
–K5. Chapel Garden
–K6. Overlook
Main Floor
–K7. Entry
–K8. Great Entry
–K9. Guests' Hall
–K10. Dining Hall
–K11. South Archers' Post
–K12. Turret Post
–K13. Turret Post Access Hall
–K14. Hall of Faith
–K15. Chapel
–K16. North Chapel Access
–K17. South Chapel Access
–K18. High Tower Staircase
–K19. Grand Landing
–K20. Heart of Sorrow
–K21. South Tower Stair
–K22. North Archers' Post
–K23. Servants' Entrance
–K24. Servants' Quarters
Court of the Count
–K25. Audience Hall
–K26. Guards' Post
–K27. King's Hall
–K28. King's Balcony
–K29. Creaky Landing
–K30. King's Accountant
–K31. Trapworks
–K32. Maid in Hell
–K33. King's Apartment Stair
–K34. Servants' Upper Floor
Rooms of Weeping
–K35. Guardian Vermin
–K36. Dining Hall of the Count
–K37. Study
–K38. False Treasury
–K39. Hall of Webs
–K40. Belfry
–K41. Treasury
–K42. King's Bedchamber
–K43. Bath Chamber
–K44. Closet
–K45. Hall of Heroes
–K46. Parapets
Spires of Ravenloft
–K47. Portrait of Strahd
–K48. Offstair
–K49. Lounge
–K50. Guest Room
–K51. Closet
–K52. Smokestack
–K53. Rooftop
–K54. Familiar Room
–K55. Element Room
–K56. Cauldron
–K57. Tower Roof
–K58. Bridge
–K59. High Tower Peak
–K60. North Tower Peak
Larders of Ill Omen
–K61. Elevator Trap
–K62. Servants' Hall
–K63. Wine Cellar
–K64. Guards' Stair
–K65. Kitchen
–K66. Butler's Quarters
–K67. Hall of Bones
–K68. Guards' Run
–K69. Guards' Quarters
–K70. Kingsmen Hall
–K71. Kingsmen Quarters
–K72. Chamberlain's Office
Dungeon and Catacombs
–K73. Dungeon Hall
–K74. North Dungeon
–K75. South Dungeon
–K76. Torture Chamber
–K77. Observation Balcony
–K78. Brazier Room
–K79. Western Stair
–K80. Center Stair
–K81. Tunnel
–K82. Marble Slide
–K83. Spiral Stair
–K84. Catacombs
–K85. Sergei's Tomb
–K86. Strahd's Tomb
–K87. Guardians
–K88. Tomb of King Barov and Queen Ravenovia
Ch. 5: The Town of Vallaki
Approaching the Town
Areas of Vallaki
–N1. St. Andral's Church
–N2. Blue Water Inn
–N3. Burgomaster's Mansion
–N4. Wachterhaus
–N5. Arasek Stockyard
–N6. Coffin Maker's Shop
–N7. Blinsky Toys
–N8. Town Square
–N9. Vistani Camp
Special Events
Ch. 6: Old Bonegrinder
Morgantha's Coven
Dream Pastries
Approaching the Windmill
Areas of the Windmill
–O1. Ground Floor
–O2. Bone Mill
–O3. Bedroom
–O4. Domed Attic
The Megaliths
Ch. 7: Argynvostholt
The Order of the Silver Dragon
Approaching the Mansion
Areas of Argynvostholt
–Q1. Dragon Statue
–Q2. Main Entrance
–Q3. Dragon's Foyer
–Q4. Spiders' Ballroom
–Q5. Ruined Stable
–Q6. Dragon's Den
–Q7. Parlor
–Q8. Iron Gate
–Q9. Servants' Quarters
–Q10. Kitchen
–Q11. Wine Storage
–Q12. Dining Hall
–Q13. Chapel of Morning
–Q14. Chapel Staircases
–Q15. Cemetery
–Q16. Dragon's Mausoleum
–Q17. West Staircases
–Q18. Balconies
–Q19. Ruined Bedchambers
–Q20. South Alcove
–Q21. North Alcove
–Q22. Bathroom
–Q23. Storage Room
–Q24. Chapel Balcony
–Q25. Trapped Hallway
–Q26. Northeast Guest Room
–Q27. Knights' Quarters
–Q28. Knights' Quarters
–Q29. Northwest Guest Room
–Q30. Curtained Staircase
–Q31. East Staircases
–Q32. Ruined Bedchambers
–Q33. Collapsed Ceiling
–Q34. Ruined Bathroom
–Q35. Upstairs Gallery
–Q36. Dragon's Audience Hall
–Q37. Knights of the Order
–Q38. Closet
–Q39. Vladimir's Bedroom
–Q40. Argynvost's Study
–Q41. Dragon's Vault
–Q42. Argynvost's Bedroom
–Q43. Hole in Roof
–Q44. Dragon Gargoyle
–Q45. Ancient Ballista
–Q46. Destroyed Ballista
–Q47. Roof Turrets
–Q48. Roof's Edge
–Q49. Beacon Tower Door
–Q50. Beacon, Lower Landing
–Q51. Beacon, Upper Landing
–Q52. Beacon Turrets
–Q53. Beacon of Argynvostholt
Special Events
Ch. 8: The Village of Krezk
Areas of Krezk
–S1. Road Junction
–S2. Gatehouse
–S3. Village of Krezk
–S4. Pool and Shrine
–S5. Winding Road
–S6. North Gate
–S7. Graveyard
–S8. Garden Gatehouse
–S9. Gardens
–S10. Abbey Entrance
–S11. Inner Gatehouses
–S12. Courtyard
–S13. Main Hall
–S14. Foyer
–S15. Madhouse
–S16. Wine Cellar
–S17. Loft and Belfry
–S18. Curtain Wall
–S19. Barracks
–S20. Upstairs Office
–S21. Haunted Hospital
–S22. Operating Room
–S23. Nursery
–S24. Morgue
Special Events
Ch. 9: Tsolenka Pass
Areas of the Pass
–T1. Gatehouse Portcullis
–T2. Demon Statues
–T3. Curtain of Green Flame
–T4. Guard Tower, Ground Floor
–T5. Guard Tower, Upper Floor
–T6. Guard Tower Rooftop
–T7. Western Arch
–T8. Stone Bridge
–T9. Eastern Arch
Special Events
Ch. 10: The Ruins of Berez
Approaching the Ruins
Areas of Berez
–U1. Abandoned Cottages
–U2. Ulrich Mansion
–U3. Baba Lysaga's Hut
–U4. Churchyard
–U5. Marina's Monument
–U6. Standing Stones
Special Events
Ch. 11: Van Richten's Tower
Approaching the Tower
Areas of the Tower
–V1. Ezmerelda's Magic Wagon
–V2. Tower Door
–V3. Rickety Scaffolding
–V4. Tower, First Floor
–V5. Tower, Second Floor
–V6. Tower, Third Floor
–V7. Tower, Fourth Floor
Special Events
Ch. 12: The Wizard of Wines
Approaching the Vineyard
Approaching the Winery
Areas of the Winery
–W1. Stables
–W2. Loading Dock
–W3. Barrel Maker's Workshop
–W4. Barrel Storage
–W5. Veranda
–W6. Well
–W7. Outhouse
–W8. Storage
–W9. Fermentation Vats
–W10. Glassblower's Workshop
–W11. Spiral Staircase
–W12. Ramp
–W13. Back Staircase
–W14. Wine Cellar
–W15. Brown Mold
–W16. Loading Winch
–W17. Master Bedroom
–W18. Kitchen and Dining Room
–W19. Sleeping Quarters
–W20. Printing Press
Special Events
Ch. 13: The Amber Temple
Areas of the Temple
–X1. Temple Facade
–X2. Entrance
–X3. Empty Barracks
–X4. Overlook
–X5. Temple of Lost Secrets
–X6. Southeast Annex
–X7. Secret Scroll Repository
–X8. Upper East Hall
–X9. Lecture Hall
–X10. Northeast Annex
–X11. Northeast Balcony
–X12. East Shrine
–X13. East Archer Post
–X14. North Staircase
–X15. Southwest Annex
–X16. West Scroll Repository
–X17. Upper West Hall
–X18. Hallway
–X19. Potion Storage
–X20. Architect's Room
–X21. West Staircase
–X22. Northwest Annex
–X23. Northwest Balcony
–X24. West Shrine
–X25. West Archer Post
–X26. Secret Alcove
–X27. Lich's Lair
–X28. Hidden Phylactery
–X29. Secret Room
–X30. Preserved Library
–X31. Central Catacombs
–X32. Lower East Hall
–X33. Amber Vaults
–X34. Wizard's Bedchamber
–X35. Sleeping Guardian
–X36. Lower West Hall
–X37. Wizard's Bedchamber
–X38. Haunted Room
–X39. Plundered Treasury
–X40. Sealed Treasury
–X41. Fissure
–X42. Amber Vault
Special Events
Ch. 14: Yester Hill
Areas of the Hill
–Y1. Trail
–Y2. Berserker Cairns
–Y3. Druids' Circle
–Y4. Gulthias Tree
–Y5. Wall of Fog
Special Events
Ch. 15: Werewolf Den
Approaching the Den
Areas of the Den
–Z1. Cave Mouth
–Z2. Guard Post
–Z3. Wolf Den
–Z4. Underground Spring
–Z5. Deep Caves
–Z6. Kiril's Cave
–Z7. Shrine of Mother Night
–Z8. Ring of Stone
Special Events
Epilogue
Strahd Prevails
Strahd Dies
App. A: Character Options
Haunted One
Gothic Trinkets
App. B: Death House
History
Areas of the House
–1. Entrance
–2. Main Hall
–3. Den of Wolves
–4. Kitchen and Pantry
–5. Dining Room
–6. Upper Hall
–7. Servants' Room
–8. Library
–9. Secret Room
–10. Conservatory
–11. Balcony
–12. Master Suite
–13. Bathroom
–14. Storage Room
–15. Nursemaid's Suite
–16. Attic Hall
–17. Spare Bedroom
–18. Storage Room
–19. Spare Bedroom
–20. Children's Room
–21. Secret Stairs
–22. Dungeon Level Access
–23. Family Crypts
–23A. Empty Crypt
–23B. Walter's Crypt
–23C. Gustav's Crypt
–23D. Elisabeth's Crypt
–23E. Rose's Crypt
–23F. Thorn's Crypt
–24. Cult Initiates' Quarters
–25. Well and Cultist Quarters
–26. Hidden Spiked Pit
–27. Dining Hall
–28. Larder
–29. Ghoulish Encounter
–30. Stairs Down
–31. Darklord's Shrine
–32. Hidden Trapdoor
–33. Cult Leaders' Den
–34. Cult Leaders' Quarters
–35. Reliquary
–36. Prison
–37. Portcullis
–38. Ritual Chamber
Endings
App. C: Treasures
Tome of Strahd
Magic Items
App. D: Monsters and NPCs
App. E: The Tarokka Deck
Composition
High Deck
Common Deck
Tarokka Cards
App. F: Handouts
Kolyan Indirovich's Letter (version 1)
Strahd's Invitation
From the Tome of Strahd
Journal of Rudolph van Richten
Kolyan Indirovich's Letter (version 2)
Journal of Argynvost
Poster Map
Supplements
Storm King's Thunder
Storm King's Thunder
1–11
Sep 6th, 2016
[+]
Introduction
Adventure Background
Running the Adventure
Ch. 1: A Great Upheaval
Nightstone
–1. Drawbridge
–2. Watchtowers
–2a. West Towers
–2b. Northwest Tower
–2c. Northeast Tower
–2d. East Tower
–2e. Southeast Tower
–2f. Southwest Tower
–3. Square
–4. Residences
–4a. Delfryndel Residence
–4b. Osstra Farm
–4c. Southwell Farm
–4d. Hulvaarn Farm
–4e. Summerhawk Residence
–4f. Agganor Residence
–4g. Nesper Farm
–4h. Xelbrin Residence
–5. Temple
–5a. Temple and Pulpit
–5b. Bedroom and Steeple
–6. Graveyards
–6a. Nandar Crypt and Graveyard
–6b. North Graveyard
–7. Stable House
–7a. Barn
–7b. Hayloft
–8. Nightstone Inn
–8a. Dining Room
–8b. Kitchen and Pantry
–8c. Morak's Bedroom
–8d. Guest Bedroom
–8e. Guest Bedroom
–8f. Kella's Bedroom
–9. Trading Post
–10. Windmill
–11. Bridge
–12. Gate to the Keep
–13. Inner Bailey
–14. Nandar Keep
–14a. Great Hall
–14b. Kitchen
–14c. Den and Library
–14d. Upstairs Hall
–14e. Master Bedroom
–14f. Roof
Dripping Caves
–1. Main Cavern
–1a. Ledges
–1b. Hot Mud Bath
–1c. Stalagmite Forest
–1d. Polluted Pool
–2. Goblin Warrens
–2a. Sleeping Caves
–2b. Cave of Bones
–3. East Caves
–3a. The Blob
–3b. Water Supply
–4. Bats and Prisoners
–5. Fissure
–6. Underground Stream
–7. Natural Chimney
–8. Hark's Hoard
–9. Boss Hark's Cave
Morak's Quest
Tower of Zephyros
Unfriendly Skies
Ch. 2: Rumblings
Special NPCs
Bryn Shander
–B1. Outer Gates
–B2. Stables
–B3. Council Hall
–B4. House of the Triad
–B5. Speaker's Palace
–B6. Town Hall
–B7. Marketplace
–B8. Kelvin's Comfort
–B9. Armory
–B10. Blackiron Blades
–B11. The Hooked Knucklehead
–B12. Rendaril's Emporium
–B13. The Northlook
–B14. Geldenstag's Rest
Goldenfields
–G1. Gatehouse
–G2. Watch Posts
–G3. Earth Mother's Bounty
–G4. Grain Towers
–G5. Livestock Fields
–G6. Town
–G7. Harvesthome Abbey
–G8. Northfurrow's End
–G9. Goldengulp Brewery
–G10. Freshwater Spring
–G11. Rice Paddies
–G12. Vegetable Gardens
–G13. Wheat Fields
–G14. Herb Gardens
–G15. Orange Orchard
–G16. Apple Orchard
–G17. Corn Field
–G18. Barley Field
–G19. Hops Field
–G20. Pumpkin Patch
Triboar
–T1. Market Square and Tower
–T2. North Caravan Campground
–T3. West Caravan Campground
–T4. Happy Horse Ranch
–T5. Wainwright's Wagons
–T6. The Lion's Share
–T7. Ransor's Open Road
–T8. The Cart and Coin
–T9. The Triboar Travelers
–T10. Northshield House
–T11. Othovir's Harness Shop
–T12. The Talking Troll
–T13. The Frost-Touched Frog
–T14. Six Windows
–T15. Boar's Rest
–T16. The Triboar Arms
–T17. Uldinath's Arms
–T18. Foehammer's Forge
–T19. Merivold Pony Park
–T20. Everwyvern House
–T21. The Pleasing Platter
–T22. Graveyard
–T23. Apothecary
–T24. Gwaeron's Slumber
–T25. Marshaling Field
Ch. 3: The Savage Frontier
Peoples of the North
Civilized Folk
Northlanders
Reghed Nomads
Uthgardt
Orcs
Shield Dwarves
Elves
Halflings
Random Wilderness Encounters
Locations of the North
Amphail
Anauroch
Ardeep Forest
Arn Forest
Ascore
Aurilssbarg
Bargewright Inn
Beliard
Beorunna's Well
Black Road
Blackford Road
Bryn Shander
Cairn Road
Calling Horns
Carnath Roadhouse
Citadel Adbar
Citadel Felbarr
Coldwood
Crags
Daggerford
Dawn Pass
Deadsnows
Deadstone Cleft
Delimbiyr Road
Delimbiyr Vale
Dessarin Hills
Dessarin Road
Dessarin Valley
Druarwood
Everlund
Evermoor Way
Evermoors
Eye of the All-Father
Fallen Lands
Far Forest
Fell Pass
Fireshear
Flint Rock
Forgotten Forest
Fork Road
Forlorn Hills
Frost Hills
Gauntlgrym
Glimmerwood
Goldenfields
Grandfather Tree
Graypeak Mountains
Grayvale
Grayvale Run
Great Worm Cavern
Griffon's Nest
Grudd Haug
Gundarlun
Gundbarg
Hawk's Nest
Helm's Hold
High Forest
High Moor
High Road
Hundelstone
Ice Peak
Ice Mountains and Ice Spires
Iceshield Lands
Icewind Dale
Iron Road
Iron Trail
Ironmaster
Ironslag
Iymrith's Lair
Jalanthar
Julkoun
Jundar's Pass
Kheldell
Kheldell Path
Klauthen Vale
Korinn Archipelago
Kryptgarden Forest
Leilon
Lizard Marsh
Llorkh
Lonely Moor
Long Road
Longsaddle
Lost Peaks
Loudwater
Lurkwood
Luskan
Maelstrom
Mere of Dead Men
Mines of Mirabar
Mirabar
Misty Forest
Mithral Hall
Moonwood
Morgur's Mound
Mornbryn's Shield
Nesmé
Nether Mountains
Neverwinter
Neverwinter Wood
Newfort
Nightstone
Noanar's Hold
Northern Means
Northfurrow
Olostin's Hold
One Stone
Orlbar
Parnast
Phandalin
Port Llast
Purple Rocks
Rassalantar
Rauvin Mountains
Rauvin Road
Raven Rock
Red Larch
Red Rocks
Reghed Glacier
Rivermoot
Ruathym
Sea of Moving Ice
Secomber
Shadowtop Cathedral
Shining Falls
Shining White
Silver Marches
Silverwood
Silverymoon
Silverymoon Pass
Southwood
Spine of the World
Star Mounts
Starmetal Hills
Stone Bridge
Stone Stand
Stone Trail
Sumber Hills
Sundabar
Surbrin Hills
Surbrin Trail
Svardborg
Sword Mountains
Ten Trail
Thornhold
Trade Way
Triboar
Triboar Trail
Tuern
Turnstone Pass
Uluvin
Uttersea
Valley of Khedrun
Vordrorn Forest
Waterdeep
Way Inn
Weathercote Forest
Westbridge
Westwood
Whalebones
Womford
Xantharl's Keep
Yartar
Zelbross
Zymorven Hall
Featured Encounters
Old Tower
Inner Circles
Harshnag
Ch. 4: The Chosen Path
Journey to the Eye
Eye of the All-Father
–1. Domed Entrance
–2. Stone Blocks
–2A. Northwest Guard Room
–2B. Southwest Guard Room
–3. Boulderfall Hall
–4. Giant Doors
–5. Portcullises
–5A. Northeast Guard Room
–5B. Southeast Guard Room
–6. Annam's Temple
–7. Feast Hall
–8. Trapped Hall
–8A. Stone Giant Statue
–8B. Magical Trap
–8C. Stone Sphere
–9. Ice Spider Tunnels
–9A. Larder
–9B. Nest
–10. Upstairs Quarters
–10A. Giant Sack
–11. Eye of Annam
Words of the Oracle
Airship of a Cult
–1. Furnace
–2. Harpoon Gun
–3. Ballista
–4. Propeller Hatch
–5. Crew Quarters
–6. Storeroom
Encounter with Iymrith
Troubleshooting
Ch. 5: Den of the Hill Giants
Hill Giants
Grudd Haug
–1. Main Entrance
–2. Feasting Hall
–3. Wolf Pen
–4. Guard Room
–5. Kitchen
–6. Larder
–7. Watermaster
–8. Gong Tower
–9. Stockyard
–10. Giants' Caves
–11. Pigkeeper's Den
–12. Pigpen
–13. Prison
–14. Abattoir
–15. Slub's Den
–16. Smithy
Ch. 6: Canyon of the Stone Giants
Stone Giants
Deadstone Cleft
–1. Canyon Entrance
–2. Roc's Nest
–3. Bear Cave
–4. Gorgon Mud Pool
–5. Thanes' Tomb
–6. Roc Handler
–7. Tomb of the Skodkong
–8. Stonecarver's Cave
–9. Goat Cave
–10. Mushroom Farm
–11. Overgrown Tunnel
–12. Warriors' Tomb
–13. Skoraeus Stonebones
–14. Temple
–15. Uthgardt Camps
–15A. Beer Barrel
–15B. Gathering Cave
–15C. Shaman's Cave
–15D. Rust Monsters' Cave
Ch. 7: Berg of the Frost Giants
Frost Giants
Svardborg
–1. Jarl's Lodge
–1A. Feast Hall
–1B. Hunting Racks
–1C. Stores
–1D. Oar Storage
–1E. Steward's Office
–1F. Winter Wolves' Den
–1G. Throne Room
–1H. Treasury
–2. Giants' Lodge
–2A. Gathering Hall
–2B. Sleeping Quarters
–2C. Warning Horn
–2D. Jarl's Mess
–2E. Armory
–3. Drydock Lodge
–3A. Old Ship Construction
–3B. Barbarian Tents
–3C. Barrel Chute
–3D. Crane
–4. Temple of Thrym
–4A. Statue of Thrym
–4B. Hall of Jarls
–4C. Hall of Heroes
–4D. Narthex
–4E. Bell Tower
–4F. Altar
–4G. Submerged Passage
–4H. Frozen Hoard
–5. Yeti Cave
–6. Outhouse
–7. Entombed Greatship
–8. Underwater Passage
–9. Greatships
The Krigvind
Ch. 8: Forge of the Fire Giants
Fire Giants
Ironslag
–1. Twelve Thousand Steps
–2. Bridge
–3. Mill
–4. Barn
–5. Hut
–5A. Millkeepers' Hut
–5B. Barnkeepers' Hut
–5C. Family Hut
–5D. Family Hut
–5E. Barnkeepers' Hut
–5F. Farmers' Hut
–6. Dairy
–7. Crop Fields
–8. Hall of the Yakfolk Chief
–9. Elevator Shaft
–10. Stairs to the Mines
–11. Elevator, Upper Level
–12. Dressing Mill
–13. Overseer's Office
–14. Assembly Hall, Upper Level
–15. Mustering Hall
–16. Giants' Quarters
–16A. Northwest Room
–16B. Northeast Room
–16C. South Room
–17. Ore Depository
–18. Foundry, Upper Level
–19. Stairs Down
–20. Slave Wheel
–21. Overseer's Office
–22. Hell Hound Pen
–23. Slave Pens
–24. Elevator, Lower Level
–25. Feasting Hall
–26. Ducal Quarters
–26A. North Bedchamber
–26B. South Bedchamber
–27. War Room
–28. Assembly Hall, Lower Level
–29. Adamantine Forge
–30. Overseer's Office
–31. Kitchen
–32. Storeroom
–33. Cistern
–34. Foundry, Lower Level
–35. Forges
–36. Armory
–37. Stairs Up
Special Delivery
Ch. 9: Castle of the Cloud Giants
Cloud Giants
Lyn Armaal
–1. Audience Chamber
–2. Workshop and Meeting Room
–3. Guest Room
–4. Armory
–5. Barracks
–6. Aft Battery
–7. Griffon Aviary
–8. Dungeon
–9. Cloud Stair
–10. Gatehouse
–11. Main Gate
–12. Servants' Quarters
–13. Kitchen
–14. Castellan's Quarters
–15. Stores
–16. Port Battery
–17. Rampart
–18. Starboard Battery
–19. Gallery
–20. Thullen's Bedroom
–21. Library
–22. Nursery
–23. Playroom
–24. Guard Room
–25. Lounge
–26. Port Lawn
–27. Starboard Lawn
–28. Greenhouse
–29. High Lawn
–30. Navigation Dome
–31. Hall of Masks
–32. Study
–33. Master Bedchamber
Conquering the Castle
Ch. 10: Hold of the Storm Giants
Storm Giants
Maelstrom
–1. Vortex and Sinkhole
–2. Portal Chamber
–3. Small Guest Quarters
–4. Giant Guest Quarters
–5. Crab Pen
–6. Nym's Whale
–7. Coral Garden
–8. Mirran's Whale
–9. Sparring Chamber
–10. Sleeping Guard
–11. Serissa's Whale
–12. Sleeping Guards
–13. Study
–14. Great Hall
–15. Throne Room
–16. Royal Treasury
–17. Council Room
–18. Meditation Cave
–19. Shark Pens
–20. Armory
–21. Temple of Stronmaus
–22. Royal Tomb
–23. Scrying Pool
–24. Study
–25. Library
–26. Uthor's Quarters
–27. Stores
–28. Kitchen
–29. Sleeping Guards
–30. Mirran's Tower
–30A. Living Room
–30B. Bedchamber
–30C. Treasury
–31. Nym's Tower
–31A. Hot Bath
–31B. Bedchamber
–32. Serissa's Tower
–32A. Living Room
–32B. Bedchamber
–33. King's Tower
–33A. Storage Rooms
–33B. Bedchamber
–33C. King's Den
–34. Guard Post
Ch. 11: Caught in the Tentacles
The Golden Goose
The Grand Dame
–1. Hold
–2. Head
–3. Forward Stairs
–4. Lower Deck
–5. Aft Stairs
–6. Main Deck Forward
–7. Dining Room
–8. Kitchen
–9. Golden Goose Casino
–10. Main Deck Aft
–11. Bridge
–12. Crew Cabins
–13. Lord Drylund's Cabin
–14. Dance Hall
–15. Aft Balcony
The Hunt for Hekaton
The Morkoth
–1. Forecastle
–2. Aft Castle
–3. Hekaton in Chains
–4. Crew Cabin
–5. Captain's Cabin
–6. First Mate's Cabin
–7. Hold
The Kraken Cometh
Back to Maelstrom?
Ch. 12: Doom of the Desert
Finding Iymrith
Iymrith's Lair
–1. Amphitheater and Environs
–2. Entrance Chamber
–3. Serpents of the Sands
–4. Iymrith's Trove
–5. Purple Wormling Nursery
Adventure Conclusion
App. A: Linked Adventures
Lost Mine of Phandelver
Tyranny of Dragons
Princes of the Apocalypse
Out of the Abyss
App. B: Magic Items
App. C: Creatures
App. D: Special NPCs
Supplements
Tales from the Yawning Portal: The Sunless Citadel
Tales from the Yawning Portal
1–3
Mar 24th, 2017
[+]
Preface
Using This Book
The Yawning Portal
The Sunless Citadel
Adventure Synopsis
–1. Oakhurst.
–2. Kobold Den.
–3. Goblin Lair.
–4. Hidden Grove.
Running the Adventure
Oakhurst
The Citadel
Fortress Level Locations
–1. Ledge
–2. Switchback Stairs
–3. Crumbled Courtyard
–4. Tower Shell
–5. Secret Pocket
–6. Old Approach
–7. Gallery of Forlorn Notes
–8. Pressure Plate
–9. Dragon Riddle
–10. Honor Guard
–11. Secret Room
–12. Tomb of a Failed Dragonpriest
–13. Empty Room
–14. Enchanted Water Cache
–15. Dragon Cell
–16. Kobold Guardroom
–17. Dragon Chow
–18. Prison
–19. Hall of Dragons
–20. Kobold Colony
–21. Dragon Throne
–22. Larder
–23. Underdark Access
–24. Trapped Access
–25. Empty Chamber
–26. Dry Fountain
–27. Sanctuary
–28. Infested Cells
–29. Disabled Traps
–30. Mama Rat
–31. Caltrop Hall
–32. Goblin Gate
–33. Practice Range
–34. Goblin Stockade
–35. Trapped Corridor
–36. Goblin Bandits
–37. Trophy Room
–38. Goblin Pantry
–39. Dragon Haze
–40. Goblinville
–41. Hall of the Goblin Chief
Grove Level Locations
–42. Central Garden
–43. The Great Hunter's Abode
–44. Rift
–45. Rift Node
–46. Old Shrine
–47. Belak's Laboratory
–48. Garden Galleries
–49. Arboretums
–50. Ashardalon's Shrine
–51. Dragon Library
–52. Underpass
–53. Belak's Study
–54. Grove Gate
–55. Twilight Grove
–56. The Gulthias Tree
Aftermath
App. A: Magic Items
App. B: Creatures
Supplements
Tales from the Yawning Portal: The Forge of Fury
Tales from the Yawning Portal
3–5
Mar 24th, 2017
[+]
Preface
Using This Book
The Yawning Portal
The Forge of Fury
Adventure Synopsis
Character Hooks
Approaching Khundrukar
The Forge of Fury
The Mountain Door
–1. End of the Trail
–2. The Dwarf-Door
–3. The Rift Hall
–5. Orc Cave
–6. Prisoner Cave
–7. Fire in the Hole
–8. Orc Commons
–9. Shaman's Lair
–10. The Grand Stair
–11. Orc Quarters
–12. Great Ulfe
–13. Dwarven Statue
–14. Bunk Room
The Glitterhame
–15. The Cold Stream
–15a. Stirge Colony
–16. High Cavern
–17. Troglodyte Cavern
–18. Troglodyte Warren
–19. Chieftain's Cave
–20. Scaly Lair
–21. Orc Tunnel
–22. Fungus Cavern
–23. Dwarven Sepulchers
–24. The Glitterhame
–25. Long Cavern
–26. Grick Lair
–27. Iron Door
The Sinkhole
–28. Waterfall Cavern
–29. River Cavern
–30. Old Storeroom
–31. Empty Storeroom
–32. Flooded Storeroom
–33. Roper's Cavern
–34. Prison
The Foundry
–35. Chamber of Statues
–36. The Great Hall
–37. The Bladeworks
–38. The Chasm
–38a. Chain Ladder
–39. Council Chamber
–40. Durgeddin's Quarters
–41. Kitchens
The Foundry
–42. Desecrated Shrine
–43. Entrance to the Dwarf-Halls
–44. Looted Rooms
–45. Skeleton Room
–46. Common Area
–47. Arundil's Chambers
–48. Looted Armory
–49. Idalla's Den
The Black Lake
–50. The Cascade
–51. Dwarven Bridges
–52. Nightscale's Lair
–53. Nightscale's Hoard
–54. The Dragon's Passage
Aftermath
App. A: Magic Items
App. B: Creatures
Supplements
Tales from the Yawning Portal: The Hidden Shrine of Tamoachan
Tales from the Yawning Portal
5–8
Mar 24th, 2017
[+]
Preface
Using This Book
The Yawning Portal
The Hidden Shrine of Tamoachan
Running the Adventure
The Lower Chambers
–1. The Vault of Chicomoztoc
–2. The Hall of Thrashing Canes
–3. Roost of the Conch
–4. Mud-Filled Doorway
–5. Tomb Stone and Wet Lime
–6. Rubble-Filled Staircase
–7. The Sepulcher of Tloques-Popolocas
–8. Courses of the Gods
–9. Stone Statue
–10. Secret Passage
–11. The Court of Cemanahuac
–12. The Tomb of Hurakan
–12B. Tomb, South Entrance
–13. Child of Zotzilaha
–14. Flooded Hall
–15. The Great Hall
–16. Secret Door
–17. Hall of the Great Spirits
–18. Hallway of the Ancestors
–19. Silver Coffer
–20. Spirit Guard of Ayocuan
–21. Stone Block
–22. Chamber of the Nacehual
–23. Light Ahead
–23A. Triangular Stone
–24. Sandbox
–25. The Nest of the Warriors
The First Tier
–26. Ramp
–27. Stairs
–28. The Arc of Nanahuatcin
–29. The Tomb of Pelota
–30. The Guardian Beast
–31. Calendar Stone
–32. The Portal to Death
–33. The Tomb of Tlacaelel
The First Tier
–33A. Sacrifice to the Sun
–34. Guardians Bar the Way
–35. Xipe's Audience Chamber
–36. Apartment of the Dust of Ages
–37. Bed of Xilonen
–38. Barred Pit
–39. Chamber of the Second Sun
The Second Tier
–40. Dragon Breath
–41. Free Gold
–42. The Chapel of Kukulkan
–43. The Smoking Mirrors
–44. Sun of Motion
–45. Mictlan
–46. Tlazoteotl
–47. Spider in Hiding
The Third Tier
–48. Hound of the Bat
–49. Sacred Chitza-Atlan
–50. Jade Wall
–51. Wind Tunnel
–52. The Hidden Room of Nahual
–53. The Valve
Temple Grounds
–54. Temple Ruin
App. A: Magic Items
App. B: Creatures
Supplements
Tales from the Yawning Portal: White Plume Mountain
Tales from the Yawning Portal
8–9
Mar 24th, 2017
[+]
Preface
Using This Book
The Yawning Portal
White Plume Mountain
Running the Adventure
Locations in the Dungeon
–1. Spiral Staircase
–2. Riddling Guardian
–3. Hidden Slime
–4. Glass Globes
–5. Numbered Golems
–6. Turnstile
–7. Geysers and Chains
–8. Coffin
–9. Pool and Drain
–10. Deceptively Deep Room
–11. Spinning Cylinder
–12. Burket's Guardpost
–13. Snarla's Sanctum
–14. Flood Doors
–15. Boiling Lake
–16. Blow Hole
–17. The Boiling Bubble
–18. Hall Pit
–19. Metal-Heating Corridor
–20. Ghoul Ambushers
–21. Stairs Up
–22. Frictionless Trap
–23. Floating Stream
–24. Sir Bluto's Guardpost
–25. Magical Secret Doors
–26. Terraced Aquarium
–27. Luxurious Prison
Escaping the Dungeon
App. A: Magic Items
App. B: Creatures
Supplements
Tales from the Yawning Portal: Dead in Thay
Tales from the Yawning Portal
9–11
Mar 24th, 2017
[+]
Preface
Using This Book
The Yawning Portal
Dead in Thay
Synopsis
The Doomvault
Into the Doomvault
Abyssal Prisons
–1. Chandelier Chamber
–2. Arena
–3. Issem's Vault
–4. Mystic Circles
–5. Succubus Vault
–6. Elemental Furnace
–7. Chaos Rift
–8. Summoning Chamber
–9. Dead End
–10. Tarul Var's Quarters
–11. Torture Chamber
–12. False Pit Gauntlet
–13. Sorlan's Haunt
–14. Demon Cells
–15. Maze of Undoing
Blood Pens
–16. Gallery of Swarms
–17. Crawling Hall
–18. Barracks
–19. Walkway Pen
–20. Abattoir
–21. Egg Chamber
–22. Hatchling Pens
–23. Dead Garden
–24. Pale Garden
–25. Dreaming Garden
Masters' Domain
–26. Temple of Light
–27. Temple of Shadow
–28. Temple of Blood
–29. Conditioning Court
–30. Training Floor
–31. Undying Laboratory
–32. Wizards' Court
–33. Cavern Guard Post
–34. Shard Cavern
–35. Dread Legion Barracks
Far Realm Cysts
–36. Dark Water
–37. Compelling Light
–38. Sinkhole Cavern
–39. Beholder's Domain
–40. Slime Slaves
–41. Garbage Transfer
–42. Otyugh Lair
–43. Summoning Chamber
–44. Chaos Lair
–45. Eldritch Altar
Forests of Slaughter
–46. Hook Horror Nest
–47. Cockatrice Roost
–48. Gorgon Lair
–49. Gate Cavern
–50. Barghest Range
–51. Pool of Recovery
–52. Displacer Beast Dens
–53. Peryton Roost
–54. Troll Cavern
–55. Pool of Consumption
–56. Behir Lair
–57. Leucrotta Lair
–58. Pool of Renewal
–59. Choker Grotto
–60. Owlbear Grove
Ooze Grottos
–61. Bone Room
–62. Ooze Temple
–63. Spawn Vats
–64. White Maw
–65. Red Master
–66. Black Elder
–67. Laboratory Barracks
–68. Arch of Blades
–69. Spawn Cavern
–70. Battle Pool
–71. Dead Pool
–72. Ooze Duel
–73. Jelly Pit
Predator Pools
–74. Kraken Pool
–75. Dragon Turtle Prison
–76. Naga's Den
–77. Scrag Pool
–78. Undead Pool
–79. Bone Pool
–80. Black Gate Pool
–81. Spawn Hall
–82. Sea Hag Lair
–83. Baron's Court
–84. Altar Pool
–85. Prisoner Cavern
Golem Laboratories
–86. Hall of Teleportation
–87. Golem Vault
–88. Black Prison
–89. Transmutation Pits
–90. Golem Pen
–91. Hall of Skulls
–92. Timeless Prison
–93. Stone Quarry
–94. Golem Assembly
–95. Efreet Prison
–96. Fire Vortex
–97. Golem Forge
Temples of Extraction
–98. Temple of Poison
–99. Temple of Suffering
–100. Temple of Pain
–101. Temple of Ooze
–102. Temple of Shadows
–103. Temple of Fortune
–104. Temple of Savagery
–105. Temple of Plague
–106. Temple of the Forest
–107. Temple of Winter
The Phylactery Vault
Aftermath
App. A: Magic Items
App. B: Creatures
Supplements
Tales from the Yawning Portal: Against the Giants
Tales from the Yawning Portal
11–14
Mar 24th, 2017
[+]
Preface
Using This Book
The Yawning Portal
Against the Giants
Running the Adventures
Customizing the Giants
Running the Adventure
Upper Works: General Features
Upper Level Locations
–1. Front Gate and Foyer
–1B. Tower Guard
–2. Subchief's Room
–3. Dormitory
–4. Barracks
–5. Maids' Chamber
–6. Hall of the Chief
–7. Chamber of the Chief's Wife
–8. Chief's Chamber
–9. Arms Room
–10. Small Dining Room
–10A. Secret Stairs
–11. Great Hall
–12. Arsenal Room
–13. Weapons Room
–14. Main Guest Chamber
–15. Common Room
–16. Common Room
–17. Kitchen
–18. Kitchen Workroom
–18A. Pantry
–19. Servants' Quarters
–20. Orc Slave Quarters
–21. Ogre Quarters
–22. Open Yard
–23. Guard Room
–24. Barracks Room
–25. Barracks Room
Dungeon Level: General Features
Dungeon Level Locations
–1. Marshaling Area
–2. Chamber of the Keeper
–3. Cell Block
–4. Outpost
–5. Barracks
–6. Barracks
–7. Chamber of the Bugbear Captain
–8. Outpost
–9. Barracks
–10. Barracks
–11. Barracks
–12. Barracks
–13. Barracks
–14. Barracks
–15. Torture Chamber
–16. Armory and Smithy
–17. Blocked Passage
–17A. Weird Abandoned Temple
–18. Buried Vestry
–19. Natural Cavern
–20. Troglodyte Cavern
–21. Lizards' Lair
–22. Partially Cleared Passage to Cistern
–23. Cavern of the Carrion Crawlers
–24. Storage Room
–25. Wine Cellar
–26. Gallery Under Clearance
–27. Chamber Under Clearance
–28. Quarters for Stone Giant Miners
–29. False Treasure
–30. Imprisoned Guards
–31. Minor Treasure Room
–32. Secret Room
–33. Chief's Secret Treasure Room
Running the Adventure
Upper Level: General Features
Upper Level Locations
–1. Guardroom Ice Cavern
–2. Guardroom Ice Cave
–3. Empty Ice Cave
–4. Small Ice Cave
–5. Ice Caverns
–6. Provisions
–7. Cavern
–8. South Cavern
–9. Northwest Chamber
–10. Southeast Chamber
–11. Cave of Bones
–12. Lower Bone Cave
–13. Ice Cavern
–14. Misty Ice Cave
–15. Ice Cave
–16. Outer Sleeping Area
–17. Upper Sleeping Area
–18. Middle Sleeping Area
–19. Lower Sleeping Area
–20. Ice Storage Cave
–21. Ice Cavern
–22. Guard Ice Cave
–23. Guard Cave
–24. Visitors' Cave
–25. Visitors' Cave
–26. Special Visitors' Cave
–27. Winter Wolf Pack
–28. Snow-Covered Dome of Ice
–29. White Puddings
Lower Level: General Features
Lower Level Locations
–1. Grand Entry Cavern
–2. Vaulted Cavern
–2A. Dragon's Ledge
–3. Abandoned Storage Cave
–4. Deserted Cavern
–4A. Stone Rubble
–4B. Hungry and Hopping
–5. Entrance Cavern
–6. Emissaries' Cavern
–7. Guest Cavern
–8. Prison Cavern
–9. Servants' Quarters Cavern
–10. Antecavern
–11. Great Cavern of the Jarl
–12. Audience Alcove and Throne Dais
–13. Guard Area
–14. Kitchen
–15. Weapons Cave
–16. Common Quarters Caverns
–17. Kennel Cave
–18. West Chamber
–19. East Chamber
–20. Jarl's Antecavern and Trophy Hall
–21. Jarl Grugnur's Private Cavern
Running the Adventure
Entrance Level: General Features
Entrance Level Locations
–1. Entry Passage
–1A. Alcove
–2. Grand Hall
–3. Throne Room and Audience Chamber
–4. Chamber of the Queen's Servants
–5. Queen's Chamber
–6. Chamber of the King's Guards
–7. King Snurre's Private Quarters
–8. Hydra Cave
–9. King Snurre's Treasure Cave
–10. Arsenal Complex
–10A. West Arsenal
–10B. East Arsenal
–11. Chimera Pen
–12. Advisor's Quarters
–12A. Obmi's Study
–12B. Obmi's Bedchamber
–13. Council Room
–13A. West Alcove
–13B. South Alcove
–14. Door Guard
–15. Kitchen
–16. Storage Chamber
–17. Guest Chamber
–18. Barracks
–19. Servants' Quarters
–20. Communal Quarters
–21. Entry Hall of the Kennels
–22. Kennel Chamber
–23. Kennel Keeper's Quarters
–24. Guardpost
–25. Barracks
Second Level: General Features
Second Level Locations
–1. Hall of the Dead
–2. Ettin Guards' Chamber
–3. Visitors' Chamber
–4. Storage Room
–5. Community Quarters
–6. Smithy
–7. Torture Chamber
–8. Secret Room
–9. Giants' Worship Area
–10. Servants' and Thralls' Worship Area
–11. Priests' Area
–12. Drow Clerics' Area
–13. Guest Chamber
–14. Guest Chamber
–15. Trolls' Chamber
–16. Thrall Pen
–17. Thrall Pen
Third Level: General Features
Third Level Locations
–1. Cavern
–2. Glowing Cave
–3. Cavern End
–4. Cave
–5. Cavern
–6. Great Vaulted Cavern
–7. Treasure Trove Cave
–8. Cave
–9. Wide Passage
–10. Singing Chamber
–11. Troll Annex
–12. Troll Central
–13. Troll Heaven
–14. Narrow Cavern
–15. Gray Cavern
–16. Small Cavern
–17. Jeweled Cavern
–18. Small Cavern
–19. Salamander Central
–20. Council Chamber and Drow HQ
App. A: Magic Items
App. B: Creatures
Supplements
Tales from the Yawning Portal: Tomb of Horrors
Tales from the Yawning Portal
10–14
Mar 24th, 2017
[+]
Introduction
Using This Book
The Yawning Portal
Tomb of Horrors
Legend of the Tomb
Running the Adventure
Locations in the Tomb
–1. False Entrance Tunnel
–2. False Entrance Tunnel
–3. Entrance to the Tomb of Horrors
–4. Fresco of the Wizardly Work Room
–5. The Arch of Mist
–6. The Face of the Great Green Devil
–7. The Forsaken Prison
–8. Gargoyle Lair
–9. Complex of Secret Doors
–10. Great Hall of Spheres
–11. The Three-Armed Statue
–12. Trapped False Doors
–13. Chamber of Three Chests
–14. Chapel of Evil
–15. Stone Gate
–16. Locked Oaken Door
–17. Magical Secret Door
–18. Corridor Protected by Fear Gas
–18A. False Crypt
–19. Laboratory and Mummy Preparation Room
–20. Huge Pit Filled with Spikes
–21. The Agitated Chamber
–22. The Cavern of Gold and Silver Mists
–23. False/True Door
–23A. Knockout Corridor
–24. Adamantine Door
–25. Pillared Throne Room
–26. Small Room with a Door of Electric Blue
–27. The Portal of Scintillating Violet
–27A. Chamber of Hopelessness
–28. The Wondrous Foyer
–29. The Valves of Mithral
–30. False Treasure Room
–31. One-Way Doors
–32. Secret Door
–33. The Crypt of Acererak the Demilich
App. A: Magic Items
App. B: Creatures
Supplements
Tomb of Annihilation
Tomb of Annihilation
1–11
Sep 19th, 2017
[+]
Introduction
Story Overview
Running the Adventure
Starting the Adventure
Welcome to Chult
Ch. 1: Port Nyanzaru
Arrival
Side Quests
Locations in the City
–1. Beggars' Palaces
–2. Executioner's Run
–3. Refuse Pit
–4. Goldenthrone
–5. Merchant Prince's Villa
–6. Grand Souk
–7. Temple of Savras
–8. Temple of Gond
–9. Temple of Sune
–10. Jewel Market
–11. Royal Docks
–12. Statue
–13. Harbormaster's Office
–14. Lighthouse
–15. Fort Nyanzaru
–16. Warehouse District
–17. Dry Dock
–18. Red Bazaar
–19. Fish Market
–20. Grand Coliseum
–21. Hall of Gold
–22. Public Bathhouse
–23. Dye Works
–24. Temple of Tymora
–25. Dinosaur Pens
City Denizens
Merchant Prince's Villa
–1. Entryway
–2. Sitting Area
–3. Grand Hall
–4. Guest Rooms
–5. Garden
–6. Dining Room
–7. Sauna
–8. Bath
–9. Kitchen
–10. Library
–11. Family Rooms
–12. Master Suite
–13. Guard Rooms
–14. Laundry Room
–15. Servants' Quarters
–16. Rain Traps
Factions and Their Representatives
Things to Do
Ch. 2: The Land of Chult
The Expedition Begins
Locations in Chult
Aldani Basin
Ataaz Kahakla
Ataaz Muhahah
Ataaz Yklwazi
Bay of Chult
Camp Righteous
–1. Command Tents
–2. Soldiers' Tents
–3. Burned-Out Shrine
–4. Animal Pens
–5. Latrines
–6. House of the Man and Crocodile
–6A. Concealed Pit Trap
–6B. Blade Trap
–6C. Puzzle Floor
–6D. Puzzle Door
–6E. Treasury
Camp Vengeance
–1. Boats
–2. Gatehouse
–3. Watchtowers
–4. Animal Pen
–5. Field Hospital Tents
–6. Command Tent
–7. Soldiers' Tents
–8. Latrines
The Cauldron
Dungrunglung
–1. Thorn Maze
–2. Main Entrance
–3. Groak's Isle
–4. Shrine
–5. Grung Hovels
–6. Lake Grunglung
–7. Prison Pit
Firefinger
Fort Beluarian
–1. West Gate
–2. Ore Gate
–3. Armorer/Weaponsmith
–4. Bazaar
–5. Temple of Helm
–6. Stables
–7. Jousting Field
–8. Flaming Fist Provisioner
–9. Flaming Fist Barracks
–10. Inner Bailey
–10A. Courtyard
–10B. Raptor Pen
–10C. Hall
–10D. Kitchen
–10E. Castellan
–10F. Bell Tower
–10G. Stores
–10H. Gauntlets' Room
–10I. Command Quarters
–10J. Guest Quarters
Heart of Ubtao
–1. Petrified Tree
–2. Staircase
–3. Cave Entrance
–4. Valindra's Lair
–5. Undead Guardians
–6. Teleportation Circle
Hisari
Hrakhamar
–1. Magma Rift
–2. Smelter
–3. Armory
–4. Forge
–5. Stores
–6. Treasury
–7. Imix Shrine
–8. Smoke-Filled Caverns
–9. Cells and Passage to Wyrmheart Mine
–10. Mine Cart Bay
Hvalspyd
Ishau
Jahaka Anchorage
–1. Jungle Gate
–2. Pier
–3. Officers' Quarters Ashore
–4. Warehouse
–5. The Cage
–6. Watchtower
–6A. Bosco's Bilge
–6B. Kitchen
–6C. Bosco's Bunk
Jahaka Bay
Kir Sabal
–1. Monastery
–2. Cleansing Chambers
–3. Elder's House
–4. Dwellings
–5. Royal House
Kitcher's Inlet
Lake Luo
Land of Ash and Smoke
Mbala
Mezro
Mistcliff
Nangalore
–1. Entrance
–2. Terraces
–3. Spirit Domes
–4. Ruined Palace
–5. Hallucinogenic Plants
–6. Pagoda
–7. Flooded Garden
–8. Zalkoré's Lair
Needle's Bones
Nsi Wastes
Omu
Orolunga
Port Castigliar
Refuge Bay
River Olung
River Soshenstar
River Tath
River Tiryki
Shilku
Shilku Bay
Snapping Turtle Bay
Snout of Omgar
Valley of Dread
Valley of Embers
Valley of Lost Honor
Vorn
Wreck of the Narwhal
Wreck of the Star Goddess
Wyrmheart Mine
–1. Office
–2. Supply Shed
–3. Ore Cart
–4. Upper Shaft
–5. Haunted Forge
–6A. Ledge
–6B. Egg Nursery
–6C. Rolling Stone Trap
–7. Upper Landing
–8. Main Living Quarters
–9. Inventors' Quarters
–10. Big Smash
–11. Urds' Quarters
–12. Bottom of the Shaft
–13. Audience Chamber
–14. Tinder's Lair
Yellyark
–1. Canoes
–2. Larder
–3. Queen Grabstab's Hut
–4. Wooden Cage
–5. Ant Hills
–6. Launch Mechanism
Ch. 3: Dwellers of the Forbidden City
Omu
Locations in the City
–1. City Entrance
–2. Walled Compound
–3. Kubazan's Shrine
–3A. Froghemoth Pool
–3B. Locked Gate
–3C. Chamber of Bravery
–4. Shagambi's Shrine
–4A. Shrine Entrance
–4B. Arena Gallery
–4C. Gladiator Cells
–4D. Gladiatorial Pit
–5. Great Rift
–6. Moa's Shrine
–6A. Shrine Entrance
–6B. Trapped Passage
–6C. Chamber of Deception
–6D. Western Secret Room
–6E. Eastern Secret Room
–7. Fallen Tree
–8. Unkh's Shrine
–8A. Shrine Entrance
–8B. Ruined Workshop
–8C. Chamber of Contemplation
–9. Adventurers' Camp
–10. I'jin's Shrine
–10A. Shrine Entrance
–10B. Puzzle Floor
–10C. Labyrinth
–10D. Puzzle Cube
–11. Chwinga Wagon
–12. Wongo's Shrine
–12A. Cracked Obelisks
–12B. Test of Friendship
–12C. Viewing Corridors
–13. Amphitheater
–14. Tomb of the Nine Gods
–15. Ruined Bazaar
–16. Papazotl's Shrine
–16A. Shrine Entrance
–16B. Mosaic Floor
–16C. Chamber of Command
–16D. Hidden Room
–17. Waterfall
–18. Nangnang's Shrine
–18A. Shrine Entrance
–18B. Chamber of Greed
–18C. Puzzle Cube
–19. Obo'laka's Shrine
–19A. Shrine Entrance
–19B. Gallery of Carvings
–19C. Sun Pool
–19D. Moon Pool
–19E. Chamber of Sacraments
–19F. Secret Passage
–20. Royal Palace
–20A. Main Entrance to the Fane
–20B. Secret Entrance to the Fane
Ch. 4: Fane of the Night Serpent
Schemes of the Yuan-ti
Getting Inside
Locations in the Temple
–1. Main Gate
–2. Hall of War
–3. Hall of Serpents
–4. Armory
–5. Fenthaza's Quarters
–6. Sacrificial Chamber
–7. Evil Oracle
–8. Prisoner Pits
–9. The Fane
–10. Harem
–11. Throne Room
–12. Ras Nsi's Lair
–13. Storeroom
–14. Venom Distillery
–15. Snake Pit
–16. Blood Baths
–17. Sauna
–18. Yuan-ti Nests
–19. Slave Grotto
–20. Underground River
–21. Hydra's Lair
–22. Fungi Cavern
–23. Secret Entrance
Ch. 5: Tomb of the Nine Gods
History of the Tomb
Exploring the Tomb
Spirits of the Nine Trickster Gods
Level 1: Rotten Halls
–1. Acererak's Warning
–2. Gallery of Tricksters
–3. False Entrance
–4. True Entrance
–4A. First Puzzle Door
–4B. Second Puzzle Door
–5. Trapped Corridor
–5A. Poison Darts
–5B. Devil Face
–5C. Floor Hatch
–6. Crystal Window
–7. Grand Staircase
–7A. We Are Not Alone
–7B. Acererak's Second Warning
–7C. Acererak's Third Warning
–7D. Acererak's Fourth Warning
–8. Magical Attraction
–9. Magic Fountain
–10. Obo'laka's Tomb
–11. Gas Pocket
–12. Trapped Chest
–13. Stone Skull
–14. Moa's Tomb
–15. Wind Tunnel
–16. Wongo's Tomb
–17. Underground Waterfall
Level 2: Dungeon of Deception
–18. Devil Pit
–19. Gravity Ring
–20. False Tomb
–21. Zombie Door
–22. Papazotl's Tomb
–23. Bottled Genie
–24. Nangnang's Tomb
–25. Scrying Pool
–26. Spiral Staircase
–27. Forge of the Tomb Dwarves
–28. Withers's Office
Level 3: Vault of Reflection
–29. Jackal Mask
–30. Iron Barrier
–31. Reflected Hall
–31A. Hidden Alcoves
–31B. Curtain of Water
–32. Rotating Crawlways
–33. Chamber of Opposition
–34. Peephole
–35. I'jin's Tomb
–35A. Stone Block
–35B. Tomb
–36. Chamber of Respite
–37. Winds of Pandemonium
–38. Revolving Room Trap
–38A. Control Room
–38B. Access Tunnel
–38C. Revolving Drum
–39. Golem Pit
–40. Curse of the Golden Skull
–41. Tomb Guardians
–42. Kubazan's Tomb
–43. Veils of Fear
–44. Vault of the Beholder
–44A. Eyes of the Beholder
–44B. Inside the Vault
Level 4: Chambers of Horror
–45. Gargoyle Guardians
–46. Lizard Den
–47. Elemental Cells
–47A. Fire Cell
–47B. Water Cell
–47C. Air Cell
–47D. Earth Cell
–48. Shagambi's Tomb
–49. Maze of Death
–49A. Stone Slabs
–49B. Green Devil Face
–49C. Black Opal Crown
–50. Mirror of Life Trapping
–51. Ghastly Door
–52. Throne Room
–53. Crypt of the Sun Queen
–54. Rolling Doom
–54A. Treasure Chest
–54B. Granite Ball
–54C. Acid Pit
–55. Unkh's Tomb
–56. Grandfather Clock
–57. Oubliette
Level 5: Gears of Hate
–58. Cog of Rot
–59. Cog of Acid
–60. Cog of Blood
–61. Control Room
–62. Stone Juggernaut
–62A. "Awaken Napaka!"
–62B. Sloped Hall
–62C. Broken Statue
–62D. Secret Room
–63. Gas-Filled Room
–64. Base of the Waterfall
–65. Underground Lake
–66. Door of Devouring
–67. Hall of the Golden Mastodon
–68. Hall of Decay
–69. Mechanus Chain
–70. Armillary Sphere
Level 6: Cradle of the Death God
–71. Lair of the Sewn Sisters
–72. Trial of the Triangle
–73. Trial of the Square
–74. Trial of the Pentagon
–75. Trial of the Hexagon
–76. Trial of the Octagon
–77. Death God's Nursery
–78. Chapel of Hate
–79. Hall of Finality
–80. Red Library
–81. Ebon Pool
Conclusion
App. A: Character Backgrounds
App. B: Random Encounters
Port Nyanzaru Encounters
Wilderness Encounters
Omu Encounters
App. C: Discoveries
Flora and Fauna
Magic Items
App. D: Monsters and NPCs
App. E: Player Handouts
Handout 1: Players' Map of Chult
Guides
Handout 11: Puzzle Cubes
Handout 12: Players' Map of Omu
Handout 13: Lord Brixton's Letter
Handout 14: I'jin's Puzzle Floor
Handout 15: Papazotl's Riddle
Handout 16: Papazotl's Puzzle Key
Acererak's Warnings
Handout 21: Devlin's Journal Excerpt
Handout 22: Withers's Journal Excerpt
Handout 23: Hieroglyphic Floor
Handout 24: Control Panel
App. F: Trickster Gods of Omu
Supplements
Waterdeep: Dragon Heist
Waterdeep
1–5
Sep 18th, 2018
[+]
Foreword
Pronunciation Guide
Information
DM Map Links
Player Map Links
Introduction
Story Overview
Choose Your Villain
Seasons
Running the Adventure
Adventure Structure
Life in Waterdeep
Character Creation
Character Advancement
Factions in Waterdeep
The Yawning Portal
Ch. 1: A Friend in Need
Where to Start
Zhentarim Hideout
The Watch Arrives
Tracking Floon
Xanathar Guild Hideout
Completing Volo's Quest
Level Advancement
Ch. 2: Trollskull Alley
Areas in the Alley
Joining Factions
Bregan D'aerthe
Emerald Enclave
Force Grey (Gray Hands)
Harpers
Lords' Alliance
Order of the Gauntlet
Zhentarim
Open for Business?
Level Advancement
Ch. 3: Fireball
What's Happening Here?
The Crime Scene
After the Blast
Nim's Secret
What Renaer Knows
Gralhund Villa
Aftermath
Loose Ends
Level Advancement
Ch. 4: Dragon Season
Setting the Stage
Encounter Chains
Encounter 1: Alley
Encounter 2: Mistshore
Encounter 3: Street Chase
Encounter 4: Mausoleum
Encounter 5: Rooftop Chase
Encounter 6: Theater
Encounter 7: Old Tower
Encounter 8: Courthouse
Encounter 9: Cellar Complex
Encounter 10: Converted Windmill
Vault Keys
Vault of Dragons
Adventure Conclusion
Ch. 5: Spring Madness
Facing Xanathar
Foiling Xanathar's Operation
Xanathar's Lair
Special Events
Ch. 6: Hell of a Summer
Cult of Asmodeus
Facing the Cassalanters
Cassalanter Villa
Temple of Asmodeus
Special Events
Ch. 7: Maestro's Fall
Facing Jarlaxle
Sea Maidens Faire
Scarlet Marpenoth
Special Events
Ch. 8: Winter Wizardry
Facing Manshoon
Kolat Towers
Extradimensional Sanctum
Special Events
Volo's Waterdeep Enchiridion
Entering Waterdeep
A Long History (in Brief)
Surviving in the City
The Wards of Waterdeep
The City's Splendors
Parting Words
App. A: Magic Items
App. B: Monsters and NPCs
Ahmaergo
Ammalia Cassalanter
Apprentice Wizard
Aurinax
Bard
Barnibus Blastwind
The Black Viper
City Guard
City Watch
The Doom Raiders
Drow Gunslinger
Durnan
Floon Blagmaar
Gazer
Hlam
Hrabbaz
Jalester Silvermane
Jarlaxle Baenre
Laeral Silverhand
Manshoon
Manshoon Simulacrum
Martial Arts Adept
Meloon Wardragon
Mirt
Nar'l Xibrindas
Nihiloor
Nimblewright
Noska Ur'gray
Orond Gralhund
Osvaldo Cassalanter
Ott Steeltoes
Remallia Haventree
Renaer Neverember
Saeth Cromley
Swashbuckler
Thorvin Twinbeard
Urstul Floxin
Vajra Safahr
Victoro Cassalanter
Volothamp Geddarm
Walking Statues of Waterdeep
Xanathar
Yalah Gralhund
App. C: Handouts
Poster Map
Supplements
Waterdeep: Dungeon of the Mad Mage
Waterdeep
5–20
Nov 13th, 2018
[+]
Waterdeep: Dungeon of the Mad Mage
Undermountain Overview
Running the Adventure
Dungeon History
The Yawning Portal
Adventure Hooks
Undermountain Secrets
Dungeon Features
Level 1: Dungeon Level
What Dwells Here?
Exploring This Level
–1. Entry Well
–2. Hall of Many Pillars
–3. Slanted Room
–4. With Sword in Hand
–5. Grell Hideout
–6. Undertakers' Watch Post
–7. Vampire Haven
–8. Bandit Headquarters
–9. Plundered Halls
–10. Cubicle of Skulls
–11. Room of Secrets
–12. Hall of Heroes
–13. Empty Room
–14. Little Box of Horrors
–15. Armory
–16. Manticore Den
–17. Stone Temple Pileup
–18. Troll's Den
–19. Ye Olde Feast Halls
–20. Beyond the Green Door
–21. Hall of Mirrors
–22. Empty Room
–23. Worg's Eye Watch Post
–24. Halls of Hopelessness
–25. Excavation Site
–26. Clean Tunnels
–27. Hidden Demiplane
–28. Grick Snack Watch Post
–29. Eye See You!
–30. Mad Elemental
–31. Delvers' Hall
–32. VIP Suite
–33. North Dormitory
–34. South Dormitory
–35. Hall of Rats
–36. Lost Halls
–37. Map Room
–38. Secret Tunnel
–39. Big Ears Watch Post
–40. Fearful Mimicry
–41. Cracked Ceiling
Aftermath
Level 2: Arcane Chambers
What Dwells Here?
Exploring This Level
–1. Goblin Bazaar
–2. Kalabash's Chambers
–3. Halaster Puppet
–4. Abandoned Camp
–5. Arch Gate to Level 4
–6. Music of the Dead
–7. Shocking Discoveries
–8. Fresco Cross Hall
–9. Spider Eyes Watch Post
–10. Ooze Temple
–11. Midna's Lair
–12. Dwarven Tools
–13. Mutated Apprentices
–14. Base de Résistance
–15. Dusty Throne
–16. Partially Collapsed Room
–17. Hungry Rust Monsters
–18. Cold Storage
–19. Giant Spider Den
–20. Dead Eyes Watch Post
–21. Animated Ballistae
–22. Garrux's Brewery
–23. Ruined Dwarven Temple
–24. Dead Adventurer
–25. Creature Storage
–26. Ancient Elven Tomb
Aftermath
Level 3: Sargauth Level
What Dwells Here?
Exploring This Level
–1. Catacombs
–2. Dead Explorer
–3. Grick Ambush
–4. Webbed Tunnels
–5. House Auvryndar
–6. Temple of Dumathoin
–7. Pain and Pleasure
–8. Wailing Tunnels
–9. Captain's Grave
–10. Caves of the River Coven
–11. Recluse
–12. Boo-ty Hunters
–13. Riverside Caves
–14. Stonecarvers' Hall
–15. Way to Wyllowwood
–16. Crossfire Caves
–17. Dangerous Paths
–18. Abandoned Cavern
–19. Chimera's Lair
–20. Drow Town
–21. Azrok's Hold
–22. Barrelstalk Garden
–23. Way to Skullport
Aftermath
Level 4: Twisted Caverns
What Dwells Here?
Exploring This Level
–1. Fungus Forest
–2. Jibber-Jabber
–3. Death from Above
–4. The Alchemist
–5. Cave of Crystals
–6. Tangled Ropes
–7. Mad Wizard's Retreat
–8. Crossroads
–9. Alarm System
–10. Drider Lair
–11. Drow Outpost
–12. Bat Cave
–13. Zurkhwood Grove
–14. Drow Rafts
–15. Slippery Slope
–16. Grotto of Madness
–17. Pick and Chuuls
–18. Slimy Alcove
–19. Beachhead
–20. Kuo-toa Refuge
–21. Archpriest's Chambers
–22. Hook Horror Homestead
–23. Hook Horror Larder
–24. Troglodyte Takeover
Aftermath
Level 5: Wyllowwood
Magic of Wyllowwood
What Dwells Here?
Exploring This Level
–1. River of the Depths
–2. Forest
–3. Guardhouses
–4. Cloaker Den
–5. Inner Forest
–6. Wyllow's Tower
–7. Alcoves of the Dead
–8. Umber Hulk Tunnel
–9. Dragon's Platform
–10. Mossy Stone Bridge
–11. We All Float Down Here
–12. Werebat Caves
–13. Dining Cave
–14. Werebat Boss
–15. Bat Cave
–16. Werebat Caves
–17. Vool's Refuge
–18. Abandoned Priory
–19. Looted Cloisters
–20. Malar's Tabernacle
–21. Abandoned Barracks
–22. Mess Hall
–23. Desecrated Sanctuary
–24. Animal Cloisters
Aftermath
Level 6: Lost Level
What Dwells Here?
Exploring This Level
–1. Umber Hulk Tunnel
–2. Acolytes' Vestry
–3. Cleansing Chamber
–4. Ransacked Room
–5. Looted Reliquary
–6. Workshop
–7. Library and Scriptorium
–8. Park-and-Ride
–9. Mustering Hall
–10. Royal Armory
–11. King's Walk
–12. Mithral Thieves
–13. High Priest's Chambers
–14. Grand Vestibule
–15. Temple of Dumathoin
–16. Heart of the Mountain
–17. Priests' Study
–18. Hemisphere of Horrors
–19. Mountain Shrine
–20. Wall of Gemstones
–21. Gem-Cutters' Workshop
–22. Gem Extraction
–23. Stripped Room
–24. Arch Gate to Level 2
–25. Dwarven Den
–26. Sacred Spirits
–27. Arch Gate to Level 4
–28. False Tomb
–29. King Melair's Lost Tomb
–30. Mummification Chamber
–31. Rest Area
–32. False Halaster
–33. Ghohlbrorn's Grave
–34. Refectory Rampage
–35. Black Cloak
–36. Temple Maintenance
–37. Showers and Sauna
–38. Wide Alcoves
–39. Temple Reliquary
–40. Music Hall
–41. Privies
–42. Hidden Pit
–43. Umber Hulk Tunnels
–44. Acolytes' Quarters
–45. Acolytes' Quarters
–46. Blasted Chamber
–47. Halls of the Faithful
–48. High Priest's Quarters
Aftermath
Level 7: Maddgoth's Castle
What Dwells Here?
The Caverns
–1. Umber Shells
–2. Empty Cavern
–3. Stone Throne
–4. Silt Pit
–5. Cave of Echoes
–6. Craft Hall
–7. Silt Pit
–8. Strange Rock Formation
–9. Stone Cathedral
–10. Xorta's Flute
–11. Disposal Cave
–12. Edible Moss
–13. Giants' Living Quarters
–14. Cave Bear Den
–15. Qurrok's Den
–16. Central Cavern
The Castle
–17. Main Entrance
–18. Stone Hallways
–19. Southwest Storeroom
–20. Northwest Storeroom
–21. Northeast Storeroom
–22. Southeast Storeroom
–23. Courtyard
–24. Privy and Bath
–25. Maddgoth's Study
–26. Clayworks
–27. Dining Room and Kitchen
–28. Well-Appointed Halls
–29. Southwest Guest Room
–30. Northwest Guest Room
–31. Northeast Guest Room
–32. Southeast Guest Room
–33. Slaad in the Octobass
–34. Maddgoth's Suite
–35. Cloakroom
–36. Records
–37. Console
–38. Glittering Hall
–39. Southwest Chamber
–40. Northwest Chamber
–41. Northeast Chamber
–42. Southeast Chamber
–43. Otto's Den
–44. Wizard's Armory
–45. Alchemist's Laboratory
–46. Maddgoth's Throne
–47. Roof and Battlements
Aftermath
Level 8: Slitherswamp
What Dwells Here?
Exploring This Level
–1. Precipice
–2. Bullywug Sentries
–3. Arch Gate to Level 6
–4. Dangerous Shrubbery
–5. Dry Cave
–6. Reflections
–7. Warded Cavern
–8. Dweomercore Hideout
–9. Temple of the Great Snake
–10. Rainfall Caverns
–11. Watch Post
–12. Fishery
–13. Detention Cave
–14. Fungal Farm
–15. Lair of the Spirit Nagas
–16. Lair of the Bone Naga
–17. Battlefield Cavern
–18. Serpent Gate
–19. Yuan-ti Temple
–20. Blacktongue Isle
–21. Lord of Fetid Obliteration
–22. Stables
–23. Bullywug Camp
–24. Kelp Farm
Aftermath
Level 9: Dweomercore
What Dwells Here?
Exploring This Level
–1. Entry Hall
–2. Trapped Hall
–3. Medusa Junction
–4. Fresh Water Fountain
–5. Portrait of a Mad Mage
–6. Reading Niche
–7. Workroom
–8. Student Dormitories
–9. Refuse Pit
–10. Where's Halaster?
–11. Student Dormitories
–12. Communal Showers
–13. Recreation Room
–14. Detention Hall
–15. Arcanaloth's Sanctum
–16. Magic Cauldron
–17. Spellcasting Hall
–18. Illusory Walls
–19. Ghostly Adventurer
–20. Lecture Hall
–21. Classrooms
–22. Potion Brewery
–23. Wormriddle's Sanctum
–24. Halaster Says What?
–25. School Supplies
–26. Bent Hallway
–27. School Meals
–28. More Halaster Statues
–29. Old Books
–30. Dining Hall
–31. Halaster's Secretary
–32. Steel-Sheathed Hall
–33. Illusion Classroom
–34. Transmutation Classroom
–35. Necromancy Classroom
–36. Wizards' Library
–37. Professor Bring
–38. "I Just Met a Girl Named Skrianna"
–39. Study Hall
–40. Empty Room
–41. Drop to Level 10
–42. Guest Lecturer's Quarters
–43. Dusty Alcoves
–44. Dweomercore's Back Door
–45. Halaster's Sanctuary
–46. Detention Area
–47. Devil on the Loose
–48. Conjuration Classroom
–49. Arch Gate to Level 14
Aftermath
Level 10: Muiral's Gauntlet
What Dwells Here?
Exploring This Level
–1. Shattered Mirrors
–2. Secret Hallway
–3. Haunted Temple of Lolth
–4. Muiral's Laboratory
–5. Dilapidated Rooms
–6. Teleportation Statues
–7. Halls of Selvetarm
–8. The Fate of Falkir's Fist
–9. God-Watched Gates
–10. Queen's Parlor
–11. Lolth's Palace
–12. Ballroom
–13. Vestibule
–14. Guest Apartment
–15. Screaming Skulls
–16. False Mirror Gate
–17. The Dark Seldarine
–18. First Blood
–19. Interrogation Room
–20. Servants' Quarters
–21. Giant Spider Hatchery
–22. Troglodyte Turf
–23. Distant Music
–24. Collapsed Areas
–25. Auvryndar Hall
–26. Spider Queen's Temple
–27. Vlonwelv's Apartments
–28. Hospital and Armory
–29. Abandoned Apartment
–30. Natural Cavern
Aftermath
Level 11: Troglodyte Warrens
What Dwells Here?
Exploring This Level
–1. Auvryndar Watch Post
–2. Captured Troglodytes
–3. Hungry Gnome
–4. Loathsome Limbs
–5. Trolling the Troglodytes
–6. Piercer Cavern
–7. Troglodyte Lair
–8. Illusory Front Line
–9. Contested Caves
–10. Troll Tunnels
–11. Forest of Stone
–12. Drow Battle
–13. Freth Refuge
–14. Auvryndar Watch Post
–15. Cleared-Out Caves
–16. Arch Gate to Level 7
–17. Behir Lair
Aftermath
Level 12: Maze Level
What Dwells Here?
Exploring This Level
–1. Into the Maze
–2. Light of the Dead
–3. Dead End
–4. Faces in the Fog
–5. Demon's Triangle
–6. Special Effects
–7. Minotaur Caves
–8. Shrine of the Horned King
–9. Foggy Caves
–10. Webbed Passage
–11. Crickets and Bats
–12. Guarded Caves
–13. Roundabout
–14. Dead End?
–15. Crickets
–16. Web-Filled Cave
–17. Demons' Ledge
–18. Drow Fortress
–19. Spiderwatch Keep
Aftermath
Level 13: Trobriand's Graveyard
What Dwells Here?
Exploring This Level
–1. Tunnels and Trenches
–2. Vast Cavern
–3. Junkyard
–4. Pretty Big Hate Machine
–5. Scrap Metal Warren
–6. Back Tunnel
–7. Clammersham Palace
–8. Smithy
–9. Metal Pools
–10. Resting Cave
–11. Hobgoblin Base Camp
–12. Paradise Lost
Aftermath
Level 14: Arcturiadoom
What Dwells Here?
Exploring This Level
–1. Entrance to Arcturiadoom
–2. Natural Caves
–3. Foyer
–4. Prison
–5. Side Chambers
–6. Statue of Arcturia
–7. Statue of Halaster
–8. Dwarven Crypt
–9. Death's Head Watch Post
–10. Dwarves' Den
–11. Smithy
–12. Melairkyn Foundry
–13. Transmutorium
–14. More Scrap Iron
–15. Mecha-Halaster
–16. Death's Head Looters
–17. Hidden Storeroom
–18. Death's Head Guard Post
–19. Storerooms
–20. Supplies
–21. Night and Day
–22. Arcane Scribblings
–23. Experiments
–24. Empty Classroom
–25. Hobgoblin Guards
–26. Apprentice's Quarters
–27. Dead Apprentice
–28. Specimens
–29. Laboratory
–30. Hideous Transmutation
–31. Illithid's Assistant
–32. Death's Head Barracks
–33. Doomcrown's Quarters
–34. Shrieking Gas Spore
–35. Rallying Hall
–36. Death's Head Training
–37. Weapon of Mass Disintegration
–38. Guest Quarters
–39. Arcturia's Boudoirs
–40. Arcturia's Chambers
–41. Watchful Pillars
Aftermath
Level 15: Obstacle Course
What Dwells Here?
Exploring This Level
–1. On Your Mark! Get Set! Go!
–2. Clacking Floor
–3. Stuffed Monsters
–4. Caught in the Tentacles
–5. Antechamber
–6. Looted Chest
–7. Fidelio's Folly
–8. Teleport Trap
–9. Hidden Rune
–10. Roller-Dragon
–11. Dead End
–12. Wheel Room
–13. Hidden Traps
–14. Sepulchers
–15. Ruined Armory
–16. Spectral Bridge
–17. Ruined Chamber
–18. Ruined Shrine
–19. Grabby Pillars
–20. Separated Hall
–21. Destroyed Room
–22. Teleport Traps
–23. Statue of Vergadain
–24. Githzerai Retreat
–25. Abandoned Smithy
–26. Statue of Moradin
–27. Mark of Death
–28. Statue of Tharmekhûl
–29. Trapped Halls
–30. Halaster's Handiwork
–31. Hall of Embers
–32. Empty Junction
–33. Shots in the Dark
–34. Chasm's Edge
–35. Scythe-Seeing
–36. Looted Vaults
–37. Harmless Halaster Statue
–38. Zombie Horde
–39. Netherskull's Sanctum
–40. Netherskull's Chasm
Aftermath
Level 16: Crystal Labyrinth
What Dwells Here?
Crystal Dungeon
–1. Entry Hall
–2. Western Cavern
–3. Main Cavern
–4. Barracks
–5. Prison Cell
–6. Eastern Cavern
–7. Anti-Illithid Defense
–8. Officer Quarters
–9. Trophy Room
–10. Golem Laboratory
–11. Stardock Gate
Stardock
–12. Dragons' Domain
–13. Jerath's Quarters
–14. Infernexus's Quarters
–15. Githyanki Trainees
–16. Nursery
–17. War Wizards
–18. Library
–19. Warehouse
–20. Dock
–21. Warrior Quarters
–22. Al'chaia's Quarters
–23. Observation Room
–24. Knights' Quarters
–25. Memorial Hall
–26. Kitchen
–27. Mess Hall
–28. Armory
–29. Prison
–30. Warrior Training
–31. Observation Room
–32. Graduation Chamber
Aftermath
Level 17: Seadeeps
What Dwells Here?
Exploring This Level
–1. Tunnel Plexus
–2. Dripping Cave
–3. Halaster's Maw
–4. Flumph Cloister
–5. Githyanki Grave
–6. Battleground
–7. Githyanki Stronghold
–8. Operation: Eat Them All
–9. Guard Post
–10. Detention Facility
–11. Halaster Is Glowing
–12. Dynamo
–13. Back Door
–14. Psipod Nexus I
–15. Psipod Nexus II
–16. Old Dwarven Halls
–17. Crumbling Bridge
–18. Gray Mold
–19. Unguarded Area
–20. River Branches
Aftermath
Level 18: Vanrakdoom
The Dark Fate of Lord Vanrak Moonstar
What Dwells Here?
Into the Shadowfell
Exploring This Level
–1. Entrance
–2. Dusty Emptiness
–3. Statue of Shar
–4. Old Friends
–5. Umbraxakar's Gift
–6. Cultists' Quarters
–7. Halls of Worship
–8. Scintilmorn's Rest
–9. Shadow Vigil
–10. Ritual Chamber
–11. Tunnels and Caverns
–12. Candlelit Halls
–13. Vampire Dens
–14. Temple Chandlery
–15. Shattered Throne
–16. Arch Gate to Level 15
–17. Lost Dwarven Horn
–18. Shadow's Edge
–19. Hall of Death
–20. Any Moonstars in Here?
–21. Clutter
–22. Under Black Sheets
–23. Decrepit Dining Hall
–24. Decrepit Kitchen
–25. Prisoner of Darkness
–26. Vampire Boss
–27. Altars of Loss
–28. Forgotten Chambers
–29. Foggy Hall
–30. Path to the Tomb
–31. Vampire's Tomb
–32. Umbraxakar's Lair
–33. Dragon's Hoard
Aftermath
Level 19: Caverns of Ooze
What Dwells Here?
Exploring This Level
–1. The Resplendent Grotto of Ichthyglug the Voluminous
–2. Space Orogs
–3. Ooze There?
–4. The Weeping Eye
–5. In the Grip of Ghaunadaur
–6. Cave with a View
–7. Standing Gate to Level 21
–8. Thanks for the Memories
–9. High Ground
–10. Culvert
–11. The Glittering Caverns of Jarûk the Prismatic
–12. Ghaunadaur Shrine
–13. The Scavenger
–14. Ooze Den
–15. Standing Gate to Level 17
–16. Tunnel to Level 20
Aftermath
Level 20: Runestone Caverns
What Dwells Here?
Runestone Caverns
–1. Desiccating Symbol
–2. Mad Golem's Lair
–3. Sunken Paradise
–4. Myconid Colony
–5. Giggling Chasm
–6. Lair of the Mummy Lord
–7. Crypt Raiders
–8. Made of Stone
–9. Way to the Gate
–10. Mad Mage's Puzzle
–11. Weird Magic
–12. Old Behir Lair
–13. Runestone Caverns
–14. The Runestone
Stalagmite Tower
–15. Outer Door and Foyer
–16. Animated Staff
–17. Lich's Study
–18. Gnomes' Landing
–19. Ezzat's Scrying Mirror
–20. Laboratory
–21. Lit Landing
–22. Rooms of Magic
–23. Ezzat's Phylactery
Aftermath
Level 21: Terminus Level
What Dwells Here?
Exploring This Level
–1. Entrance
–2. Ore-Filled Cart
–3. Depleted Mine
–4. Deeper Mines
–5. Rubble-Strewn Cavern
–6. Duergar Outpost
–7. Cleric's End
–8. Mining Equipment
–9. Miners' Quarters
–10. Common Areas
–11. Kitchen and Pantry
–12. Miners' Potty
–13. Grand Vestibule
–14. Shrine of Laduguer
–15. Valtagar's Quarters
–16. Fire and Iron
–17. Hammers and Anvils
–18. Iron Mine
–19. Outpost
–20. Poisonous Mine
–21. Clean Air Station
–22. Guard Post
–23. Fazrian's Court
–24. Secret Vault
Aftermath
Level 22: Shadowdusk Hold
What Dwells Here?
Exploring This Level
Tier 1
–1. Grand Foyer
–2. Twisted Gallery
–3. West Wing
–4. Decayed Quarters
–5. Storeroom
–6. Kitchen
–7. Derelict Shrine
–8. Nothic's Niche
–9. East Wing
–10. Noble Quarters
–11. Melissara's Study
–12. Lounge
–13. Walking Dead
–14. Training Room
–15. Fountain
Tier 2
–16. Arcane Sanctum
–17. Vertrand's Room
–18. Berlain's Suite
–19. Shadowdusk Hold Fresco
–20. Pillared Hall
–21. Parlor
–22. Torm's Shrine
–23. Meditation Rooms
–24. Nothic Warrens
–25. Abandoned Chamber
–26. Hoarded Secrets
–27. Privy
–28. Legacy of Xerrion
–29. Landing
Tier 3
–30. Lower Halls
–31. Approach to Madness
–32. Far and Gone
–33. Shrine
–34. Zalthar's Chambers
–35. Eyes of Stone
–36. Vacant Rooms
–37. Secret Room
–38. Dezmyr's Chambers
–39. Dracolich's Phylactery
–40. Lynnorax's Lair
–41. Shadowdusk Vault
Aftermath
Level 23: Mad Wizard's Lair
Who Dwells Here?
The Dungeon
–1. No Retreat
–2. Reversed Library
–3. Talking Heads
–4. Helmed Horrors
–5. Magical Repository
–6. Wizardly Wards
–7. Teleportation Pillars
–8. Teleportation Pillars
–9. Vaults
–10. Arcane Display
–11. Trobriand's Workshop
–12. Gate to the Stone Bridge
–13. The Metal Mage
–14. Man with the Rabbit's Head
–15. Gate to Neverlight Grove
–16. Broom Room
–17. Arcturia's Court
–18. Animated Hallway
–19. Double Door Roulette
–20. Hidden Helm
–21. Displaced Vault
Halaster's Tower
–22. Tower Entrance
–23. Gnome with No Name
–24. Potion Brewery
–25. Factory
–26. Gate to Icewind Dale
–27. Rantantar's Wand
–28. Hidden Treasure
–29. Apprentice Portraits
–30. Scrying Room
–31. Art Studio
–32. Jhesiyra's Warning
–33. Mad Mage Showdown
–34. Flying Saucer
–35. Exercise Room
–36. Gate to Triboar
Conclusion
Skullport
Reaching Skullport
Skullport Overview
Exploring Skull Island
–1. Murkspan Bridge
–2. Main Gate
–3. Harbors
–4. Duergar Barracks
–5. Human Barracks
–6. Depleted Armory
–7. Bugbear Barracks
–8. Gargoyle Towers
–9. Tower of the Seven Woes
–10. Kuo-toa Lair
Exploring the Town
–11. Old Markets
–12. Dead Man's Corner
–13. Thimblewine's Pawnshop
–14. Heralds' Meet
–15. The Black Tankard
–16. Gyudd's Distillery
–17. Skull Square
–18. The Sea Chest
–19. The Flagon and the Dragon
–20. Dark Harvest Market
–21. The Sword and Sextant
–22. The Guts & Garters
–23. The Feathered Rat
–24. Thaglar's Foundry
–25. The Bat's Roost
–26. The Keel Hall
–27. The Poisoned Quill
–28. Twinbeard's Traps
–29. Sargauth's Bounty
–30. The Lanternlighter's
–31. Dalagor's Fortress
–32. Dumathoin's Jest
–33. The Overflowing Urn
–34. Nightshade's Caress
–35. The Worm's Gullet
–36. Tanor'thal Refuge
App. A: Dungeon Denizens
App. B: Elder Runes Deck
App. C: Secrets Deck
App. D: Dungeon Key
Supplements
Ghosts of Saltmarsh
Ghosts of Saltmarsh
1–12
May 21st, 2019
[+]
Ch. 1: Saltmarsh
Politics and Factions
Saltmarsh Overview
–1. City Gate
–2. Barracks and Jail
–3. The Wicker Goat
–4. Eliander's House
–5. Mining Company Headquarters
–6. Keledek Tower
–7. Faithful Quartermasters of Iuz
–8. Empty Net
–9. Green Market
–10. Sharkfin Bridge
–11. Kester's Leather Goods
–12. Hoolwatch Tower
–13. The Snapping Line
–14. Council Hall
–15. Weekly Market
–16. Primewater Mansion
–17. The Dwarven Anvil
–18. Fishmongers' Plants
–19. Oweland House
–20. Solmor House
–21. Mariners' Guildhall
–22. Ingo the Drover's House
–23. Carpenters' Guildhall
–24. Crabber's Cove
–25. The Leap
–26. Temple of Procan
–27. Saltmarsh Cemetery
–28. Winston's Store
–29. Sea Grove of Obad-Hai
–30. Standing Stones
Downtime Activities
Saltmarsh Region
Adventures in Saltmarsh
Saltmarsh Backgrounds
Ch. 2: The Sinister Secret of Saltmarsh
Background
Adventure Summary
Adventure Hooks
The Haunted House
–1. Entrance Hall
–2. Library
–3. Study
–4. Living Area
–5. Living Area
–6. Living Area
–7. Dining Room
–8. Withdrawing Room
–9. Kitchen
–10. Scullery
–11. Moldering Bedroom
–12. Decrepit Bedroom
–13. Guest Bedroom
–14. Crumbling Bedroom
–15. Ned's Bedroom
–16. Alchemist's Bedroom
–17. Box Room
–18. Landing
–19. Attic
–20. Wine Cellar
–21. Cellar
–22. Sanbalet's Private Quarters
–23. Skeletons' Room
–24. Laboratory
–25. Slimy Cavern
–26. Natural Cavern
–27. Storage Cavern
–28. Sloping Passage
–29. Stock Cavern
–30. Sea Cave
The Sea Ghost
–1. Main Deck
–2. Forecastle
–3. Poop Deck
–4. Galley Stores
–5. Ship's Stores
–6. Ship's Galley
–7. Lizardfolk Quarters
–8. Punketah's Quarters
–9. Captain's Cabin
–10. Crew Quarters
–11. Cargo Hold
–12. Bosun's Cabin
–13. First Mate's Cabin
–14. Secret Prison Cell
–15. The Secret Cache
–16. Bilge
Ch. 3: Danger at Dunwater
Background
Rules of Engagement
Roleplaying Lizardfolk
Adventure Summary
Traveling to the Lair
Lizardfolk Lair
–1. North Entrance
–2. Guard Room
–3. Barracks
–4. Officer's Quarters
–5. Officer's Quarters
–6. Armory
–7. Kitchen
–8. Stores
–9. Barracks
–10. Banquet Hall
–11. Throne Room
–12. Temple
–13. Vestry
–18. Senior Shaman's Living Quarters
–19. Senior Shaman's Sleeping Quarters
–20. Chief Shaman's Living Quarters
–21. Chief Shaman's Sleeping Quarters
–22. Cave of the Giant Lizards
–23. Guard Room
–24. Nursery
–25. Hatchery
–26. Gate and Treasure Room
–27. Guard Room
–28. Officer's Quarters
–29. Barracks
–30. Subchief's Living Quarters
–31. Subchief's Sleeping Quarters
–32. Guard Room
–33. Queen's Living Quarters
–34. Queen's Sleeping Quarters
–35. Queen's Lounge
–36. Royal Bath
–37. Royal Hatchery
–38. Minister's Quarters
–39. Minister's Sleeping Quarters
–40. Drill Hall
–41. Thick Gate
–42. Guard Post
–43. Prisoner Cell Entry Hall
–44. Barracks
–47. Garbage Room
–48. Guard Post
–49. Guards' Pool
–50. Koalinth Pool
–51. Locathah Pool
–52. Merfolk Pool
Conclusion
Epilogue: Croc Hunt
Ch. 4: Salvage Operation
Background
Adventure Summary
Adventure Hooks
State of the Ship
–1. Main Deck
–2. Altar to Lolth
–3. Navigator's Room
–4. Webbed Doorway
–5. Spider Nest
–6. Food Storage
–7. Krell's Cabin
–8. First Mate's Cabin
–9. Spider Chambers
–10. Unholy Shrine
–11. Galley
–12. Cargo Hold
Death of the Emperor
Conclusion
Ch. 5: Isle of the Abbey
Background
Adventure Hooks
Adventure Summary
Traveling to the Isle
The Island
The Abbey Ruins
Locations in the Ruins
–1. Rubble and Cellar Entrance
–2. Common Area
–3. Kitchen
–4. Ogmund's Quarters
–5. Barracks
–6. Meditation Room
–7. Ozymandias's Quarters
–8. Bayleaf's Quarters
–9. Odium's Quarters
–10. Disciples' Quarters
–11. Entrance Guardroom
–12. Hallway Guardroom
–13. False Treasure Room
–14. Treasure Room
Conclusion
Ch. 6: The Final Enemy
Background
Council of War
Sahuagin Stronghold
The Mission Begins
–1. North Entrance and Guard Post
–2. Guard Post
–3. Unfinished Champion's Quarters
–4. Champion's Quarters
–5. Unfinished Barracks
–6. Champions' Quarters
–7. Unfinished Champions' Quarters
–8. Makeshift Storeroom
–9. Armory
–10. Disorganized Storeroom
–11. Tidy Storeroom
–12. Guard Post
–13. Slave Pen
–14. Unfinished Guest Room
–15. Guest Room
–16. Larder
–17. Large Storeroom
–18. Secret Room
–19. Hall
–20. Large Hall
–21. Blademaster's Quarters
–22. Champion's Quarters
–23. Champions' Quarters
–24. Living Quarters
–25. Hatchery
–26. Hatchery
–27. Barracks
–28. Wave Shaper's Quarters
–29. Barracks
–30. Champion's Quarters
–31. Priestess's Quarters
–32. Priestess's Quarters
–33. Priestess's Quarters
–34. Priestess's Quarters
–35. Prayer Room
–36. High Priestess's Quarters
–37. Temple
–38. Vestry
–39. Occupied Shark Pen
–40. Nearly Empty Shark Pen
–41. Banquet Hall
–42. Throne Room
–43. Royal Servant's Chambers
–44. Living Quarters of the Baroness
–45. Sleeping Quarters of the Baroness
–46. Baron's Living Quarters
–47. Baron's Sleeping Quarters
–48. Barracks
–49. Champions' Armory
–50. Torture Chamber and Dungeon
–51. Large Armory and Stores
–52. Treasure Chamber
–53. Arena
–54. Barracks
–55. Champions' Quarters
–56. Chamber of the Wave Shapers
–57. Wave Shaper's Quarters
–58. Guard Post
–59. Abandoned Guard Post
–60. Temporary Barracks
–61. Old Guard Room
Conclusion
–1. North Entrance and Guard Post
–5. Unfinished Barracks
–19. Hall
Ch. 7: Tammeraut's Fate
Background
Adventure Summary
Adventure Hooks
Harpy Attack
The Village of Uskarn
Firewatch Island
The Hermitage
–1. Pier and Beach
–2. Courtyard Gardens
–3. Yard and Cistern
–4. Main Entry
–5. Midden
–6. Archer's Post
–7. Scullery
–8. Dining Hall
–9. Library
–10. Distillery
–11. Hermit Cells
–12. Kitchen
–13. Larder
–14. Grotto
–15. Old Storeroom
–16. Junk Room
–17. Battlement
–18. Scriptorium
–19. Defensive Overlook
–20. Prior's Quarters
–21. Guard Tower
–22. Abandoned Quarters
–23. Roof
–24. Belfry
–25. Bolt-Hole
Last Stand
Preparing for the Drowned Ones
Death from the Deep
Safe by Day
The Wreck
Conclusion
Extending the Adventure
Ch. 8: The Styes
Background
Adventure Summary
Adventure Hooks
Part 1: A Dying District
–1. Harbor Master
–2. Frother's Lamp
–3. Marketplace
–4. District Garrison
–5. Council Hall
–6. Refrum's Workshop
–7. Dory's Warehouse
–8. Rashlen Manor
–9. Thornwell Tower
–10. Mortuary
–11. Hopene'er Asylum
Part 2: Murder Mystery
Part 3: Hemlock Pit
Part 4: The Lamp's Shadow
Part 5: Tharizdun's Progeny
Aftermath
App. A: Of Ships and the Sea
Underwater Locations
App. B: Magic Items
App. C: Monsters and NPCs
Supplements
The Orrery of the Wanderer
Acquisitions Incorporated
1–6
Jun 18th, 2019
[+]
Ch. 1: The Orrery of the Wanderer
Running an Acquisitions Incorporated Campaign
Story Overview
Ep. 1: Right Place, Wrong Heroes
A Disorienting Orientation
Dock Ward
Warehouse Environs
The Fissure
–1. Rats
–2. Trials
–3. Traps
–4. Tunnels
–5. Death
–6. Goblin
–7. Stomp
–8. Tentacle
–9. Dragon
–10. Shrine of Destruction
Exiting the Fissure
Conclusion
Franchise Downtime
Continuing the Adventure
Ep. 2: Fun in Phandalin
Layers of Villainy
Traveling to Phandalin
Arrival in Phandalin
Recent Events in Phandalin
Plots of the Six
People of Phandalin
Locations in Phandalin
Tresendar Manor
Tresendar Manor Dungeon
–1. Cellar
–2. Storage
–3. Hall with Pit
–4. Crypt
–5. Cells
–6. Empty Room
–7. Failed Ritual
–8. Charnel Chasm
–9. Between a Rock and a Cockatrice
–10. Far Realm Rift
–11. Workshop
–12. Office
Clean-Up Crew
Conclusion
Franchise Downtime
Continuing the Adventure
Ep. 3: Darkness at the Lighthouse
To the Lighthouse
A Detour to Neverwinter
The Tortured Tortle Mutiny
Silent Sound Lighthouse
Secret Basement
Super-Secret Basement
–1. Out of Service
–2. Incomplete Circuits
–3. Recharging Station
–4. Mechachimera
Conclusion
Franchise Downtime
Continuing the Adventure
Ep. 4: Dran Enterprises
Traveling to Luskan
Searching for Dran Enterprises
Fishbone Tavern
The Peg and Hook
Infiltrating Dran Enterprises
Portal Nexus
Portal Encounters
On Board The Maverick
Conclusion
Franchise Advancement
Franchise Downtime
Continuing the Adventure
Ep. 5: Hide and Seek
Enter Flabbergast
Traveling to Horn Enclave
Dhargun Ironworks
Horn Enclave
Wedding Itinerary
Orrery Vault
Going in Style
Riders on the Storm
Battle in the Skies!
(Mis)Fortune
Lottie's Palace
–1. Gambling Den
–2. Cashier
–3. Club Lounge
–4. Kitchen
–5. Machine Room
–6. Swimming Pool
–7. Office
–8. Boardroom
Conclusion
Franchise Downtime
Continuing the Adventure
Ep. 6: Showdown with the Six
Seeking the Ritual Site
The Moon Glade
Mission to Red Larch
Stage 1: The Dran & Courtier?
–1. Main Door
–2. Common Room
–3. Bar
–4. Kitchen and Larder
–5. Propha and Audra's Room
–6. Door to the Basement
–7. Upstairs Rooms
–8. Shared Study
–9. "C" Team Quarters
Stage 2: Little Inn of Horrors
Stage 3: Feeling Small
Stage 4: Revenge for the "C" Team
Additional Stages
Confronting the Keymaster
Dimensional Caverns
The End of the World
Conclusion
Franchise Downtime
The Campaign to Come
Supplements
Essentials Kit: Dragon of Icespire Peak
Essentials Kit
1–6
Jun 24th, 2019
[+]
Running the Adventure
Overview
The Forgotten Realms
First Session: Character Creation
The Adventure Begins
Axeholm
Location Overview
Travel to Axeholm
Arrival
Butterskull Ranch
Location Overview
Travel to the Ranch
Arrival
Circle of Thunder
Location Overview
Travel to the Circle
Arrival
Dragon Barrow
Location Overview
Travel to the Barrow
Arrival
Dwarven Excavation
Location Overview
Arrival
When Orcs Attack
Falcon's Hunting Lodge
Location Overview
Arrival
Gnomengarde
Location Overview
Arrival
Icespire Hold
Location Overview
Finding Icespire Hold
Travel to Icespire Hold
Arrival
Loggers' Camp
Location Overview
Preparations
Travel to the Camp
Arrival
Mountain's Toe Gold Mine
Location Overview
Travel to the Mine
Arrival
Shrine of Savras
Location Overview
Arrival
Tower of Storms
Location Overview
Travel to the Lighthouse
Arrival
Umbrage Hill
Location Overview
Woodland Manse
Location Overview
Arrival
Leaving the Manse
Counterattack!
Ending the Adventure
Where Next?
Creatures
Creature Stat Blocks
Creature Descriptions
Sidekicks
Printable Assets
Supplements
Essentials Kit: Storm Lord's Wrath
Essentials Kit
7–9
Sep 3rd, 2019
[+]
Introduction
Running the Adventure
–Abbreviations
Running for One Player
–Using Sidekicks
–Adjusting Encounters
–High Road
–Kryptgarden Forest
–Leilon
–Mere of Dead Men
–Neverwinter
–Neverwinter Wood
–Phandalin
–Starmetal Hills
–Sword Mountains
–Triboar Trail
The Adventure Begins
–Adventure Background
–Adventure Hooks
–Mercenaries for Lord Neverember
–Spies for Waterdeep
–Friends and Family
–A Stake in Leilon
–Love of Adventure
Welcome to Leilon
Exploring Leilon
–Aubrey's Peculiarities Shoppe
–Barge Yard
–Fishery
–House of Thalivar
–Idol Island
–Shrine of Lathander
–Settler Camp
–Grizzelda Copperwraught
–Sergeant Hazz Yorrum
–Merrygold Brightshine
–Valdi Estapaar
–Town Square
–The Quest Board
–Starting Quests
–Attack on the Wayside Inn Quest
–A Normal Day in Leilon Quest
–Follow-Up Quests
–Aid from Phandalin Quest
–Foul Weather at Wayside Quest
–House of Thalivar Quest
–Missing Patrol Quest
–Thunder Cliffs Quest
–Leveling Up
Attack on the Wayside Inn
Location Overview
–Undead Attack
–Monsters
–Inn Occupants
–Aftermath
A Normal Day in Leilon
A Town Meeting
–A Hard Decision
–Chasing the Children
–Storm's Moving In
–Aftermath
–The Request
–Something Fishy in Town
–Approaching the Town
–Aftermath
–Marsh, Unmellow
–Monsters
–Tactics
–Aftermath
–Time to Rest
Aid from Phandalin
Location Overview
–Quest Goals
Travel to Phandalin
–Encounters on the Way
–Goat Check
–Herding
–Hungry Ogres
Arrival
–On the Town
–Stonehill Inn
–Following Skeel
–Lionshield Coster
–Barthen's Provisions
–Phandalin Miner's Exchange
–Shrine of Luck
–Townmaster's Hall
The Attack
–Aftermath
Foul Weather at Wayside
Location Overview
–Quest Goals
Travel to the Inn
–A Violent Atmosphere
–Encounters on the Way
–Armor of Talos
–Curse of Talos
–The Creeping Storm
–Aftermath
–Lightning Strikes
Arrival
–The Victims
–Inside the Inn
–The Common Area and Courtyard
–Upstairs
–The Basement
–Help
–Aftermath
–Failure
–Clues
House of Thalivar
Location Overview
–Quest Goals
Travel to the Tower
–Encounters on the Way
–Cowardly Soldiers
–Strange Sighting
Arrival
–Dealing with Gallio Elibro
–Gallio's Possession
–Ghostly Events
–Confronting Thalivar's Ghost
–House of Thalivar Locations
–H1. Tower Exterior
–H2. Entry Hall
–H3. Gallio's Study
–H4. Kitchen
–H5. Servant's Quarters
–H6. Library
–Trapped Statues
–H7. Scaffolds
–H8. Collapsed Rooms
–H9. Thalivar's Bedroom
–H10. Broken Beacon
–Ghostly Farewell
Missing Patrol
Location Overview
–Quest Goals
Travel in the Mere
–Encounters in the Mere
–Yuan-ti Scouts
–Pit of Snakes
–Quicksand and Alligators
–Troll Brawl
–Hydra Wranglers
–Tracking the Lizards
–Following the Tracks
–Fighting the Lizards
–Lizardfolk Forces
–The Unfolding Situation
–A Rotten Way to Die
–Aftermath
Thunder Cliffs
Location Overview
–Quest Goals
Travel to the Cliffs
–Meeting the Captains
–The Interview
–A Secret Agent
–A Decision
Encounters on the Way
–Mutinous Intentions
–The Moment of Truth
–Allow the Mutiny
–Talk
–Fight
–Bad News
–Ghost Ship
Arrival
–Threats by Air
–Talos is Angry
–Sea Galley
Thunder Cliffs Caves
–1. Unsure Shore
–2. Unhappy Cultists
–A Better Offer?
–Success!
–3. Sea Hag Coven
–Accessing the Cave
–The Coven Cave
–A Nice Chat
–4. The Dying Second
–The Sick Room
–5. The Cultist's Quarters
–The Blowhole
–6. Loot
–Trap
–7. Gadrille the Reef-Reaver
–Swirling Pool Chamber
–Shrine Chamber
–Treasury
–Aftermath
Ending the Adventure
Duties in Leilon
Continuing the Story
App. A: Creatures
App. B: Sidekicks
Sidekick Cards
–Donnabella Fiasco
–Galandro Luna
–Inverna Nightbreeze
–Nib Addlespur
–Pickled Pete
–Quinn Hightopple
–Ruby Hammerwhacker
–Shanjan Kwan
–Talon Thornwild
Sidekick Stat Blocks
Proficiencies
Sidekick Level
–Experts Beyond 11th Level
–Spellcasters Beyond 11th Level
–Warriors Beyond 11th Level
Supplements
Essentials Kit: Sleeping Dragon's Wake
Essentials Kit
9–11
Sep 3rd, 2019
[+]
Introduction
Running the Adventure
–Abbreviations
Running for One Player
–Using Sidekicks
–Adjusting Encounters
–Conyberry
–Crags
–High Road
–Kryptgarden Forest
–Leilon
–Mere of Dead Men
–Neverwinter
–Neverwinter Wood
–Phandalin
–Starmetal Hills
–Sword Mountains
–Triboar Trail
The Adventure Begins
–Adventure Background
Welcome to Leilon
Exploring Leilon
–Aubrey's Peculiarities Shoppe
–Barge Yard
–Fishery
–House of Thalivar
–Idol Island
–Lathander Shrine
–Settler Camp
–Torver's Post
–Town Square
–Tymora Shrine
–Umber Hulk's Shell Inn
–The Quest Board
–Starting Quests
–Death Knight-Dreadnaught Quest
–Leilon Point Quest
–Follow-Up Quests
–Bronze Shrine Quest
–Iniarv's Tower Quest
–Claugiyliamatar's Lair Quest
–Leveling Up
Bronze Shrine
Location Overview
–Quest Goals
Travel to the Shrine
Arrival
–Climbing the Shrine
–Bronze Shrine Locations
–B1. Jetty
–B2. Guarded Entry
–Molten Bronze Trap
–B3. Scaly Eye Tombs
–B4. Scaly Eye Chambers
–B5. Bronze Gate Entrance
–B6. Statue Chamber
–B7. Ascension Chamber
–Stair Trap
–B8. Lhammaruntosz's Chamber
–Innate Spellcasting
–Regeneration
–Spellcasting
–Lhammaruntosz's Thanks
–Treasure
Claugiyliamatar's Lair
Location Overview
Travel to the Lair
–Myrkul Patrol
Arrival
–Lair Locations
–C1. Lookout Post
–C2. Owlbear Pens
–C3. Gnawbones Camp
–Pot of Poison
–Secret Poison Pit
–C4. Enchanting Spore Cavern
–Statues
–C5. Vine Stairway
–C6. Phase Spider Den
–C7. Slime Pool Overlook
–C8. Slime Pools
–Pushing Vines
–Slime Tunnel
–Statues
–C9. Zuri's Hidden Hoard
–C10. Bridge
–C11. Statue Overlook
–Statues
–C12. Map Room
–Hidden Message
–C13. Claugiyliamatar's Cavern
–Roleplaying Claugiyliamatar
–C14. Claugiyliamatar's Hoard
–Statues
–Finding Viantha
–Undead Encounter
–Viantha Found
–Roleplaying Viantha
–Return to the Lair
Death Knight-Dreadnaught
Location Overview
–Quest Goals
Travel to the Ship
Arrival
–Staked Zombies
–Where is Fheralai Stormsworn?
–Death Knight's Soul
–Dreadnaught Locations
–D1. Coastal Rocks
–D2. Skeletal Figurehead
–Halberd
–D3. Main Deck
–D4. Hellfire Orb
–D5. Forecastle
–D6. Quarterdeck
–D7. Poop Deck
–D8. Chart Room
–D9. Storage Lockers
–D10. Captain's Cabin
–D11. Oar Deck
–Skeleton Crew
–D12. Badwind's Cabin
–D13. Magazine
–D14. Crew Quarters
–D15. Galley
–D16. Surgery
–D17. Death Knight's Soul
–The Bard
–D18. Stores
–D19. Prisoner Cell
–D20. Armory
–D21. Flooded Hold
Iniarv's Tower
Location Overview
–Quest Goals
Travel to Iniarv's Tower
–Zombie Escape
Arrival
–Iniarv's Tower Locations
–I1. Walls
–I2. Pit Trap
–I3. Gatehouse
–Doors and Portcullises
–Murder Holes
–I4. Courtyard
–Slippery Mud
–I5. Main Tower
–Collapsed Cellar Entrance
–I6. Main Tower Roof
–I7. North Guard Tower First Floor
–Ladder
–Steel Box
–I8. North Guard Tower Second Floor
–I9. South Guard Tower First Floor
–I10. South Guard Tower Second Floor
Leilon Point
Location Overview
–Quest Goals
Arrival at Leilon Point
–Leilon Point Locations
–Farmhouses
–Fishing Supply Hut
–Head House
–Huer's Hut
–Umberlee Shrine
Arrival at Salt Cave
–Salt Cave Locations
–S1. Head Hall
–S2. Clam Cavern
–S3. Training Cavern
–S4. Ritual Cavern
Ending the Adventure
App. A: Creatures
App. B: Sidekicks
Sidekick Cards
–Donnabella Fiasco
–Galandro Luna
–Inverna Nightbreeze
–Nib Addlespur
–Pickled Pete
–Quinn Hightopple
–Ruby Hammerwhacker
–Shanjan Kwan
–Talon Thornwild
Sidekick Stat Blocks
Proficiencies
Sidekick Level
–Experts Beyond 9th Level
–Spellcasters Beyond 9th Level
–Warriors Beyond 9th Level
App. C: Necromancer's Journal
Supplements
Essentials Kit: Divine Contention
Essentials Kit
11–12
Sep 3rd, 2019
[+]
Introduction
Running the Adventure
–Abbreviations
Running for One Player
–Using Sidekicks
–Map of the Sword Coast
–Conyberry
–Crags
–High Road
–Kryptgarden Forest
–Leilon
–Mere of Dead Men
–Neverwinter
–Neverwinter Wood
–Phandalin
–Starmetal Hills
–Sword Mountains
–Triboar Trail
The Adventure Begins
–Adventure Background
–Upcoming Threats
–Divine Contention as a Stand-Alone
Welcome to Leilon
Exploring Leilon
–Aubrey's Peculiarities Shoppe
–Barge Yard
–Fishery
–Grizzelda Copperwraught
–Sergeant Hazz Yorrum
–Merrygold Brightshine
–Valdi Estapaar
–Vangol Kuskolt
–House of Thalivar
–Idol Island
–Knight's Goblet Inn
–Lathander Shrine
–Torver's Post
–Town Gates
–Town Square
–Tymora Shrine
–Tyr Shrine
–Umber Hulk's Shell Inn
–Quayside
–The Quest Board
–Adventure Locations
–Starting Quests
–Gulch Quest
–Icingdeath and Twinkle Quest
–Thalivar's Beacon Quest
–Leilon Besieged Quest
–Follow-Up Quest
–Storm Lord's Hideout Quest
–Ebondeath's Mausoleum Quest
–Leveling Up
Dumathoin's Gulch
Location Overview
–Quest Goals
Travel to the Gulch
–Encounters on the Way
–Panicked Gnome
–Gruesome Remains
Arrival
–Exploring the Gulch
–Cliffs
–Stone Arch
–Stream
–Moonstone
–Moon Writing
–Undead Forces
–Boneclaw
–Sword Wraith Platoon
–Guardian of the Gulch
–Conclusion
Ebondeath's Mausoleum
Location Overview
–Quest Goals
Travel to the Tomb
Arrival
–Mausoleum Features
–Lighting
–Construction
–Doors
–Rubble
–Mausoleum Locations
–E1. Entry Hall
–E2. Cultist Camp
–E3. Wine Cellar
–Secret Door
–E4. High Priest's Chamber
–E5. Ritual Room
–Secret Door
–E6. Halls of the Fiend
–E7. Vaults of the Uthlords
–E8. Crypt of the First Royals
–E9. Ebondeath's Lair
–Conclusion
Icingdeath and Twinkle
Location Overview
–Quest Goals
Arrival
–Drow Crews
–Discovering the Drow
–Meeting the Ship Captains
–Icingdeath and Twinkle Features
–Ballistas
–Ceilings
–Doors
–Figureheads
–Light
–Rigging
–Sails
–Statistics
–Sunshield
–Icingdeath Locations
–I1. Icingdeath Main Deck
–Magic Statue
–I2. Icingdeath Forecastle
–I3. Icingdeath Aftercastle
–I4. Icingdeath Captain's Cabin
–I5. Chart Room.
–Secret Door
–I6. Oil Pump Room
–I7. Icingdeath Main Hold
–I8. Icingdeath Galley.
–I9. Icingdeath Cargo Cabin
–Twinkle Locations
–T1. Twinkle Main Deck
–T2. Twinkle Forecastle.
–T3. Twinkle Aftercastle
–T4. Twinkle Captain's Cabin
–T5. Crystal Chamber
–Antimagic Crystal
–T6. Twinkle Main Hold
–T7. Twinkle Galley
–T8. Twinkle Cargo Cabin
Events
–Journey to Neverwinter
–Audience with Neverember
–Journey Back to Leilon
–Invisible Assassins
–Storm
–Battle on the Sword Sea
–Ending the Battle
–Reward
Leilon Besieged
Quest Overview
Quest Goals
Running the Battle
–Narrative Combat
–Random Encounters
–Resting
–How Many Combatants?
–Defenders
–Cult of Talos
–Cult of Myrkul
–Use of Magic
–Determining Victory
–Crushing Defeat
–Defeat
–Pyrrhic Victory
–Victory
–Great Victory
Order of Events
The Battle Begins
–Battlefield Events
–Event 1. Dawn of the Dead
–Event 2. The Storm Breaks
–Event 3. Against the Lightning
–Event 4. Back to the Mud
–Event 5. Streets of Rage
–Event 6. Rolling Thunder
–Event 7. Enter the Dragon
–Event 8. Thunder Drums
–Event 9: Eye of the Storm
–Event 10: Champion of Storms
–Event 11. Exodus
–Event 12. Last Stand
–Event 13. Ghost Tower.
–The party achieved three or more victories
–The party achieved fewer than three victories
–Event 14. Old Gnawbone
–Event 15. Divine Contention
–Conclusion
Storm Lord's Hideout
Location Overview
Travel to the Ship
–Roc Patrol
–Tornado
Arrival
–Death Knight's Soul
–Dreadnaught Features
–Ceilings
–Light
–Unholy Presence
–Dreadnaught Locations
–D1. Skeletal Figurehead
–D2. Upper Deck
–D3. Hellfire Orb
–D4. Shrine to Talos
–D5. Storage Lockers
–D6. Captain's Cabin
–D7. Oar Deck
–D8. Ironhide's Cabin
–D9. Magazine
–D10. Crew Quarters
–D11. Galley
–D12. Surgery
–D13. Death Knight's Soul
–Treasures
–D14. Stores
–D15. Prisoner Cell
–D16. Armory
–D17. Flooded Hold
–Rise of the Storm Lord
–Conclusion
Thalivar's Beacon
Location Overview
–Quest Goals
Travel to the Tower
Arrival
–Meeting Gallio Elibro
–Gallio's Hidden Agenda
–Tower Features
–Ceilings
–Light
–Doors
–Thalivar's Beacon Locations
–B1. Tower Exterior
–B2. Entry Hall
–B3. Supply Room
–B4. Kitchen
–B5. Servant's Quarters
–B6. Garrison
–B7. Armory
–Weapons Locker
–B8. Guard Room
–B9. Yurrum's Office
–B10. Laboratory
–B11. Gallio's Study
–B12. Library
–B13. Planar Beacon
–Dimensional Cells
–B14. Ethereal Spire
–The Ruinstone
Into the Ethereal
–The Ritual
–Hunting for Star Spawn
–Conclusion
Ending the Adventure
App. A: Creatures
App. B: Sidekicks
Sidekick Cards
–Donnabella Fiasco
–Galandro Luna
–Inverna Nightbreeze
–Nib Addlespur
–Pickled Pete
–Quinn Hightopple
–Ruby Hammerwhacker
–Shanjan Kwan
–Talon Thornwild
Sidekick Stat Blocks
Proficiencies
Sidekick Level
–Experts Beyond 11th Level
–Spellcasters Beyond 11th Level
–Warriors Beyond 11th Level
Supplements
Baldur's Gate: Descent Into Avernus
Baldur's Gate
1–13
Sep 18th, 2019
[+]
About the Adventure
Adventure Overview
Adventure Background
Roleplaying Devils
Life in the Nine Hells
Ch. 1: A Tale of Two Cities
Fall of Elturel
Evil in Baldur's Gate
Running This Chapter
The Basilisk Gate
Elfsong Tavern
–E1. Taproom
–E2. Lounge
–E3. Private Dining Room
–E4. Storage Alcove
–E5. Storeroom
–E6. Kitchen
–E7. Upstairs Dining Room
–E8. Private Dining Room
–E9. Fancy Guest Suite
–E10. Private Dining Room
–E11. Large Guest Room
–E12. Plain Guest Rooms
–E13. Alan's Bedroom
Dungeon of the Dead Three
–D1. Courtyard
–D2. Baths
–D3. South Massage Room
–D4. North Massage Room
–D5. Welcome to the Dungeon
–D6. Bloated Corpse
–D7. Bhaal's Altar
–D8. Moldy Tapestry
–D9. The Dead Three Doors
–D10. Necromites' Room
–D11. Partially Collapsed Crypt
–D12. Bane's Altar
–D13. Morgue
–D14. Hungry Rat
–D15. Flooded Room
–D16. Flooded Crypt
–D17. Myrkul's Altar
–D18. Gas Buildup
–D19. Partially Collapsed Crypt
–D20. Half-Plundered Crypt
–D21. Zombie Crypt
–D22. Torture Chamber
–D23. Secret Door and Sentry
–D24. Myrkul's Rest
–D25. Bane's Rest
–D26. Bhaal's Rest
–D27. Echoes of Battle
–D28. Old Cellar
–D29. Mortlock Vanthampur
–D30. Tiamat's Stolen Treasure
–D31. Torches
–D32. Stolen Goods
–D33. Covenant of the Dead Three
Low Lantern
–L1. Main Deck
–L2. Forecastle
–L3. Aftcastle
–L4. Laraelra's Cabin
–L5. Taproom and Gambling Hall
–L6. Tavern Lounge
–L7. Guest Cabin
–L8. Sleeping Quarters
Vanthampur Villa
–V1. Yard
–V2. Stable House
–V3. Foyer
–V4. Servants' Quarters
–V5. Kitchen
–V6. Pantry
–V7. Stairs Down
–V8. Parlor
–V9. Dining Room
–V10. Gallery
–V11. Upstairs Hall
–V12. Balcony
–V13. Thurstwell's Bedroom
–V14. Mortlock's Bedroom
–V15. Amrik's Bedroom
–V16. Duke's Powder Room
–V17. Master Bedroom
–V18. Duke's Study
–V19. Tower Peak
Under the Villa
–V20. Cellar
–V21. Wine Cellar
–V22. Sewer Tunnels
–V23. Cold Storage
–V24. Dining Room
–V25. Kitchen
–V26. Temple of Zariel
–V27. Escape Tunnel
–V28. Secret Shrine
–V29. Prison
–V30. Barrier of Iron Bars
–V31. Vestry
–V32. Connecting Tunnel
–V33. Cultists' Quarters
–V34. Ritual Chamber
–V35. Thavius Kreeg's Quarters
–V36. Vanthampur Vault
Final Encounters in Baldur's Gate
Journey to Candlekeep
Candlekeep
Getting to Avernus
Ch. 2: Elturel Has Fallen
Running This Chapter
Arrival in Elturel
High Hall
–H1. Hall of Heroes
–H2. Grand Foyer
–H3. Central Altar
–H4. Private Chapels
–H5. Stairs to Residences
–H6. Desecrated Altar of Torm
–H7. Pipe Organ
–H8. Defenses
–H9. Balcony
–H10. Recessed Mausoleums
–H11. Vaults
–H12. Temple of the Highest
–H13. Hall of Scholars
–H14. Chamber of Torm's Council
–H15. Unknown Hero
–H16. Main Crypts
–H17. Escape Tunnel
Grand Cemetery
–G1. Walk of Bravery
–G2. Chapel of Light
–G3. Chapel of Mourning
–G4. Vestment Chamber
–G5. Gideon's Quarters
–G6. Undead Pit
–G7. Workshop
–G8. Ossuary of the Faithful
–G9. Main Ossuary
–G10. Meditation Chamber
–G11. Vault of Honor
–G12. Vault of Ascendance
Escaping the Siege
Ch. 3: Avernus
Running This Chapter
What Is Avernus?
Features of Avernus
Using the Poster Map
Fort Knucklebone
Raggadragga Attacks!
Warlords of the Avernian Wastelands
Quest for the Sword
Haruman's Hill
Hellwasp Nest
–N1. Entry Level
–N2. Drone Cells
–N3. Hellwasp Larvae
–N4. Larder
Ch. 3: Avernus - Path of Demons
Spawning Trees
Tower of Urm
Obelisk
Mirror of Mephistar
Pit of Shummrath
Crypt of the Hellriders
–C1. Sealed Gates
–C2. Funerary Chambers
–C3. Knights' Caskets
–C4. Warlocks' Tomb
–C5. Memorial Steles
–C6. Ritual Rooms
–C7. Olanthius's Retreat
Arches of Ulloch
Kostchtchie's Maw
Ch. 3: Avernus - Path of Devils
Demon Zapper
Bone Brambles
–B1. Entrances
–B2. Dead Ends
–B3. Red Ruth's Lair
Uldrak's Grave
Arkhan's Tower
Monument to Tiamat
Bel's Forge
–F1. Descent to the Forge
–F2. Fire Giant Blacksmiths
–F3. Weapons Rack
–F4. Pool of Magma
Sibriex
Wrecked Flying Fortress
–W1. Bridge
–W2. Alarm Console
–W3. Damaged Machinery
–W4. Records Room
–W5. Adamantine Rods
–W6. Black Bell
–W7. Stirge Nest
–W8. Signal Desks
Ch. 3: Avernus - Other Locations
Stygian Dock
Styx Watchtowers
–T1. Ground Floor
–T2. Second Floor
–T3. Roof
Sundered Chains
The Wandering Emporium
Zariel's Flying Fortress
Roaming Encounter: Smiler the Defiler
Ch. 4: Sword of Zariel
Approaching the Citadel
The Scab
–S1. Oozing Entrance
–S2. Angelic Window
–S3. Drowned Hag
–S4. Bloody Downpour
–S5. Food Fight
–S6. Torture Chamber
–S7. Trantolox's Larder
–S8. Hag's Lair
–S9. Digging Demons
–S10. Crokek'toeck's Prison
–S11. Statue of Yeenoghu
–S12. Trantolox's Chamber
–S13. Cackling Gnolls
–S14. Entrance to the Bleeding Citadel
Entering the Citadel
Idyllglen
–I1. Idyll Road
–I2. Statue of Zariel
–I3. Temple of Lathander
Claiming the Sword
Ch. 5: Escape from Avernus
Who Should Rule Avernus?
Will Elturel Be Saved?
Endgame in Elturel
Baldur's Gate Gazetteer
History of Baldur's Gate
Baldur's Gate Today
Government
Citizenry
Economy and Trade
Religion
Dangers in Baldur's Gate
City Landmarks
Upper City
Lower City
Outer City
Beyond Baldur's Gate
Baldur's Gate Character Backgrounds
Dark Secrets
App. A: Diabolical Deals
App. B: Infernal War Machines
Stat Blocks
Rules
Fiendish Variations
Chases on Avernus
App. C: Magic Items
App. D: Creatures
App. E: Infernal Rapture Menu
App. F: Story Concept Art
App. G: Infernal Script
Supplements
Eberron: Forgotten Relics
Eberron
1–2
Nov 19th, 2019
[+]
Eberron: Forgotten Relics
Story Overview
Running the Adventure
Starting the Adventure
High Walls
Mithral Tower
Saving Caden
Skycoach Ride
Terminus
Areas of Terminus (1-7)
–T1. Skycoach Platform
–T2. Commerce Stair
–T3. Tenement Tower Stairs
–T4. Top-Level Apartments
–T5. Lower-Level Apartments
–T6. Skybridge
–T7. Graffiti Hall
Areas of Terminus (8-14)
–T8. Daask Hideout
–T9. Interrogation Room
–T10. Terminus Station Lift
–T11. Bodega
–T12. Ticket Booth
–T13. Bathroom
–T14. Station Platform
Lightning Rail to Wroat
Conclusion
Supplements
Theros: No Silent Secret
Mythic Odysseys of Theros
1–2
Jun 2nd, 2020
[+]
No Silent Secret
Story Overview
Running the Adventure
Starting the Adventure
What the Dead See
Into the Wilds
The Court of Orestes
–1. Khystonos Riverbank
–2. Antechamber
–3. Viewing Room
–4. Flooded Catacomb
–5. Crypts of the Deathless
–6. Shrine of Phenax
–7. Tomb of Orestes
–8. Cave and Tunnel
Deciphering the Mask
Myths to Be Told
Supplements
Icewind Dale: Rime of the Frostmaiden
Icewind Dale
1–12
Sep 15th, 2020
[+]
Welcome to the Far North
About This Book
Adventure Summary
Running the Adventure
Adventure Flowchart
Character Creation
Ch. 1: Ten-Towns
Running This Chapter
Ten-Towns Overview
Cold Open
Starting Quest: Cold-Hearted Killer
Starting Quest: Nature Spirits
Bremen
Bremen in a Nutshell
Overland Travel
Locations in Bremen
Lake Monster
Bryn Shander
Bryn Shander in a Nutshell
Overland Travel
Locations in Bryn Shander
Foaming Mugs
Caer-Dineval
Caer-Dineval in a Nutshell
Overland Travel
Locations in Caer-Dineval
Black Swords
–C1. Main Gate
–C2. Snowy Courtyard
–C3. Kennel and Sled Storage
–C4. Guard Towers
–C5. Armory
–C6. Gatehouse
–C7. Great Hall
–C8. Speaker's Den
–C9. Speaker's Office
–C10. Servants' Quarters
–C11. Kitchen
–C12. Kadroth's Bedchamber
–C13. Soothsayer's Room
–C14. Speaker's Bedchamber
–C15. Old Library
–C16. Under the Castle
–C17. Cold Storage
–C18. West Cistern
–C19. Storage
–C20. Shrine to Levistus
–C21. Avarice's Quarters
–C22. Iron Lever
–C23. East Cistern
–C24. Prisoners
Caer-Konig
Caer-Konig in a Nutshell
Overland Travel
Locations in Caer-Konig
The Unseen
–O1. Bunker
–O2. Main Keep
–O3. Overlook
–O4. Armory
–O5. Chokepoint
–O6. Commander's Quarters
–O7. Spore Servants
–O8. Duergar Quarters
Dougan's Hole
Dougan's Hole in a Nutshell
Overland Travel
Location in Dougan's Hole
Holed Up
–L1. Exterior
–L2. Flensing Chamber
–L3. Caged Townsfolk
–L4. Entrance Corridor
–L5. Garagai's Icy Tomb
–L6. War Room
–L7. Garagai's Bedroll
–L8. Whale Oil Storage
Easthaven
Easthaven in a Nutshell
Overland Travel
Locations in Easthaven
Toil and Trouble
–U1. Cave Mouths
–U2. Dire Wolf Den
–U3. Cave Drawings
–U4. Moaning Cavern
–U5. Icy Bridge
–U6. Old Camp
–U7. Waterfall
–U8. Sacred Spring
–U9. Ossuary
–U10. Cauldron of Plenty
Town Hall Capers
–T1. Reception Hall
–T2. Administrative Office
–T3. Speaker's Office
–T4. Coat Closet
–T5. Privy
–T6. Chardalyn Figurehead
–T7. Chair Storage
–T8. Records Room
–T9. Event Venue
–T10. Small Claims Court
–T11. Fishing Permits
–T12. Employee Breakroom
–T13. Supply Closet
–T14. Town Library
–T15. Office and Storage Space
–T16. Stairs to the Dungeon
–T17. Jailers' Room
–T18. Jail
–T19. Interrogation Room
Good Mead
Good Mead in a Nutshell
Overland Travel
Locations in Good Mead
The Mead Must Flow
–V1. Three Entrances
–V2. Main Entrance
–V3. Firelit Cave
–V4. Refuse Pit
–V5. Stolen Mead Casks
–V6. Frozen Stream
–V7. Cave Bear's Lair
–V8. Burial Niches
–V9. Duhg Is Here
–V10. Ancient Tomb
Lonelywood
Lonelywood in a Nutshell
Overland Travel
Locations in Lonelywood
The White Moose
–E1. Elf Statues
–E2. Barrow Entrance
–E3. Marble Gazebo
–E4. Sarcophagus and Crystal Pillars
–E5. Moon Dial
–E6. Barrow
–E7. Mirror of the Full Moon
–E8. First Tomb of the Half-Moon
–E9. Second Tomb of the Half-Moon
Targos
Targos in a Nutshell
Overland Travel
Locations in Targos
Mountain Climb
–F1. Chasm
–F2. Trophies
–F3. Yeti Den
Termalaine
Termalaine in a Nutshell
Overland Travel
Locations in Termalaine
A Beautiful Mine
–M1. Tool Room
–M2. Gem Deposits
–M3. River Cavern
–M4. Processing Room
–M5. Underdark Shaft, Level 1
–M6. Bucket Lift
–M7. Bucket Lift Landing
–M8. Grell Lair
–M9. Hungry Kobolds
–M10. Underdark Shaft, Level 3
–M11. Kobold Tunnels
–M12. Fossilized Skull and Psi Crystal
–M13. Geode Workface
Ch. 2: Icewind Dale
Running This Chapter
Wilderness Encounters
Places of Interest
Angajuk's Bell
–A1. Frozen Pier
–A2. Stone Cabin
–A3. Bell
–A4. Hole in the Ice
Black Cabin
–B1. Outhouse
–B2. Wooden Walkway
–B3. Workshop
–B4. Main Room
–B5. Sweetberry Summer Wine
–B6. Laboratory
–B7. Abandoned Bedroom
–B8. Macreadus's Bedroom
Cackling Chasm
–Z1. Cave Mouth
–Z2. Feasting Cave
–Z3. Shrine to Yeenoghu
–Z4. Frozen Rift
–Z5. Chyzka's Cave
–Z6. Sleeping Cave
–Z7. Storeroom
–Z8. Caged Berserker
Cave of the Berserkers
–Q1. Icy Path
–Q2. Bear's Head
–Q3. Eggshells in Cells
–Q4. Waste Chute
–Q5. Frostmaiden's Fire
–Q6. Slaughterhouse
–Q7. Meat Storage
–Q8. Living Quarters
Dark Duchess
–D1. Main Deck
–D2. Forecastle
–D3. Aft Castle
–D4. Surgeon's Cabin
–D5. First Mate's Cabin
–D6. Chart Room
–D7. Storage
–D8. Captain's Cabin
–D9. Hold
–D10. Galley
–D11. Rum Storage
–D12. Water Storage
Id Ascendant
–N1. Forward Deck
–N2. Cargo Hold
–N3. Cryogenic Stasis Pods
–N4. Battle Deck
–N5. Maintenance
–N6. Propulsion Room
–N7. Bridge
–N8. Observation Deck
–N9. Captains' Quarters
Jarlmoot
–J1. Ring of Thrones
–J2. Hall of Braziers
–J3. Curved Tunnel
–J4. Turn the Gold Key?
–J5. Chamber of Chests
Karkolohk
–K1. Watchtowers
–K2. Main Gate
–K3. Courtyard
–K4. Archer Platforms
–K5. Main Battle Platform
–K6. Healers' Huts
–K7. Walk of Doom
–K8. Goblin Huts
–K9. Main Keep Foyer
–K10. Guard Barracks
–K11. Dining Room
–K12. Chief's Quarters
–K13. Treasury
Lost Spire of Netheril
–P1. Upside-Down Entrance
–P2. Upside-Down Corridor
–P3. Upside-Down Library
–P4. Upside-Down Workshop
–P5. Upside-Down Potion Storage
–P6. Upside-Down Laboratory
–P7. Upside-Down Apprentices' Study
–P8. Upside-Down Reading Room
–P9. Collapsed Staircase
–P10. Rubble-filled Spiral Stairway
–P11. Upside-Down Laboratory
–P12. Snow and Shadow
–P13. Upside-Down Shrine
–P14. Upside-Down Refectory
–P15. Upside-Down Bedchamber
–P16. Upside-Down Rune Chamber
Reghed Tribe Camp
Revel's End
–R1. Pier
–R2. Elevator
–R3. Guard Rooms
–R4. Hospital
–R5. Stables
–R6. Mess Hall
–R7. Councilors' Quarters
–R8. Kitchen and Side Rooms
–R9. Guard Towers
–R10. Armory
–R11. Courtyards
–R12. Meeting Room
–R13. Storeroom
–R14. Privy
–R15. Hexagon
–R16. Panopticon
–R17. Cells
–R18. Surveillance Hub
–R19. Guard Barracks
–R20. Hall of Absolution
–R21. Warden's Quarters
–R22. Warden's Office
–R23. Tower Roof
Skytower Shelter
–S1. Stone Causeway
–S2. Barricade and Chieftain
–S3. Overlook
–S4. Chieftain's Cave
–S5. Shrine of Mind and Spirit
–S6. Griffons' Cave
–S7. Shrine of Strength and Honor
–S8. Passage of Carvings
–S9. Feasting Cave
–S10. Communal Cave
Wyrmdoom Crag
–W1. Approach
–W2. Goat-Ball Court
–W3. Weaponsmith
–W4. The Crawl
–W5. Main Hall
–W6. Private Caves
–W7. Feasting Cave
Ch. 3: Sunblight
Running This Chapter
Finding the Fortress
Xardorok's Fortress
–X1. Entrance
–X2. Vestibule
–X3. Upper Barracks
–X4. Xardorok's War Room
–X5. Xardorok's Quarters
–X6. Guard Post
–X7. Office of the Captain of the Guard
–X8. Private Dining Hall
–X9. Portcullis
–X10. Durth's Quarters
–X11. Nildar's Quarters
–X12. Training Room
–X13. Western Gear Room
–X14. Workshop
–X15. Eastern Gear Room
–X16. Northwest Cavern
–X17. Duergar Mines
–X18. Guarded Corridor
–X19. Chardalyn Throne
–X20. Quaggoth Den
–X21. Treacherous Guards
–X22. Western Elevator
–X23. Outer Gate
–X24. Forge
–X25. Assembly Platform
–X26. Vertical Shaft
–X27. Giant Lizard Pens
–X28. Dungeon
–X29. Deep Duerra's Temple
–X30. Eastern Elevator
–X31. Devil in Disguise
–X32. Trapped Hall
–X33. Lower Barracks
–X34. Torture Chamber
–X35. Guest Quarters
–X36. Duergar Hammerers
–X37. Treasure Vault
Fortress Fallout
Ch. 4: Destruction's Light
Running This Chapter
Return to Ten-Towns
Dragon Scourge
Showdown!
Vellynne's Quest
Ch. 5: Auril's Abode
Running This Chapter
Sea of Moving Ice
Island of Solstice
–I1. Ruined Dock
–I2. Shipwrecks
–I3. Nass Lantomir's Ghost
–I4. Ice Statues
–I5. Yeti Caves
–I6. Garden of Death
Grimskalle
–G1. Entrance
–G2. Guard Room
–G3. Frost Giant Warden
–G4. Ruined Kitchen
–G5. Feast Hall
–G6. Perched Mephits
–G7. Throne Room
–G8. Queen's Bedchamber
–G9. Crowned Rooftop
–G10. Ice Rink
–G11. Tomb Entrance
–G12. Skeletal Guards
–G13. Vassavicken's Tomb
–G14. Vassavicken's Axe
–G15. Tests of the Frostmaiden
–G16. Test of Cruelty
–G17. Test of Endurance
–G18. Test of Isolation
–G19. Test of Preservation
–G20. Entrance to the Vault
–G21. Hall of the Four Winds
–G22. Chamber of the Codicil
–G23. Auril's Blessing
Wrapping Up
Ch. 6: Caves of Hunger
Running This Chapter
Race to the Glacier
Opening the Way
Into the Caves of Hunger
–H1. Into the Glacier
–H2. Crashed Skycoach
–H3. Flameskulls
–H4. Kobold Vampire Spawn
–H5. Icicle Drop
–H6. Ruined Tower
–H7. Rubble-Strewn Cave
–H8. Arcane Eye Activator
–H9. Golem Head
–H10. Toppled Spire
–H11. Den of Shadows
–H12. Curse of Hunger
–H13. Icicle-Filled Cave
–H14. Ice Sculptures
–H15. Drakareth's Doom
–H16. Ice Cave
–H17. Den of the Vampire Spawn
–H18. Snow Golems
–H19. Den of Death
–H20. Ice Crypt
–H21. Frozen Frost Giant
–H22. Borehole
–H23. Remorhaz Nest
–H24. Remorhaz Mother
–H25. Empty Side Caves
–H26. Egg-Shaped Cave
–H27. West Observation Platform
–H28. Drow Outpost
–H29. East Observation Platform
–H30. Vlagomir's Spark
–H31. Thing in the Ice
–H32. Mirrored Cavern
–H33. Watcher in the Walls
–H34. City Debris
–H35. Mysterious Cube
–H36. Frozen Grove
–H37. Weird Insights
–H38. Ice Caves
–H39. Passage to Ythryn
Wrapping Up
Ch. 7: Doom of Ythryn
Running This Chapter
Necropolis of Ythryn
Necropolis of Ythryn Locations
–Y1. Ice Causeway
–Y2. Wizard Spires
–Y3. Chain Lightning Stadium
–Y4. Tower of Abjuration
–Y5. Prison
–Y6. Spire Entrance
–Y7. Tower of Conjuration
–Y8. House of the Arcane
–Y9. Library
–Y10. Arboretum
–Y11. Tower of Divination
–Y12. Wellspring of Answers
–Y13. Bazaar of the Bizarre
–Y14. Hall of Silk
–Y15. Observatory
–Y16. Menagerie
–Y17. Theater
–Y18. Tower of Necromancy
–Spire of Iriolarthas (Y19a-Y19q)
–Y20. Tower of Evocation
–Y21. Obelisk
–Y22. Tower of Illusion
–Y23. Ythryn Mythallar
–Y24. Tower of Enchantment
–Y25. Hall of Weightless Wonder
–Y26. Tower of Transmutation
–Y27. Music Hall
–Y28. Skydock Spire
–Y29. Museum
Dealing with the Arcane Brotherhood
Auril's Wrath
Summoning the Tarrasque
Epilogue
What Secrets Remain
Summer Is Coming
Winter Everlasting
Year of Chilled Marrow
App. A: Icewind Dale Trinkets
App. B: Character Secrets
Alagondar Scion
Doppelganger
Drizzt Fan
Elusive Paramour
Escaped Prisoner
Littlest Yeti
Midwinter Child
Old Flame
Orc Stone
Owlbear Whisperer
Pirate Cannibal
Reghed Heir
Reincarnation
Ring Hunter
Runaway Author
Slaad Host
Spy
App. C: Creatures
App. D: Magic
Magic Items
Books
Wizard Spells
App. E: Rime of the Frostmaiden
Maps
Supplements
Candlekeep Mysteries
Candlekeep Mysteries
1–16
Mar 16th, 2021
[+]
A Book of Books
Using the Adventures
Candlekeep
Entering Candlekeep
Defenses and Decorum
Sages and Master Sages
The Avowed
Candlekeep Locations
The Joy of Extradimensional Spaces
Finding the Book
Opening the Portal
Fistandia's Mansion
–M1. Foyer and Hallway
–M2. Patio
–M3. Library
–M4. Exercise Room
–M5. Study
–M6. Kitchen
–M7. Pantry
–M8. Dining Room
–M9. Arboretum
–M10. Stairs
–M11. Laboratory
–M12. Planetarium
–M13. The Chained Library
–M14. Trophy Room
–M15. Bedroom
–M16. Balcony
–M17. Alchemical Laboratory
–M18. Summoning Room
–M19. Preserved Menagerie
Conclusion
Mazfroth's Mighty Digressions
Finding the Book
What's Going On?
Monstrous Books
Journey to Baldur's Gate
The Wide
Blackgate
Amberdune Hideout
–A1. Common Room
–A2. Kitchen
–A3. Corridor Dormitory
–A4. Korvala's Office
–A5. Storage Room
–A6. Hidden Vault
Conclusion
Book of the Raven
Finding the Book
Map of Mystery
Chalet Brantifax
–C1. Storage Cellar
–C2. Servants' Quarters
–C3. Haunted Well
–C4. Cloakroom
–C5. Den
–C6. Dining Room
–C7. Kitchen
–C8. Parlor
–C9. Graveyard
–C10. Guest Room
–C11. Guest Room
–C12. Study
–C13. Master Bedroom
–C14. Baron's Loft
–C15. Attic Nursery
–C16. Servants' Attic
–C17. Storage Attic
Shadow Crossing
Wereraven
A Deep and Creeping Darkness
Finding the Book
Maerin
Vermeillon
–V1. The Wand and Hammer
–V2. Stonemason's Workshop
–V3. Mayor's House
–V4. Tree
–V5. Graveyard
–V6. Merchant's Cart
–H1. Entryway
–H2. Assembly Room
–H3. Meeting Room
–H4. Dining Room
–H5. Parlor
–H6. Upstairs Landing
–H7. Daughter's Bedroom
–H8. Master Bedroom
–H9. Library
–H10. Guest Bedroom
–H11. Son's Bedroom
–M1. Main Tunnel
–M2. Southern Wing
–M3. Northern Wing
–M4. Cave-In
–M5. Entrance to the Meenlock Lair
–M6. Chamber of Weeping
–M7. Mossy Maze
–M8. Pools
–M9. Transformation Chamber
Fate of Vermeillon
Meenlock
Shemshime's Bedtime Rhyme
Adventure Overview
Player Handout: Shemshime's Rhyme
Finding the Book
Cellar Inhabitants
Starting the Adventure
Events
The Firefly Cellar
–F1. The Stacks, Balcony
–F2. The Stacks
–F3. Scriptorium
–F4. Firefly Room
–F5. Bindery
–F6. The Worm Tunnel
–F7. Kitchen
–F8. Avowed Quarters
–F9. Gailby's Room
–F10. Ebder's Room
–F11. Crinkle's Room
–F12. Avowed Quarters
–F13. K'Tulah's Room
–F14. Varnyr's Room
The Price of Beauty
Beginning the Adventure
Temple of the Restful Lily
–T1. Lobby
–T2. Changing Rooms
–T3. Lounge
–T4. Garden
–T5. Bath and Hot Spring
–T6. Kitchen
–T7. Treatment Rooms
–T8. Storage
–T9. Guest Rooms
–T10. Ilmar's Room
–T11. Abandoned Shrine
–T12. Sacred Pool
–T13. Tower Foyer
–T14. Saeth's Room
–T15. Tower Studio
–T16. Tower Kitchen
–T17. Victims' Quarters
–T18. Hags' Lair
Conclusion
Book of Cylinders
Beginning the Adventure
Northward Ho!
Helping the Grippli
–T1. Courtyard
–T2. Upper Court
Aftermath
Grippli
Sarah of Yellowcrest Manor
Beginning the Adventure
Grieving Ghost
Secrets in Waterdeep
Greenfast
–G1. Mayor's House
–G2. The Bulging Cauldron
–G3. Lord Viallis's House
–G4. Faerl's House
–G5. Barn
Temple of the Burnt Tongue Cult
–B1. Antechamber
–B2. Arcane Study
–B3. Dungeon Access
–B4. Office
–B5. Symbol Workshop
–B6. Study
–B7. Dark Chapel
–B8. Secret Vault
–B9. Secret Library
–B10. Ossuary
–B11. Cells
–B12. Acolytes' Training Room
–B13. Sacrificial Remains
Conclusion
Lore of Lurue
Finding The Book
Lore Comes to Life
Into the Wood
–H1. Dry Well
–H2. Hag Shack
–H3. Hag's Menagerie
Peril at the Pool
Conclusion
Kandlekeep Dekonstruktion
Beginning the Adventure
Earthquake!
The Barn Door
–B1. Library
–B2. Main Room
–B3. Stonky's Study
–B4. Observatory
Under the Barn Door
–U1. Descending Staircase
–U2. Rocket Boosters
–U3. Unlit Hallway
–U4. Forge
–U5. Stonky's Missing Ring
–U6. Workshop
–U7. Stonky's Command Center
Conclusion
New Monsters
Zikran's Zephyrean Tome
Finding the Book
Gazre-Azam's Predicament
Zikran's Laboratory
–L1. Coral Spire
–L2. Flooded Cave
–L3. Tidal Chamber
–L4. Zikran's Quarters
–L5. Laboratory and Lair
The Cloud Peaks
Cloud Giants' Keep
–C1. Front Yard
–C2. Entrance Hall
–C3. Armory
–C4. Mess Hall
–C5. Kitchen
–C6. Second Floor Bedroom
–C7. Zikran's Basement Workshop
Conclusion
The Curious Tale of Wisteria Vale
Finding the Book
The Cure
Adventure Summary
Into the Demiplane
Wisteria Vale
–W1. Vyridian Forest
–W2. Farms
–W3. Blossom's Rest
–W4. Silks and Soles
–W5. Marketplace
–W6. Manor
Exploring the Manor
–M1. Lounge
–M2. Kitchen
–M3. Dining Room
–M4. Storage
–M5. Backstage
–M6. Ballroom
–M7. Library
–M8. Master Bedroom
–M9. Guest Bedroom
–M10. Guest Bathroom
Finding Quill
Quill's Party
Aftermath
The Book of Inner Alchemy
Finding the Book
Order of the Immortal Lotus
Into the Cloakwood
Temple of the Immortal Lotus
–L1. Stele Forest
–L2. Living Quarters
–L3. Hall of Knowledge
–L4. Training Grounds
–L5. Jagged Sanctum
Aftermath
The Canopic Being
Beginning the Adventure
Player Handout: Xemru's Note
Mission to Tashluta
Valin's Tomb
–T1. Portal
–T2. Alessia's Quarters
–T3. Mirrors of Fortune
–T4. Testing Chamber
–T5. Scrying Pool
–T6. False Tomb
–T7. Meditation Room
–T8. Antechamber
–T9. Observatory of Fate
–T10. Treasure Room
–T11. Observatory of History
Conclusion
The Scrivener's Tale
Beginning the Adventure
The Scrivener's Mark
A Mysterious Dream
A Troubled Journey
Baldur's Gate
Haven of the Red Quill
–H1. Deep Stairwell
–H2. Collapsing Room
–H3. Central Chamber
–H4. Reading Room
–H5. Dragon Fresco
–H6. Bunkroom
–H7. Deep Spring
–H8. Great Library
Conclusion
Nintra Siotta, Princess of the Shadow Glass
Alkazaar's Appendix
Adventure Overview
Finding the Books
Adventure Background
Arriving in Anauroch
Travel in Anauroch
Arrival at Haruun
–H1. Cave Entrance
–H2. Worm Rubble
–H3. Hall of Rainbows
Travel to the Necropolis
Necropolis of Azumar
–V1. Mastaba
–V2. Mausoleum
–V3. Dracolich's Antechamber
–V4. Hall of Records
–V5. Vault
What Happens Next?
Chwinga
Xanthoria
Beginning the Adventure
The Lykortha Expanse
–L1. Entrance
–L2. Alchemist's Alcove
–L3. Cavern of Souls
–L4. Moldy Bedroom
–L5. Faerie Ring
–L6. Flooded Cavern
–L7. Kitchen
–L8. Meditation Cavern
–L9. Cove of Experimentation
–L10. Charnel Pit
–L11. Xanthoria's Grove of Horrors
Xanthoria's Defeat
Lichen Lich
Supplements
Ravenloft: The House of Lament
Ravenloft
1–3
May 18th, 2021
[+]
The House of Lament
Story Overview
Running the Adventure
The Hauntings of Halvhrest House
Starting the Adventure
Adventure Flowchart
House of Lament Features
House of Lament Locations (1-9)
–1. Porch
–2. Foyer
–3. Parlor
–4. Gallery
–5a. Tower Base
–5b. Tower Heights
–6. Sitting Room
–7. Conservatory
–8. Ballroom
–9. First Floor Hall
House of Lament Locations (10-18)
–10. Kitchen
–11. Dining Room
–12. Music Room
–13. Second-Floor Hall
–14. Guest Bedrooms
–15. Morning Room
–16. Master Bedroom
–17. Master Bath
–18. Office
House of Lament Locations (19-27)
–19. Exterior Balcony
–20. Third-Floor Hall
–21. Servants' Quarters
–22. Family Room
–23. Nursery
–24. Children's Bedroom
–25. Widow's Walk
–26. Tower Chamber
–27. Wine Cellar
House of Lament Locations (28-31)
–28. Storage
–29. Buried Ruins
–30. Buried Tower
–31. Amber Cavity
Escaping the House
Beyond the House
Supplements
The Wild Beyond the Witchlight
The Wild Beyond the Witchlight
1–8
Sep 21st, 2021
[+]
Into the Feywild
Adventure Summary
Running the Adventure
Feywild Trinkets
Backgrounds
Races
Character Traits
Beginning the Adventure
Pronunciation Guide
Ch. 1: Witchlight Carnival
Running This Chapter
Carnival Owners
Witchlight Hands
Carnival Overview
Carnival Locations
Carnival Events
Ch. 2: Hither
Running This Chapter
Prismeer Overview
Features of Hither
Arrival in Hither
Locations in Hither
Downfall
Where's Bavlorna?
The Soggy Court
Downfall Locations
–D1. Channel
–D2. Damaged Balloon
–D3. Stepstone Crossing
–D4. Burned-out Balloon Factory
–D5. Chattering Heads
–D6. His Royal Majesty Gullop XIX
–D7. Murky Lake
–D8. Holding Cells
–D9. Proving Grounds
–D10. Trinket, Bauble, and Charm's
–D11. Sinking Palace
–D12. Bavlorna's Cottage
–D13. Big Barkless
–D14. Toadstool Patch
–D15. Bullywug Hut
–D16. Bullywug Hut
–D17. King's Mount
–D18. Bavlorna's Cauldron
–D19. Watch Tower
Bavlorna's Cottage
–B1. Preservation Pool
–B2. Taxidermy Workshop
–B3. Fabric Storage Room
–B4. Rickety Stairs
–B5. Trove of Lesser Goodies
–B6. Balcony
–B7. Hallway
–B8. Guest Room
–B9. Secret Passage
–B10. Study
–B11. Aviary
–B12. Meat Locker
–B13. Kitchen
–B14. Cages
–B15. Pantry
–B16. Dining Room
–B17. Hooch Distillery
–B18. Bavlorna's Bedroom
–B19. Bavlorna's Hoard
From Hither to Thither
Ch. 3: Thither
Running This Chapter
Features of Thither
Arrival in Thither
Locations in Thither
Loomlurch
Approaching Loomlurch
Where's Skabatha?
Skabatha's Minions
Lost Children
Loomlurch Locations
–L1. Root Bridges
–L2. Goblin Market
–L3. Parlor
–L4. Workshop
–L5. Granny Nightshade's Garden
–L6. Rocking Horse
–L7. Tin Soldier Barracks
–L8. Workhouse Dormitory
–L9. Sewing Room
–L10. Cupboards
–L11. Family Tree
–L12. Textile Mill
–L13. Granny Nightshade's Kitchen
–L14. Study
–L15. Redcap Patch
–L16. Granny Nightshade's Bedroom
–L17. Aviary
From Thither to Yon
Ch. 4: Yon
Running This Chapter
Features of Yon
Arrival in Yon
Locations in Yon
Motherhorn
Entering Motherhorn
Approaching Motherhorn
Where's Endelyn?
A Tragedy in the Making
Motherhorn Locations
–M1. Main Entrance
–M2. Amphitheater
–M3. Stage Left
–M4. Prop Storage
–M5. Dressing Room
–M6. Performers' Quarters
–M7. Oracular Library
–M8. Endelyn's Mask Collection
–M9. Backdrop Hallway
–M10. Shadow Theater
–M11. Stage Workshop
–M12. Parts Storage
–M13. Worker Cells
–M14. Orrery of Tragedies
–M15. Theater Boxes
–M16. Darkling Balloon Dock
–M17. Prison
–M18. Audience Chamber
–M19. Viewing Gallery
–M20. Paper Birds and Hidden Belfry
–M21. Ornithopter Pad
–M22. Endelyn's Room
Leaving Yon
Ch. 5: Palace of Heart's Desire
Running This Chapter
Arrival at the Palace
Exploring the Palace
Lower Palace Locations
–P1. Front Gate
–P2. Palace Garden
–P3. Pavilion
–P4. Standing Stones
–P5. Fountain of Awakening
–P6. Woodcutter's Axe
–P7. Rose Garden
–P8. Maiden's Pond
–P9. Envy's Tower
–P10. Wrath's Tower
–P11. Carriage House
–P12. Hall of Stars
–P13. Court of Storms
–P14. Spiral Staircases
–P15. Servants' Quarters
–P16. Palace Kitchen
–P17. Base of the Beanstalk
–P18. Banquet Hall
–P19. Dining Terrace
–P20. Aviary
–P21. Records Room
–P22. Ballroom
–P23. Round Table
–P24. Ruined Staterooms
–P25. Bathing Room
–P26. Changing Room
–P27. Armory
–P28. Library
–P29. Rug of White Roses
–P30. Sludge-Filled Tower
–P31. Throne Room
Upper Palace Locations
–P32. Minstrels' Gallery
–P33. Glass Statues
–P34. Hall of Hatches
–P35. Flooded Hall
–P36. Costume Room
–P37. Dretch Nursery
–P38. Secret Library
–P39. Roost
–P40. Guest Wing
–P41. Talking Door
–P42. Laboratory
–P43. Mirror of Heart's Desire
–P44. Jars of Time
–P45. Zybilna's Bedroom
–P46. Dressing Room
–P47. Destroyed Study
–P48. Turrets
–P49. Black Book
–P50. Vault
–P51. Beanstalk Tower
Ending the Story
Zybilna Comes Alive
Zybilna's Gifts
App. A: Magic Items
App. B: Factions
Hourglass Coven
League of Malevolence
Valor's Call
App. C: Creatures
App. D: Roleplaying Cards
App. E: Stagefright's Lines
Story Tracker
Supplements
Strixhaven: Campus Kerfuffle
Strixhaven
1–4
Dec 7th, 2021
[+]
Ch. 3: Campus Kerfuffle
Running This Adventure
First Day on Campus
–B1. Main Entrance
–B2. Biblioplex Lounge
–B3. Student Café Seating
–B4. Information Desk
–B5. Student Store
–B6. Biblioplex Café
–B7. Lecture Hall
–B8. Study Area
–B9. Book Garden
–B10. Main Stacks
–B11. Hall of Oracles
–B12. Student and Alumni Art Gallery
–B13. Amphitheater
–B14. Student Activities Center
–B15. Student Council Hall
–B16. Advanced Student Stacks
–B17. Advanced Student Office
–B18. Advanced Student Lounge
–B19. The Compendium
Orientation Challenge
Frog's the Word
–F1. Study Tables
–F2. Seating Area
–F3. Barista Station
–F4. Newsstand
–F5. Fireside Lounge
–F6. Quiet Room
Magical Physiologies Exam: Slaadi
Advance to 2nd Level!
Work Hard, Play Harder
Bow's End Tavern
–E1. Patio Seating
–E2. Main Dining Room
–E3. Servers' Station and Bar
–E4. Overflow Seating
–E5. Back Exit
–E6. Kitchen
Magical Physiologies Exam: Owlbears
Campus Daredevils
–C1. Veranda
–C2. Foyer
–C3. Grand Hall
–C4. Dining Hall
–C5. Portrait Salon
–C6. Drawing Room
–C7. Hall of Beauty
–C8. Kitchen
–C9. Curio Room
–C10. Grand Deck
–C11. Side Deck
–C12. Faculty Office
–C13. Captain Dapplewing's Study
–C14. Central Passageway
–C15. Faculty Storage
–C16. Reflection Room
–C17. Grand Lounge
–C18. Tea Room
–C19. Student Storage
–C20. Attic
Advance to 3rd Level!
Magical Physiologies Exam: Otyughs
All the World's a Stage
The Rose Stage
–R1. General Seating
–R2. Orchestra Pit
–R3. Main Stage
–R4. Backstage Doors
–R5. Rose Room
–R6. Storage Hall
–R7. Stage Storage Area
Secrets in Sedgemoor
–S1. Marsh Banks
–S2. South Islet
–S3. Central Islet
–S4. South Research Shed
–S5. North Research Shed
–S6. East Islet
–S7. Underwater Spring
Advance to 4th Level!
Supplements
Strixhaven: Hunt for Mage Tower
Strixhaven
4–6
Dec 7th, 2021
[+]
Ch. 4: Hunt for Mage Tower
Running This Adventure
Back in Session
Mascots Everywhere!
–W1. Hall and Learning Platform
–W2. Observation Hut A
–W3. Southwest Clearing
–W4. Southern Outskirts
–W5. Southern Clearing
–W6. Southeastern Clearing
–W7. Observation Hut B
–W8. Western Clearing
–W9. Observation Hut C
–W10. Observation Hut D
–W11. Northwestern Clearing
–W12. Northern Clearing
–W13. Northern Outskirts
–W14. Observation Hut E
Scrivening and Symbology Exam: Glyph of Warding
Advance to 5th Level!
Party at the Rose Stage
Stack 'Em High
It's Got Three Heads!
Practice Makes Perfect
–A1. Southwestern Outbuilding
–A2. Southeastern Outbuilding
–A3. Practice Field
–A4. Dugout
–A5. Bleachers
Scrivening and Symbology Exam: Symbol Glyphs
Getting Some Air
Dangerous Knowledge
Scriptoria Collections
Scrivening and Symbology Exam: Augury
Tell Us In Song!
Battle of Strixhaven
–X1. Strixhaven Field
–X2. Locker Room
Advance to 6th Level!
Supplements
Strixhaven: The Magister's Masquerade
Strixhaven
6–8
Dec 7th, 2021
[+]
Ch. 5: The Magister's Masquerade
Running This Adventure
Cordially Invited
Reception at Bow's End
Fate at Furygale
Advanced Arcane History Exam: Relics
Dressing for Success
The Masquerade's Theme
Party Preparations
Advanced Arcane History Exam: Devices
Suspicions
Fancying Up Footwork
Preparing the Hall
–K1. Serenity Quadrants
–K2. Wise Kollema
–K3. Demonstration Stage
–K4. Second-Floor Study
–K5. Infirmary Intake
–K6. Infirmary Hall
–K7. Sickroom
Advance to 7th Level!
Advanced Arcane History Exam: Unearthed Arcana
A Starlit Night
Preparing for the Masquerade
Arriving at the Masquerade
Masquerade Events
The Masquerade's Conclusion
Midnight at Lorehold
–L1. Main Hall
–L2. Administrative Office
–L3. Porch
–L4. Records Room
–L5. Restricted Records Room
–L6. Deans' Reception Room
–L7. Dean Plargg's Office
–L8. Dean Tullus's Office
–L9. Deans' Records Room
Aftermath
Advance to 8th Level!
Supplements
Strixhaven: A Reckoning in Ruins
Strixhaven
8–10
Dec 7th, 2021
[+]
Ch. 6: A Reckoning in Ruins
Running This Adventure
A Sinister Shadow
A Brief Distraction
Arcane Herbology Exam: Vegetation Identification
Clue in the Bayou
–D1. The Stickiest Crate
–D2. Angry Trudges
–D3. Lonely Crate
–D4. Confused Constructs
–D5. Empty Crate
–D6. Unstable Crate
Advance to 9th Level!
No Time to Lose
But What about Classes?
The Stage Is Set
About Murgaxor
Into the Badlands
–T1. Watchtowers
–T2. Collapsing Cave
–T4. Supply Room
–T5. Lab
–T6. Mushroom Cave
–T7. Gorgon's Cave
–U1. Meditation Alcove
–U2. Ritual Area
–U3. Guard Chamber
–U4. Living Area
This Is Surreal, Isn't It?
Ruins of Caerdoon
–N1. Haunted Watchtower
–N2. Wailing Moat
–N3. Wreckage
–N4. Supply Train
–N5. Siege Towers
–N6. Fortress
Advance to 10th Level!
Confronting Murgaxor
Ritual Stones
Basement Features
Locations in the Basement
–M1. Central Chamber
–M2. Munition Storage
–M3. Broken Elevator
–M4. Ruined Storage
–M5. Armory
–M6. Immortality Ritual
Heroes of Strixhaven
Failing to Stop the Ritual
Supplements
Journeys through the Radiant Citadel
Journeys through the Radiant Citadel
1–14
Jul 19th, 2022
[+]
Welcome to the Radiant Citadel
Using the Adventures
The Radiant Citadel
Features
Noteworthy Sites
Concord Jewels
Life in the Citadel
Groups of the Citadel
Citadel Defenses
Entering the Citadel
Legends and Lore
Citadel Adventures
Using the Citadel
Salted Legacy
Background
Welcome to the Market
Market Investigations
Market Games
What Vendors Know
Revealing the Plot
Conclusion
Siabsungkoh Gazetteer
Wynling
Written in Blood
Background
Starting the Adventure
To the Rattle
Fallen Farmhouse
Kianna's Farmhouse
–F1: Overgrown Yard
–F2: Porch
–F3: Living Room
–F4: Bedroom
–F5: Dining Room
–F6: Kitchen
–F7: Cellar and Tunnel
–F8: Cavern
Conclusion
Godsbreath Gazetteer
Soul Shaker
The Fiend of Hollow Mine
Background
Starting the Adventure
Welcome to Milpazul
The Fiend's Identity
A Town Called Hollow
Hollow Mine
–H1: Mine Entrance
–H2: Teocín's Quarters
–H3: Corpse Disposal
–H4: Serapio's Quarters
–H5: Wailing Cavern
–H6: Tunnel to San Citlán
Night of the Remembered
Conclusion
San Citlán Gazetteer
Tlacatecolo
Wages of Vice
Background
Starting the Adventure
The River of Gold
On the Hunt
Peril at the Parade
Conclusion
Zinda Gazetteer
Sins of Our Elders
Background
Cycle of Dread
Starting the Adventure
Exploring Yeonido
Lingering Memories
Spirit of the Past
Conclusion
Yeonido Gazetteer
Gold for Fools and Princes
Background
Starting the Adventure
Death in the Mines
Anisa Academy
The Goldwarren
–G1: Junction Tunnel
–G2: Southwest Tunnel
–G3: Newly Dug Caverns
–G4: Abandoned Excavation
–G5: Aurumvorax Nest
Beyond the Goldwarren
Conclusion
Sensa Empire Gazetteer
Aurumvoraxes
Trail of Destruction
Background
Starting the Adventure
Exploring Etizalan
The Way Up
Twin Gods Observatory
Traveling to the Gate
Gate of Illumination
–I1: Cave Entrance
–I2: Hall of Histories
–I3: Blessings Memorial
–I4: Raided Memorial
–I5: Preparation Room
–I6: Caldera
Conclusion
Tletepec Gazetteer
Tlexolotl
In the Mists of Manivarsha
Background
Starting the Adventure
Storm of Destruction
Venturing from Sagorpur
The Swamp Forest
Forest of Hands
Conclusion
Shankhabhumi Gazetteer
Riverine
Between Tangled Roots
Background
Starting the Adventure
Traveling the Skybridge
Lambakluha
Conclusion
Dayawlongon Gazetteer
Bakunawa
Shadow of the Sun
Background
Starting the Adventure
Chaos at the Bazaar
The Lions' Plea
Ashen Heir Hideout
–A1: Courtyard
–A2: Prayer Hall
–A3: Hallway
–A4: Selenic Garden
After the Ashes
The Twilight Rose
Pedestal of Judgment
Conclusion
Akharin Sangar Gazetteer
Pari
The Nightsea's Succor
Background
Starting the Adventure
The Restless Dead
Castle Djaynai
The Night Revelers
Ancestors' Danse House
To the Nightsea
Arrival in Janya
Trench of Love Lost
–T1: Trench
–T2: Wreck
–T3: Broken Entry
–T4: Obsidian Throne
–T5: Forgotten Library
Conclusion
Djaynai and Janya Gazetteer
Haint
Buried Dynasty
Background
Starting the Adventure
The Old City
–Y1: Servants' Quarters
–Y2: Destroyed Entry
–Y3: Throne Room
–Y4: Receiving Hall
–Y5: Bedchamber
–Y6: Underground Garden
Secret Grotto
–S1: Jade Golem Tomb
–S2: Hallway Alcoves
–S3: Documents Alcove
–S4: Dragon Grotto
–S5: Exit Tunnel
Surprise Audience
Conclusion
Yongjing Gazetteer
Orchids of the Invisible Mountain
Background
Starting the Adventure
Across the Llanos
Ghost Orchid Tepui
–A1: Waterfall Pool
–A2: Ancient Statue
–A3: Waterfall Ascent
–A4: Tepui Plateau
–A5: Crashed Airship
Crystal Caves
–C1: Pool of Skins
–C2: Meditation Nook
–C3: Whistling Hall
–C4: Orchid Cavern
–C5: Ghost Orchid Tree
–C6: The Sleeping Stone
–C7: Polluted Pool
The Tepui's Fate
Back across the Llanos
Silver Tapir Monastery
The Drought Elder
–D1: Egg Chamber
–D2: Dead End
–D3: Void Striders
–D4: Vestige of Consciousness
–D5: Mandible Walk
Conclusion
Atagua Gazetteer
Whistler
Beyond the Radiant Citadel
Tayyib Empire
Umizu
Supplements
Dragons of Stormwreck Isle
Starter Set
1–3
Jul 31st, 2022
[+]
Running the Adventure
Overview
Getting Started
The Forgotten Realms
Adventure Background
The Dungeon Master
Voyage to Stormwreck Isle
–Explaining the Game
–Run the Encounter
–Shenanigans
–Wrap Up
Ch. 1: Dragon's Rest
Welcome to Dragon's Rest
–A1: Path and Monastic Cells
–A2: Winch House
–A3: Kitchen
–A4: Library
–A5: Temple of Bahamut
Cloister Quests
Exploring the Island
Ch. 2: Seagrow Caves
Caves Overview
Running This Chapter
–B1: Entrance Tunnel
–B2: Fungus Farm
–B3: Larder
–B4: Circle Chamber
–B5: Sinensa's Sanctum
–B6: Crystal Cave
Ending This Chapter
Ch. 3: Cursed Shipwreck
Shipwreck Overview
Running This Chapter
–C1: Main Deck
–C2: Forecastle
–C3: Quarterdeck
–C4: Captain's Quarters
–C5: Galley
–C6: Crew Quarters
–C7: Mess Hall
–C8: Lower Deck
–C9: Hold
Ending This Chapter
Ch. 4: Clifftop Observatory
Observatory Overview
Running This Chapter
–D1: Overlook
–D2: Rotunda Ruins
–D3: Kobold Camp
–D4: Isolated Study
–D5: Observatory Tower
–D6: Secret Library
Sparkrender's Ritual
Ending the Adventure
App. A: Magic Items
Using a Magic Item
Item Descriptions
App. B: Creatures
Creature Stat Blocks
Creature Descriptions
Supplements
Light of Xaryxis
Spelljammer
5–8
Aug 16th, 2022
[+]
Introduction: Wildspace Awaits!
Adventure Summary
Running the Adventure
Part 1 — Seeds of Destruction
Chapter 1: Astral Rain
Chapter 2: Attack of the Star Moth
Chapter 3: Treacherous Salvage
–1: Captain's Chair
–3: Spelljamming Helm
–4: Bridge Floor
–6: Observation Platform
–10: Mess Hall
–14: Cargo Hold
–17: Cellblock
–19: Storage
Part 2 — Terrors of the Void
Chapter 4: A Friend Indeed
Chapter 5: Living on the Edge
Chapter 6: Grave Alliance
–5: Spelljamming Helm
–13: Lower Cargo Hold
–14: Brig
Part 3 — Chaos in Doomspace
Chapter 7: Trust Issues
Wildspace System: Doomspace
Chapter 8: Arena of Blood
–1: Arena
–2: Armory
–3: Vestibule
–4: Audience Chamber
–5: Vocath's Sanctum
–6: Private Dock
Chapter 9: Discord and Diplomacy
Part 4 — Saviors of the Multiverse
Chapter 10: Space Invaders
Wildspace System: Xaryxispace
Chapter 11: Crowning Moment
Chapter 12: Light of Xaryxis
Conclusion
Further Adventures
Supplements
Dragonlance: Shadow of the Dragon Queen
Dragonlance
1–11
Nov 22nd, 2022
[+]
War Comes to Krynn
Using This Book
History of Krynn
The Dragon Armies
The War of the Lance
Life on Ansalon
Kalaman Region
Religion and the Gods
Ch. 1: Character Creation
Peoples of Krynn
Race Option
Organizations
Backgrounds
Feats
Sorcerer Subclass
Ch. 2: Prelude to War
Overview
Running the Adventure
Adventure Flow
The Dragon Queen's Threat
Character Connections
Pronunciation Guide
Preludes
Ch. 3: When Home Burns
Running This Chapter
Arriving in Vogler
Vogler Gazetteer
Final Farewell
Parting Gift
The Kingfisher Festival
Betrayal at High Hill
Back in Vogler
Sighting the Enemy
A Fateful Morning
Invasion of Vogler
Ch. 4: Shadow of War
Running This Chapter
Kalaman Gazetteer
Arriving in Kalaman
Castle Kalaman
Message for a Mage
Reporting for Duty
The First Mission
Missions for Kalaman
Wheelwatch Outpost
–W1: Courtyard
–W2: South Guard Towers
–W3: Northwest Guard Tower
–W4: Northeast Fortification
–W5: Barracks
–W6: Prison
–W7: Storage
–W8: Stable
–W9: Kitchen
Battle at Steel Springs
The Lord's Arrival
Raided Catacombs
–R1: Hall of Knights
–R2: Crypts
–R3: Tomb of Vaunted Steel
–R4: Hall of Steeds
–R5: Monument of the Lost
–R6: Shrine of the Honored
–R7: Tomb of Heroes
Ch. 5: The Northern Wastes
Running This Chapter
Desperation in Kalaman
Into the Wastes
Exploring the Wastes
–C1: Shrine Entrance
–C2: Altar Room
–C3: Cleansing Room
–C4: Hall
–C5: Crypt
–C6: Offering Chamber
–D1: Entry Chamber
–D2: Abandoned Dormitories
–D3: Lower Chambers
–D4: Barricaded Room
–D5: Spire Depths
–E1: First Level
–E2: Second Level
–E3: Third Level
–E4: Fourth Level
–E5: Shadowfell Expanse
–F1: Crystal Cave
–F2: Descending Cliffs
–F3: Sand Pit
–I1: Wooden Bridge and Lake
–I2: Main Entrance
–I3: Watchtower
–I4: Prisoner Cages
–I5: Zirrok's Hut
Ch. 6: City of Lost Names
Running This Chapter
History of the City
Path of Memories
–M1: Hall of Betrayal
–M2: Fallen Shop
–M3: Flooded Passage
–M4: Wine Cellar
–M5: Bone Gauntlet
–M6: Flooded Tavern
–M7: Ghosts of the Past
–M8: Wizard's Workshop
–M9: Demelin's Apartment
Test of High Sorcery
View of the City
Exploring the City
Bastion of Takhisis
Occupied Mansion
–O1: Exterior
–O2: Foyer
–O3: Carriage House
–O4: Salon
–O5: Lower Hallway
–O6: Kitchen
–O7: Pantry
–O8: Drawing Room
–O9: Upper Hallway
–O10: Master Bedroom
–O11: Library
Temple of Paladine
–P1: Causeway
–P2: Wooded Berm
–P3: Lake
–P4: Nave
–P5: Preparation Chamber
–P6: Rectory
–P7: Chancel
Threshold of the Heavens
–T1: Plaza
–T2: Entry
–T3: Tower Monitoring
–T4: Energy Field
–T5: Drone Monitoring
–T6: City Overview
–T7: Communications
–T8: Navigation
–T9: Scrying Room
–T10: Bridge
The City Rises
Escaping the Enemy
Ch. 7: Siege of Kalaman
Running This Chapter
A Hasty Retreat
Return to Kalaman
Day of Dread
Night of Terror
Battle of Kalaman
The Flying Citadel
–S1: Tunnels
–S2: Entry
–S3: Burial Vault
–S4: Chemosh's Shrine
–S5: Vestry
–S6: Elven Catacombs
–S7: Madar's Tomb
–S8: Cithcillion's Tomb
–S9: Tenadria's Tomb
–S10: Corridors
–S11: Rubble and Ruin
–S12: Sanctuary
–S13: Treasure Vault
–S14: Primordial Altar
–S15: Draconian Garrison
–S16: Study
–S17: Library
–S18: Draconian War Room
–S19: Cells
–S20: Storeroom
–S21: Ruined Hall
–S22: Nuitari's Shrine
–S23: Mourning Sanctum
–S24: Sargonnas's Shrine
–S25: Lord Soth's Throne Room
Dragon Army Rout
Kalaman Victorious
App. A: Gear and Magic Items
Adventuring Gear
Gnome Siege Weapons
Magic Items
App. B: Friends and Foes
Random Encounters
Creatures
App. C: Sidekicks
Allies at War
App. D: Story Concept Art
App. E: Maps
Supplements
Keys from the Golden Vault
Keys from the Golden Vault
1–11
Feb 21st, 2023
[+]
Introduction–A Collection of Heists
Using the Adventures
Running the Adventures
The Golden Vault
Heist Complications
The Murkmire Malevolence
Adventure Background
Using the Golden Vault
A Cry for Help
The Opening Gala
Varkenbluff Museum of Natural History
–V1: Grand Entrance
–V2: Museum Shops
–V3: Ancient Plants Exhibit
–V4: Ancient Cultures Exhibit
–V5: Curator's Office
–V6: Records Room
–V7: Break Room and Storage
–V8: Creatures of the Past Exhibit
–V9: Underground Wonders Exhibit
–V10: Archaeology Display
–V11: Unearthed Café
–V12: Prehistoric Predators Exhibit
–V13: Gemstone Wing
–V14: Access Hallway
–V15: Privies
–V16: Basement
–V17: Attic
Conclusion
The Murkmire Stone
The Stygian Gambit
Adventure Background
Using the Golden Vault
Starting the Adventure
Planning the Heist
The Afterlife Casino
–A1: Docking Area
–A2: Avernus
–A3: Dis
–A4: Minauros
–A5: Bar Malbolge
–A6: Phlegethosian Spa & Stygian Baths
–A7: Laundry
–A8: Cirque Maladomini
–A9: Cania
–A10: Waterfall Overlook
–A11: Nessus
–A12: Staging Area and Animal Cages
–A13: Employee Lounge
–A14: Quentin's Office
–A15: Clerk's Office
–A16: Security Office
–A17: Holding Cells
–A18: Back Hallways
–A19: Vault
Conclusion
Reach for the Stars
Adventure Background
Using the Golden Vault
Adventure Hooks
Meeting Elra
Elra's Camp
Delphi Mansion
–D1: Foyer
–D2: Dining Hallway
–D3: Dining Room
–D4: Kitchen
–D5: Pantry
–D6: Parlor
–D9: Guest Bedrooms
–D10: Balcony
–D12: Gallery
–D13: Alchemy Lab
–D14: Meditation Room
–D15: Markos's Bedroom
–D16: Student Quarters
–D17: Bathroom
–D18: Third-Floor Hall
–D19: Eldritch Observation Room
–D20: Component Storage
–D21: Star-Map Room
–D22: Storage Rooms
–D23: Wine Cellar
–D24: Temple
–D25: Storage
–D27: Ritual Room
Conclusion
Stat Blocks
Prisoner 13
Adventure Background
Adventure Hooks
Using the Golden Vault
Varrin's Proposition
Trek to the Prison
Revel's End
–R1: Dock
–R2: Elevator
–R3: Guard Rooms
–R4: Hospital
–R5: Stables
–R6: Mess Hall
–R7: Councilors' Quarters
–R8: Kitchen and Side Rooms
–R9: Guard Towers
–R10: Armory
–R11: Courtyard
–R12: Meeting Room
–R13: Storeroom
–R14: Privy
–R15: Hexagon
–R16: Panopticon
–R17: Cells
–R18: Surveillance Hub
–R19: Barracks
–R20: Hall of Absolution
–R21: Warden's Quarters
–R22: Office
–R23: Tower Roof
Conclusion
Tockworth's Clockworks
Adventure Background
Using the Golden Vault
Into the Underdark
Meeting the Mayor
Planning the Heist
Little Lockford Overview
Little Lockford Locations
–L1: Entrance and Gatehouse
–L2: Town Hall
–L3. Abbey of the Deep Brother
–L4. Infirmary
–L5: Jail
–L6: Power Station
–L7: Foundry
–L8: Motherlode Tavern
–L9: Tockworth's Workshop
–L10: Miners' Guildhall
–L11: Warehouse 6
–L12: Security Center
Conclusion
Stat Blocks
Masterpiece Imbroglio
Adventure Background
Adventure Hooks
Using the Golden Vault
Barn Visit
Planning the Heist
Agile Hand Guildhouse
–G1: Front Porch
–G3: Staircase
–G4: Cartwright's Workshop
–G5: Livery Office
–G6: Basement Staircase
–G7: Service Entrance
–G8: Courtyard
–G9: Conference Room
–G10: Main Hall
–G11: Kitchen
–G12: Parlor
–G13: Tower Rotunda
–G14: Upstairs Foyer
–G15: L-Shaped Hall
–G16: Stablemaster's Quarters
–G17: Small Common Room
–G18: Large Common Room
–G19. North Balcony
–G20: Private Room
–G21: Gwish's Room
–G22: South Balcony
–G23: Stolen Goods
–G24: Elix's Office
–G25: Shared Bedroom
–G26: Dusk's Quarters
–G27: Tower Peak
–G28: Cellar
–G29: Murky Pool
–G30: Trapdoor
–G31: Follow the Arrows
–G32: Eastern Maze
–G33: Western Maze
–G34: Cell Block
–G35: Storage Room
–G36: Storage Room
–G37: Secret Tunnel
Conclusion
Magic Item
Axe from the Grave
Adventure Background
Using the Golden Vault
Toadhop
Mackerel and Trout
Planning the Heist
Skalderang Conservatory
–C1: Dining Hall
–C2: Kitchen and Pantry
–C3: Servants' Quarters
–C4: Gallery
–C5: Shrine (Locked)
–C6: Mezzanine
–C7: Students' Quarters
–C8: Bathroom
–C9: Sythian's Bathroom (Locked)
–C10: Laundry Room
–C11: Music Hall
–C12: Outdoor Balcony
–C13: Hallway
–C14: Sythian's Study
–C15: Sythian's Quarters (Locked)
–C16: Attic
–C17: Library (Locked)
–C18: Rooftop
Conclusion
Sythian Skalderang
Vidorant's Vault
Adventure Background
Using the Golden Vault
Steal the Diadem
Preparation
The Vault
–T1: Lobby
–T2: Break Room
–T3: Gem Room
–T4: Scrolls and Potions Room
–T5: Documents Room
–T6: Gallery
–T7: Armory
–T8: Zoo
–T9: Library
–T10: Pit
–T12: Balcony
–T13: Vidorant's Quarters
–T14: Strong Room
–T15: Inner Vault
Vidorant Arrives
Conclusion
Shard of the Accursed
Adventure Background
The Accursed Shard
Adventure Hooks
Using the Golden Vault
What Really Happened
Town of Oztocan
Xeluan's Tomb
–X1: Main Entrance
–X2: Vestibule
–X3: Arrow Slit Hallway
–X4: Great Chamber
–X5: Barricaded Corridor
–X6: Forgotten Garden
–X7: Ruined Shrines
–X8: Living Quarters
–X9: Storage
–X10: Edino's Study
–X11: Mess Hall
–X12: Worker Rest Area
–X13: Reconstructed Shrine
–X14: History Room
–X15: Upper West Antechamber
–X16: Aminta's Quarters
–X17: Treasury
–X18: Mezzanine
–X19: War Room
–X20: Food Storage
–X21: Guest Hall
–X22: Crypt of the Watched
Conclusion
Heart of Ashes
Adventure Background
Using the Golden Vault
Heart of the Matter
Planning the Heist
Castle Cinis
–S1: Entry Hall
–S2: Hallway
–S3: Dining Hall
–S4: Kitchen
–S5: Library
–S6: Art Gallery
–S7: Stone Staircase
–S8: Upper Hallway
–S9: Parlor
–S10: Naevys's Bedroom
–S11: Regine's Bedroom
–S12: Charmayne's Bedroom
–S13: Royal Gallery
–S14: Mage Tower
–S15: King's Armory
–S16: King's Bedroom
–S17: Heart of Jhaeros
The Void
Conclusion
Affair on the Concordant Express
Adventure Background
Adventure Hooks
Using the Golden Vault
Glitch the Quadrone
The Concordant Express
Train Cars
–E1: Caboose
–E2: Abacus Car
–E3: Aquarium Car
–E4: Cargo Car
–E5: Planartarium Car
–E6: Passenger Car
–E7: Temple Car
–E8: Jail Car
–E9: Engine Car
Conclusion
Party at Paliset Hall
Adventure Background
Using the Golden Vault
Meeting Fifel
Planning the Heist
Loch Wynnis
Sundown Crossing
Paliset Hall
–P1: Fountain and Patio
–P2: Foyer
–P3: Coat Check
–P4: Ballroom
–P5: Parlor
–P6: Art Gallery
–P7: Banquet Hall
–P8: Kitchen
–P9: Balcony
–P10: Main Bedroom
–P11: Main Bathroom
–P12: Vault Tower
–P13: Vanity
–P14: Guest Bedroom
–P15: Guest Bathroom
–P16: Private Study
–P17: Powder and Fitting Room
–P18: Cellar
–P19: Servants' Quarters
–P20: Inside the Solitaire Rift
The Crestfall Coven
The Solitaire Cracks
Conclusion
Secrets of the Shard Solitaire
Fire and Darkness
Adventure Background
Hooks and Rewards
Using the Golden Vault
Planning the Heist
Brimstone Hold
–B1: Bridge
–B2: Gatehouse
–B3: Prison Tower
–B4: Prison Yard
–B5: Inner Yard
–B6: Upper Yard
–B7: Harbor
–B8: Cliff Towers
–B9: Harbor Towers
–B10: Efreeti Face
–B11: Guard Room
–B12: Secret Passage
–B13: Prison Cells
–B14: Large Prison Cell
–B15: Erinyes Barracks
–B16: Common Room
–B17: Kitchen
–B18: Duergar Barracks
–B19: Storeroom
–B20: Salamander Barracks
–B21: Storeroom
–B22: Antechamber
–B23: Administrative Office
–B24: Nebukath's Chamber
–B25: Audience Chamber
–B26: Lounge
–B27: Vestibule
–B28: Jarazoun's Chamber
–B29: Vrakir's Chamber
–B30: Vrakir's Demiplane
Conclusion
Supplements
Phandelver and Below: The Shattered Obelisk
Starter Set
1–12
Sep 19th, 2023
[+]
Welcome to Phandalin
Threats from Below
About This Book
Adventure Summary
Running the Adventure
Character Creation
Adventure Hooks
Far Realm Influence
Ch. 1: A Dangerous Journey
Running This Chapter
The Road to Phandalin
Cragmaw Hideout
–H1: Cave Mouth
–H2: Goblin Guard Post
–H3: Kennel
–H4: Steep Passage
–H5: Overpass
–H6: Goblin Den
–H7: Twin Pools Cave
–H8: Klarg's Cave
Ch. 2: Trouble in Phandalin
Running This Chapter
Welcome to Phandalin
Encounters in Phandalin
Town Description
Redbrand Ruffians
Redbrands' Hideout
–R1: Cellar
–R2: Barrack
–R3: Trapped Hall
–R4: Tresendar Crypts
–R5: Holding Cells
–R6: Armory
–R7: Storeroom and Work Area
–R8: Crevasse Cave
–R9: Guard Barrack
–R10: Common Room
–R11: Wizard's Workshop
–R12: Glasstaff's Quarters
What's Next?
Ch. 3: The Spider's Web
The Story So Far
Running This Chapter
Conyberry and Agatha's Lair
Old Owl Well
Ruins of Thundertree
–U1: Westernmost Cottage
–U2: Blighted Cottages
–U3: The Brown Horse
–U4: Druid's Watch Post
–U5: Blighted Farmhouse
–U6: Ruined Store
–U7: Old Tower
–U8: Old Smithy
–U9: Herbalist's Shop
–U10: Town Square
–U11: Old Garrison
–U12: Weaver's Cottage
–U13: Dragon Cultists' Cottage
Wyvern Tor
Cragmaw Castle
–C1: Castle Entrance
–C2: Trapped Hall
–C3: Archer Post
–C4: Ruined Quarters
–C5: Storeroom
–C6: Hobgoblin Quarters
–C7: Banquet Hall
–C8: Dark Hall
–C9: Goblin Shrine
–C10: Postern Gate
–C11: Ruined Tower
–C12: Guard Quarters
–C13: Haunted Tower
–C14: King's Quarters
What's Next?
Ch. 4: Wave Echo Cave
Running This Chapter
Wave Echo Cave
–W1: Cave Entrance
–W2: Mine Tunnels
–W3: Old Entrance
–W4: Old Guardroom
–W5: Assayers' Office
–W6: South Quarters
–W7: Ruined Storeroom
–W8: Fungi Cavern
–W9: Great Cavern
–W10: Dark Pool
–W11: North Quarters
–W12: Smelter Cavern
–W13: Starry Cavern
–W14: Wizards' Quarters
–W15: Forge of Spells
–W16: Booming Cavern
–W17: Old Streambed
–W18: Collapsed Cavern
–W19: Temple Of Dumathoin
–W20: Priests' Quarters
What's Next?
Ch. 5: Paths of Peril
Running This Chapter
Townmaster's Plight
Stolen Shards
Zorzula's Rest
–Z1: Entrance
–Z2: Vestibule
–Z3: Mess Hall
–Z4: Bunks
–Z5: Latrines
–Z6: Hot Spring
–Z7: Overlook Forge
–Z8: Kitchen
–Z9: Pantry
–Z10: Captain's Suite
–Z11: Vault
–Z12: Mining Tunnels Entrance
–Z13: Mine Cart Maintenance Chamber
–Z14: Crystal Cavern
–Z15: Cliff Strip Mine
–Z16: Cesspit
–Z17: Shrine to Ilsensine
–Z18: Storage Chamber
–Z19: Sanctum Crossing
Indigo Sanctum
What's Next?
Ch. 6: The Shattered Obelisk
The Sinister Truth
Running This Chapter
Return to Phandalin
Talhundereth
–T1: Temple Entrance
–T2: Deepening Hall
–T3: Lesser Chapel
–T4: Priest Quarters
–T5: Sparring Chamber
–T6: Training Master's Quarters
–T7: Armory
–T8: Vault
–T9: Residential Room
–T10: Private Rooms
–T11: Common Room
–T12: Kitchen
–T13: Pantry
–T14: Reading Room
–T15: Librarian's Room
–T16: Library
–T17: Defaced Statue
–T18: Cleansing Chamber
–T19: Procession Hall
–T20: Crypt Entrance
–T21: Worship Hall
Crypt of the Talhund
–P1: Lower Landing
–P2: Ghostly Hall
–P3: Corpse Preparation Rooms
–P4: Hidden Sanctum Access Rooms
–P5: Watery Chamber
–P6: Honored Approach
–P7: Reliquary
–P8: Honored Dead
–P9: Historian's Tomb
–P10: Founder's Tomb
–P11: Valiant Approach
–P12: Valiant Dead
–P13: General's Tomb
–P14: Rotating Sanctum
–P15: Blessed Dead
–P16: Haunted Hall
–P17: Architect's Tomb
–P18: Obelisk Chamber
Gibbet Crossing
–G1: Surface Entrance
–G2: Storeroom
–G3: Cage Workshop
–G4: Living Quarters
–G5: Showroom
–G6: Prison
–G7: Stairs to Flooded Passage
–G8: Intersection
–G9: Depleted Mine
–G10: Collapsed Tunnel
–G11: Talhundereth Passage
–G12: Receiving Room
–G13: Private Rooms
–G14: Toppled Tower
–G15: Duergar Delegate Room
–G16: Negotiating Chamber
–G17: Drow Delegation Room
–G18: Drow Passage
–G19: Azfadiel Receiving Room
–G20: Azfadiel Shrine
–G21: Receiving Room
–G22: Moldy Room
–G23: Killing Hall
–G24: Guard Room
–G25: Drow Vault
What's Next?
Ch. 7: Rifts in Reality
Running This Chapter
Shadow over Phandalin
Journey through the Deep
–J1: Bloody Intersection
–J2: Tunnel Chasm
–J3: Grell Lair
–J4: Larder
–J5: Blasted Intersection
–J6: Behir Den
–J7: Scavengers' Nook
–J8: Burbling Intersection
–J9: Gibbering Grotto
–J10: Hooked Stones
Illithinoch
–X1: Gates
–X2: Reception Hall
–X3: Hashutu's Room
–X4: Laboratory
–X5: Cosmologium
–X6: Psychic Library
–X7: Voalsh's Lounge
–X8: Voalsh's Quarters
–X9: Prisoner Pens
–X10: Experimentation Chamber
–X11: Feeding Pool
–X12: Sleeping Pods
–X13: Lecture Hall
–X14: Chishinix's Room
–X15: Elder Brain Pool
–X16: Ritual Chamber
Far Realm Rifts
–F1: Sludge Grooves
–F2: Common Eatery
–F3: Private Eatery
–F4: Food Source
–S1: Entry Cavern
–S2: Crystal Pit
–S3: Flesh Vortex Chamber
–S4: Rune Alcove
–L1: Gazing Chamber
–L2: Views of Madness
–L3: The Rolling Eye
–L4: Dead Thief
–L5: Broken Glass
–L6: Rune Chamber
–L7: Golcuus's Lair
What's Next?
Ch. 8: Beyond a Lightless Star
Running This Chapter
Doom Comes to Phandalin
The Briny Maze
–B1: Maze Entry
–B2: Passage of Death
–B3: Webbed Chamber
–B4: Wall of Hubris
–B5: Tumor Garden
–B6: Right Temporal Lobe
–B7: Githyanki Camp
–B8: Shalfi's Gear
–B9: Shalfi's Digging Spot
–B10: Left Temporal Lobe
–B11: Hidden Chamber
–B12: Encephalon Lair
–B13: Past Feeding
–B14: Prospective Lair
–B15: Mental Tension
–B16: Junk Room
–B17: Dragon's Den
–B18: The Collectors' Nook
–B19: Lore Halls
–B20: The Scar
–B21: Ashripask's Alcove
–B22: Briny Pool
The Endless Void
–M1: Stone Pier
–M2: Valsyx's Clearing
–M3: Charnyz's Dell
–N1: The Mouth
–N2: Throat
–N3: Membrane
–N4: The Guts
–W1: Prison Pyramid
–W2: Nellik's Windmill
–A1: Anima Entry
–A2: Refectory
–A3: Disciples' Chamber
–A4: Pit Overlook
Ilvaash's Refraction
Wrapping Up
Epilogue
Netherese Obelisks
App. A: Bestiary
Aberrant Zealot
Ashenwights
Encephalons
Fiendish Auger
Flesh Meld
Intellect Snare
Mind Flayers
Mutates
Oculorb
Psionic Goblins
Redbrand Ruffian
App. B: Magic Items
Item Descriptions
Story Tracker
Cover
Supplements
Turn of Fortune's Wheel
Planescape
3–18
Oct 17th, 2023
[+]
Introduction: Beginning of the End
Adventure Summary
Running the Adventure
Glitch Characters
Part 1 — Schemes in Sigil
Chapter 1: Grave Escape
–M1: Morgue
–M2: Autopsy Room
–M3: Possessions Room
–M4: Cold Locker
–M5: Crematorium
–M6: Corpse Retrieval
–M7: Dining Hall
–M8: Burial Grove
–M9: Records Room
–M10: Hallway
Chapter 2: Philosophers with Clubs
Chapter 3: Fortune Favors the Bold
–F1: Dragon Bar
–F2: Casino Cages
–F3: Illusory Fountain
–F4: Slot Machines
–F5: Table Games
–F6: Big-Ticket Prize
–F7: Fortune's Wheel
–F8: Ice Lounge
–F9: Stage
–F10: Security Room
–F11: Private Rooms
–F12. Portal to the Platinum Rooms
Part 2 — The Mosaic Mimir
Chapter 4–Into the Outlands
–W1: Terrace
–W2: Library
–W3: Main Room
–W4: Bedrooms
–W5: Study
–W6: Castellan Chamber
–W7: Meditation Chamber
–W8. Signal Tower
Chapter 5–Automata: Recalibration
Chapter 6–Curst: Invisible Bonds
–C1. Junk Heaps
–C2. Hidden Tunnel
–C3. Escape Route
Chapter 7–Excelsior: Lost Souls
Chapter 8–Faunel: Vicious Alliances
Chapter 9–Glorium: Heroes of the Day
Chapter 10–Rigus: Eternity's Rampart
Chapter 11–Sylvania: Titan on the Town
Chapter 12–Outlands Explorations
Chapter 13–Secrets of the Spire
Part 3 — Secret Realities
Chapter 14: Behind the Wheel
–P1: Fortune's End
–P2: Dungeonland
–P4: Fiend's Ante
–P5: Shemeshka's Guard
Chapter 15: Echoes of Delusion
–T1: Lair of the Eye
–T2: Beherit's Head
–T3: Ocular Space
–T4: Arlgolcheir's Morass
–T5: Gzemnid's Maw
–T6: X01's Throng
Conclusion
Cover
Extras
The Tortle Package
Tomb of Annihilation
1–4
Nov 3rd, 2017
[+]
Introduction
The Snout of Omgar
Using This Supplement
Tortle
Exploring the Island
Island Locations
Ahoyhoy
1. South Gate
2. North Gate and Courtyard
3. Living Area
4. Fishing Space and Storage
5. Amphitheater
6. Egg Hatcheries
7. Gong
8. Smithy
9. Market
Dangwaru (The Typhoon Palace)
1. Ruined Portico
2. Statue of Umberlee
3. Overgrown Garden
4. Antechamber and Portcullis
5. Feast Hall
6. Abandoned Quarters
7. Ruined Bath
8. Shrine
9. Crab Pool
10. Crumbling Walkway
11. Throne Room
12. Sea Cave
13. Ruined Guard Room
14. Terrace Garden
15. Cleric's Chambers
16. Kitchen and Storage
17. Hallway
18. Treasury
19. Glass Statue
20. Haunted Cage
21. Lounge
22. Caves of Worship
23. Blow Holes
24. Shrine of Umberlee
Geonid Caves
High Horn
Mud Pits of Florrb
Shrine of Fangs
New Monsters
Handouts
Extras
X Marks the Spot
Ixalan
4–4
Dec 11th, 2017
[+]
Background
Overview
Adventure Hooks
Treasure
Starting the Adventure
The Great Escape
Conqueror's Foothold
Field of Ruin
Fort Leor and Fort Durron
Primal Wellspring
Unclaimed Territory
Temple of Aclazotz
Conclusion
App. A: Monster and NPC Statistics
App. B: Locations of Ixalan
App. C: Map of Ixalan
App. D: Hidden Plunder
App. E: Player Characters
Extras
Lost Laboratory of Kwalish
Extra Life
5–10
Nov 10th, 2018
[+]
Adventure Primer
Background
Adventure Summary
Running the Adventure
Adventure Hooks
Part 1 — Mission to the Barrier Peaks
The Cartophile
Hirelings
Rumors and Legends
Reaching the Peaks
Trinkets from the Barrier Peaks
Part 2 — Monastery of the Distressed Body
Cliff-Side Approach
The Monastery
Locations in the Monastery
Onward Journey
Part 3 — The Ooze-Flooded City
Daoine Gloine
Meeting Kwalish
Concluding the Adventure
Acknowledgments and Final Thanks
App. A: Random Encounters
App. B: Further Options
The Cartophile
Mary Greymalkin
The Enhanced Sphinx
The Grand Master
Brains in Jars
More Monastery
High Priest
Baubles
Abyssal Throne Gate
Kwalish
App. C: Monsters and NPCs
App. D: Magic Items
App. E: New Spells
App. F: Additional Rumors
Daoine Gloine Map
Extras
Locathah Rising
Extra Life
9–9
Sep 19th, 2019
[+]
Introduction
Running the Adventure
Adjusting Encounters
The Adventure Begins
The Darkening
Umberlee's Maw
–1. Caravel Emergent
–2. What Is Dead May Never Die
–3. The Boneyard
–4. Tortle in Torpor
–5. Ravenous Rabble
–6. Awaiting the Master's Orders
–7. The Master
–8. Kraken Kibble
–9. Quarters of the Kraken Priests
–10. The Kraken
–11. Olhydra's Canal
–12. Shrine to Olhydra
–13. Umberlee's Chosen
The Final Countdown
App. A: Creature statistics
App. B: Locathah Characters
Extras
Infernal Machine Rebuild
Extra Life
5–10
Nov 12th, 2019
[+]
Introduction
Background
Adventure Summary
Running the Adventure
Adventure Hooks
Ch. 1: The Unicorn and the Hags
Background
Who Dwells Here?
The Three Mothers
Banrion the Unicorn
The Fey Woods
Aftermath
Ch. 2: An Invitation Extended
Background
The Two Agents
Expedition Options
Manipulating Time
Ch. 3: Construction of Horrors
Background
Who Dwells Here?
Missing Components
Mechanical Guide
Exploring the Tomb
–1. Office of the Artificer
–2. Umber Hulk Pen
–3. Entrance to the Tomb
–4. Side Entrance
–5. Control Room
–6. Captive Balor
–7. Forsaken Prison
–8. Sculptors' Workroom
–9. Artisans' Chambers
Exploring the Tomb (areas 10-18)
–10. Great Hall of Spheres
–11. Escape Room
–12. False Doors
–13. Chamber of Three Chests
–14. Chapel of Evil
–15. Secret Door
–16. Rift to the Lower Planes
–17. Flooding Pit
–18. Guardian Door
–18a. Gemsmith's Workshop
Ch. 4: Temple of Moloch
Background
Who Dwells Here?
Missing Components
Mechanical Guide
Exploring the Temple
–1. Entry Chamber
–2. Water Room
–3. Empty Ceremonial Chamber
–4. Guardroom
–5. Watch Room
–6. Barracks
–7. Storage Area
–8. Office of the Torturer
Exploring the Temple (areas 9-16)
–9. Torture Chamber
–10. Prison Cells
–11. Office of the Warden
–12. Owl Laboratory
–13. Bear Laboratory
–14. Main Laboratory (North)
–15. Thessalar's Laboratory
–16. Main Laboratory (South)
Exploring the Temple (areas 17-24)
–17. Midden
–18. Disposal Pit
–19. Sitting Room
–20. Thessalar's Bedroom
–21. Elite Guard Barracks
–22. Alchemical Lab
–23. Body Tanks
–24. Halls of Statues
Exploring the Temple (areas 25-32)
–25. Main Temple
–26. Workshop
–27. Workshop and Storage
–28. Private Chapel
–29. Secret Equipment Room
–30. Hidden Stairs
–31. Gemsmith's Cell
–32. Guardroom
Exploring the Temple (areas 33-39)
–33. Sculptors' Dormitory
–34. Guardroom
–35. Office of the Demogorgon
–36. Office of Hebediah's Steward
–37. Office of Emmanuel's Steward
–38. Treasure Vault
–39. Stairs to Underground Lake
Ch. 5: Final Showdown
Special Delivery
Completing the Machine
Concluding the Adventure
App. A: Further Options
Chapter 1: The Unicorn and the Hags
Chapter 2: An Invitation Extended
Chapter 3: Construction of Horrors
Chapter 4: Temple of Moloch
Chapter 5: Final Showdown
Additional Locations
Additional NPCs
App. B: NPCs and Monsters
App. C: New Magic and Special Items
Poisons
Magic Items
App. D: Player Handouts
Walk-Through Map
Piece of the Infernal Machine of Lum the Mad
Extras
The Lost Dungeon of Rickedness: Big Rick Energy
Rick and Morty
1–3
Nov 19th, 2019
[+]
Introduction
Running the Adventure
Pregenerated Characters
The Lost Dungeon of Rickedness
General Features
Leveling Up
What If They Die?
The Lost Dungeon of Rickedness Locations
Locations 1-9
–1. Stirge Room
–2. Goblin Room
–3. Statue Room
–4. Magic Mouth Room
–5. Another Goblin Room
–6. Treasure Room
–7. Third Goblin Room
–8. Writer's Room
–9. Pickle Roooom!
Locations 10-19
–10. Butt Room
–11. Orc Gift Room
–12. Festive Dinner Room
–13. Da Mage Room
–14. Synecdoche Room
–15. Buttless Zombie Room
–16. Many Doors Room
–17. Wizard Room
–18. Meeseeks Room
–19. Evil Clock Room
Locations 20-29
–20. Mort... Sorry, Goblin Room
–21. Bathroom Room
–22. Tommy Two-Butts Room
–23. Commercial Room
–24. Ooze Cult Room
–25. Pirate Room
–26. Clone Room
–27. Heavy Door Room
–28. Schwifty Room
–29. Mimic Room
Locations 30-39
–30. Virus Room
–31. Lever Room
–32. Chapel of the Buttless Room
–33. Nothic Room
–34. Frankie Freem's Room
–35. Treasure Treats Room
–36. Nice Butterfly Room
–37. Fun Skeleton Room
–38. Mama Owlbear Room
–39. Boss Room
Conclusion
App. C: Magic Items
Using a Magic Item
Item Descriptions
App. D: Creatures
Creature Stat Blocks
Creature Descriptions
Extras
Wildemount: Tide of Retribution
Wildemount
1–3
Mar 17th, 2020
[+]
Tide of Retribution
Story Overview
Adventure Summary
Setup and Starting Points
That Sinking Feeling
–P1. South Shore
–P2. West Shore
–P3. North Shore
–P4. East Shore
–P5. Bridge
–P6. Cliffs.
–P7. Farmer's Cottage
–P8. Docks
–P9. Tavern
–P10. Public Square
Seafarers
Hunger of the Deep
Ambush at Palma Flora
Concluding the Adventure
Character Advancement
Extras
Wildemount: Dangerous Designs
Wildemount
1–3
Mar 17th, 2020
[+]
Dangerous Designs
Story Overview
A Boom in the Night
–H1. Ironlot Streets
–H2. Gearhole Prison
–H3. The Builder's Plot
–H4. Lay of the Land Herbalist
–H5. Firemark Facility
–H6. Nima Cinnarid's House
–H10. Ironside Barracks
Ascending the Mountain
Stahlmast's Lair
–L1. Turret Cavern
–L2. Armory
–L3. Volatile Materials Storage
–L4. Recreation Room
–L5. Stahlmast's Workroom
–L6. Kitchen
–L7. Prison Cells
Stahlmast's Lair (areas L8-L14)
–L8. Shark Chamber
–L9. Training Room
–L10. Ambassador's Bedroom
–L11. Kobold Barracks
–L12. Steam Trap
–L13. Blacksmith's Chamber
–L14. Smithy
Stahlmast's Lair (areas L15-L20)
–L15. Storage Chamber
–L16. Infirmary
–L17. Surgery
–L18. Stahlmast's Bedroom
–L19. Clockwork Forge
–L20. Passage to the Underdark
Concluding the Adventure
Character Advancement
Extras
Wildemount: Frozen Sick
Wildemount
1–3
Mar 17th, 2020
[+]
Frozen Sick
Story Overview
Mystery in Palebank Village
Croaker Cave
–C1. Entrance Pool
–C2. Training Pool
–C3. Bat Cavern
–C4. Bandit Camp
–C5. Old Croaker's Pool
–C6. Hulil's Cavern
Jolly Dwarf
Traveling to Eiselcross
Syrinlya
Into the Wilds
Salsvault
–S1. Entrance Chamber
–S2. Ransacked Frigid Woe Laboratory
–S3. Animated Armor Laboratory
–S4. Frigid Woe Laboratory
–S5. Disease Storage
–S6. North Hall
Salsvault (areas S7-S12)
–S7. Unoccupied Dorm
–S8. Ruined Dorm
–S9. Zombie Dorm
–S10. Ferol Sal's Chamber
–S11. Kitchen
–S12. Dining Hall
Salsvault (areas S13-S18)
–S13. Drowned Library
–S14. South Hall
–S15. Animated Weapon Storage
–S16. Golem Laboratory
–S17. Ferol's Laboratory
–S18. Drowned Curative Laboratory
Concluding the Adventure
Extras
Wildemount: Unwelcome Spirits
Wildemount
1–3
Mar 17th, 2020
[+]
Unwelcome Spirits
Story Overview
Adventure Summary
Setup and Starting Points
Mission in Urzin
Exploring Brokenveil Marsh
–B1. Urzin's March
–B2. Withered Grove
–B3. Sunken Boneyard
–B4. Crumbling Tower
–B5. Bullywug Cave
–B6. Ritual Stone
–B7. Brokenveil Bluffs
–B8. The Mossback Steward
–B9. Fort Venture
Infiltrating Fort Venture
–V1. Palisade
–V2. Tent Yard
–V3. Commander's Quarters
–V4. Training Yard
–V5. Main Hall
Infiltrating Fort Venture (V6-V11)
–V6. Chapel
–V7. Armory Tent
–V8. Jail
–V9. Storehouse
–V10. Kennels
–V11. Latrines
Return to Urzin
Concluding the Adventure
Extras
Adventures in the Forgotten Realms: In Scarlet Flames
Adventures in the Forgotten Realms
8–8
Jun 30th, 2021
[+]
In Scarlet Flames
Part 1: The Village of Secomber
Part 2: The Wizard's Barrow
–1. Guard Chamber
–2. Moldering Supplies
–3. Rotten Common Room
–4. Abandoned Quarters
–4A: Hidden Shrine
–5. Ceremonial Entryway
–6. Descent Passage
–7. Observer's Chamber
–8. Second-Level Passageways
–9. Component Vault
–10. Ritual Casting Chamber (North)
–11. Ritual Casting Chamber (South)
–12. Laboratory Chamber
–13. Common Catacomb
–14. Grand Library
–15. Processional Hall
–16. Honored Crypts
Part 3: What's Next?
Appendix: Maps, Monsters, & NPCs
Extras
Adventures in the Forgotten Realms: The Hidden Page
Adventures in the Forgotten Realms
8–9
Jul 7th, 2021
[+]
The Hidden Page
Part 1: Hidden Chambers
–1. Entry Hall
–2. Crackling Corridor
–3. Emitter Stone
–4. Bladed Corridors
–5. Listing Floor
–6. Room of Rising Blades
–1. West Foyer
–2. Grand Hall
–3. Dining Room
–4. Kitchen
–5. Study
–6. East Foyer
–7. Bed Chamber
–8. Outer Garden
–9. Solarium
–10. Cellar
Part 4: What's Next
Appendix: Monsters and Magic Items
Extras
Adventures in the Forgotten Realms: A Verdant Tomb
Adventures in the Forgotten Realms
9–9
Jul 14th, 2021
[+]
A Verdant Tomb
Part 1: Riverside
–1. Sunken Yard
–2. Garden Shrine
–3. Sepulcher Entrance
Part 2: Inside the Crypts
–4. Ceremonial Chamber
–5. Northern Crypt
–6. Southern Crypt
–7. Grand Mausoleum
–8. Processional Corridor
–9. Tiled Passage
–10. Memorial Chamber
–11. Grand Crypt
Part 3: What's Next
App. A: Appendix A: New Spells
App. B: Appendix B: New Artifacts
Extras
Adventures in the Forgotten Realms: Deepest Night
Adventures in the Forgotten Realms
9–10
Jul 21st, 2021
[+]
Deepest Night
Part 1: The Outer Lair
–1. Cleft in the Rock
–2. Boulder Trio
–3. Abandoned Altar
Part 2: The Inner Lair
–4. At the Threshold
–5. A Deep, Dark Well
–6. Giant Snake Den
–7. Lost Bones
–8. Poison Pool
–9. Abandoned Chambers
–10. Rotting Ceremonial Chamber
–11. Magic Door
Part 3: Starry Refuge
–12. Deepest Night
–13. A Cozy Cottage
Part 4: What's Next
App. A: Appendix A: Monsters & NPCs
App. B: Appendix B: New Magic Items
Extras
Adventures in the Forgotten Realms: From Cyan Depths
Adventures in the Forgotten Realms
10–10
Jul 28th, 2021
[+]
From Cyan Depths
The Fortress of the Cobalt Mage
–1. Lakeshore Gate
–2. Central Guard Tower
–3. Southern Guard Tower
–4. Northern Guard Tower
–5. Arched Walkways
–6. Northern Turret
–7. Southern Turret
–8. Cellar Vault
–9. Wizard's Residence
–10. Sanctum
–11. Study
–12. Meeting Hall
–13. Observatory
App. A: Appendix A: Monsters & NPCs
App. B: Appendix B: Spells
App. C: Appendix C: Artifacts
Extras
NERDS Restoring Harmony: The Candy Mountain Caper
NERDS Restoring Harmony
1–3
Sep 1st, 2021
[+]
Restoring Harmony: The Candy Mountain Caper
The Candy Mountain Caper
–Path 1: The Secret Tunnel
–Path 2: Candy Mountain Mine
–C1. Mine Perimeter
–C2. Mining Camp
–C3. Stairway
–C4. Central Storage
–C5. Mine Shafts
–C5A. Secret Tunnel Cavern
–C5B. Rock Candy Mother Lode
–C5C. Net Trap
–C5D. The Coral Gem
–C5E. Dragon Fossil
Completing the Mission
Magic Items
Extras
NERDS Restoring Harmony: Circus of Illusion
NERDS Restoring Harmony
1–3
Sep 1st, 2021
[+]
Restoring Harmony: Circus of Illusions
Harmony
Circus of Illusions
Getting In
Encounters at the Circus
Exploring the Circus
–C1. Ticket Booth
–C2. Main Tent
–C3. Magnifico's Tent
–C4. Rubina's Tent
–C5. Filippo Fleetfinger's Tent
–C6. Imelda the Strongwoman's Tent
–C7. Vendors
Completing the Mission
Magic Items
Extras
Critical Role: Call of the Netherdeep
Critical Role
3–13
Mar 15th, 2022
[+]
Introduction: Answering the Call
World of Exandria
Story Overview
Running the Adventure
Ruidium
Rivals
Character Creation
Pronunciation Guide
Ch. 1: A Fateful Competition
Running This Chapter
Jigow
Adventure Start
–J1: Best Pies in the Jumble
–J2: One-Shot Solution
–J3: The Ifolon Plunge
–J4: Call to Arms
–J5: Wetwalks Paddywhack
–J6: Herding the Horizonbacks
–J7: Riddles and Rhymes
–J8: Temple of the Luxon
–J9: Helter-Skelter
–J10: Black Islands
The Emerald Grotto
–E1: Grotto Entrance
–E2: Kelp Tangle
–E3: Cavern Fork
–E4: Ghostgrass Patch
–E5: Landslide
–E6: Quipper Den
–E7: Octopus's Garden
–E8: Riptide Tunnel
–E9: Dead End?
–E10: Moonshark Lair
–E11: Moon Weaver's Gateway
–E12: Prayer Site of Sehanine
Next Steps
Ch. 2: The Leave-Taking
Running This Chapter
After the Festival
Road to Bazzoxan
Reunion with the Rivals
Emerald Loop Caravan Stop
–L1: Entrance to the Clearing
–L2: Big Yuyo
–L3: Ox Corral
–L4: Adventurers' Camp
–L5: Bonfire
Arrival at Bazzoxan
Ch. 3: Bazzoxan
Running This Chapter
No Time for Pleasantries
Bazzoxan Overview
–B1: Gate of Bazzoxan
–B2: Crematorium
–B3: Infirmary
–B4: Gatehold Barracks
–B5: Dilapidated Temple
–B6: Wall of the Unforgotten
–B7: The Ready Room
Betrayers' Rise
–R1: Entrance
–R2: Hall of Holes
–R3: Vestibule
–R4: Path of Emptiness
–R5: Flagellant's Path
–R6: Cloister of Penitence
–R7: Stairs Down
–R8: Spiders' Chancel
–R9: Basilica of Revelry
–R10: Supplicant's Pit
–R11: Stairs Up
–R12: Threshold of the Excoriated
–R13: Lightless Labyrinth
–R14: Blood Font of the Ruiner
–R15: Misty Chasm
–R16: Prayer Site of Avandra
Next Steps
Ch. 4: The Jewel of Hope
Running This Chapter
Rivals in Ank'Harel
Arrival in Ank'Harel
Ank'Harel Gazetteer
Faction Story Tracks
–What Lies Beneath
–Vermilion Gambits
–Knowledge Is Power
Ch. 5: The Drowned City
Running This Chapter
Cael Morrow Overview
–M1: Stone Column
–M2: Warded Entrance Hall
–M3: Allegiance Base Camp
–M4: Royal Guest House
–M5: Access Corridor
–M6: Sunken Tavern
–M7: Hall of the Royal Library
–M8: Submerged Library
–M9: Temple of the Arch Heart
–M10: Crumbling Building
–M11: Kelp Forest
–M12: Cliffside Path
–M13: Villa
–M14: Watchtower
–M15: Collapsed Guard Tower
–M16: Collapsed Ruins
–M17: Rift to the Netherdeep
Ch. 6: The Netherdeep
Running This Chapter
Netherdeep Overview
Netherdeep Regions
Grottoes of Regret
–N1: Antechamber
–N2: Child's Lament
–N3: Unforgotten Fallacy
–N4: Haunted Ashes
–N5: Alyxian's Refuge
–N6: Loss of Innocence
–N7: Battle at the Betrayers' Rise
–N8: Ruiner's Spear
–N9: Hall of the Portal
Vents of Fury
–N10: Belching Gallows
–N11: Frothing Hollow
–N12: Scalding Pit
–N13: Warriors of Wrath
–N14: Carmine Sepulcher
–N15: Spear of the Apotheon
–N16: Curse of Ruidus
–N17: Heart of Truth
–N18: Fragment of Melancholy
Chasm of Yearning
–N19: Cavern of Many Hands
–N20: Cavern of Many Eyes
–N21: Cavern of Many Peaceful Ends
–N22: Cavern of Many Graves
–N23: Grotto of Many Futures
–N24: Cavern of Many Waterfalls
–N25: Fragment of Loathing
–N26: Sanctuary of Despair
Ch. 7: The Heart of Despair
Running This Chapter
Within the Heart
–H1: Statue of Alyxian
Battle for the Soul of the Apotheon
Back into the Light
App. A: Creatures
Using a Stat Block
Adventuring Rivals
Creatures A-Z
App. B: Magic Items
Ruidium Items
Magic Item Descriptions
App. C: Medals of Merit
Printable Image
App. D: Fragments of Suffering
App. E: Story Concept Art
App. F: Poster Map
Extras
Spelljammer Academy
Spelljammer
1–4
Aug 1st, 2022
[+]
Part 1 — Spelljammer Academy: Orientation
Introduction
Part 1: Welcome to Wildspace
Part 2: Academy Orientation
Part 3: Intruder Alert!
Creature Statistics
Handouts
Part 2 — Spelljammer Academy: Trial By Fire
Introduction
Part 1: Preflight Meal
Part 2: Test of Mettle
Part 3: Sabotage!
Creature Statistics
Handout 1: Hammerhead Ship
Appendices
Part 3 — Spelljammer Academy: Realmspace Sortie!
Introduction
Part 1: Tyrant Trap!
Part 2: Like Clockwork!
Part 3: Fire in the Galley!
Creature Statistics
Appendix A: Realmspace
Handout 1: Tyrant Ship Map
Part 4 — Spelljammer Academy: Behold H'Catha
Introduction
Part 1: The Spindle
Part 2: Journey Interrupted
Part 3: Homecoming
Creature Statistics
Handout 1: Spelljammer Academy Map
Extras
Lightning Keep
Minecraft
3–3
Sep 26th, 2023
[+]
Lightning Keep
Running the Adventure
Beginning the Adventure
Arrival at the Keep
Exploring the Keep
–K1: Lower Gatehouse
–K2: Courtyard
–K3: Outhouse
–K4: Outer Barrack
–K5: Stable
–K6: Main Hall
–K7: Vestibule
–K8: Kitchen and Well
–K9: Pantry
–K10: Dining Hall
–K11: Servants' Quarters
–K12: Armory
–K13: Upper Gatehouse
–K14: Gallery
–K15: Bedroom
–K16: Privy
–K17: Bedroom
–K18: Bedroom
–K19: Inner Barrack
–K20: Private Study
–K21: Cornerstones
Concluding the Adventure
Extras
Chains of Asmodeus
Extra Life
11–20
Oct 30th, 2023
[+]
Introduction: Welcome to the Nine Hells
The Nine Hells
Sins
Running the Adventure
Story Overview
Adventure Flowchart
The Nine Hells
Great Heroes
New Characters
Saving Souls
Lost Souls
Souls of the Damned
Group Patrons
Hellriders of Elturel
Conclave of Halruaa
Deathstalkers of Bhaal
Ch. 1: Kelemvor's Cathedral
Running this Chapter
The Infernal Contracts
The Cathedral
Entering the Nine Hells
Meeting Tiax
No Turning Back
Ch. 2: The Nine Hells
Character Objectives
River Styx Encounters
Asmodeus and the Nine Sins
Let Me Tempt You
The Dukes
Life in the Nine Hells
Features of the Nine Hells
Ch. 3: Avernus, the Eternal Battlefield
Running This Chapter
Avernus Overview
Key Locations in Avernus
Adventure: The War-Slough
War-Slough Locations
–W1: Sentry Tower
–W2: Ruined Tower
–W3: Ichor Lake and the Demon Nest
–W4: Canyon Trove
Ch. 4: Dis, the City of Burning Iron
Running This Chapter
Dis Overview
Key Locations in the City of Dis
Adventure: The Agora of Floating Knives
The Outer Agora Locations
–A1: The Arena
–A2: Neogi Shop
The Inner Agora Locations
–A3: Barges of Theater
–A4: The Market of Killers
–A5: The Market of Victims
–A6: Orishada's Palace
Ch. 5: Minauros, the Endless Swamp
Running This Chapter
Minauros Overview
Key Locations in Minauros
Adventure: The Ineffable Trove
In Search of the Discarded and Forgotten
–I1: Klassk's Lair
–I2: Ilfrich's Lair
–I3: Thelekarna's Roost
–I4: The Grinken Eyre
Ch. 6: Phlegethos, the Fiery Wasteland
Running This Chapter
Phlegethos Overview
Key Locations in Phelegethos
Adventure: The Elemental Preserve
The Elemental Preserve Locations
–E1: Hunting Lodge
–E2: Hateli of the Storm's Realm
–E3: Anagwendol's Prison
–E4: Kordichai's Manor
Ch. 7: Stygia, the Frozen Sea
Running This Chapter
Stygia Overview
Key Locations in Stygia
Adventure: The Chasm of Found Things
Chasm of Found Things Locations
–C1: The Entrance
–C2: Congregation of Gjaaki
–C3: The Echoes
–C4: Angel of the Ice
–C5: The Aboleth
–C6: Keeper of Found Things
–C7: The Awful Fisher
–C8: Gjaaki
Ch. 8: Malbolge, the Realm of Decay
Running This Chapter
Malbolge Overview
Key Locations in Malbolge
Adventure: The Sign of the Hag's Arms
The Sign of the Hag's Arms Locations
–S1: The Swarm
–S2: Ekengarik's Hive
–S3: Entrance
–S4: Feasting Hall
–S5: Kitchens
–S6: Guest Rooms
–S7: The Basements
–S8: Irabella's Workshops
–S9: Malecki's Workshops
–S10: Anacreda the Angelmaker
Ch. 9: Maladomini, the Domain of Ruined Cities
Running This Chapter
Maladomini Overview
Key Locations in Maladomini
Adventure: The Eye Market
Eye Market Locations
–M1: Outer Streets
–M2: Ganglands—Ilkatar's Territory
–M3: Ganglands—Memnoriac's Territory
–M4: Ganglands—Jacelisk's territory
–M5: The Slums
–M6: The Eye Market
Ch. 10: Cania, the Relentless Cold
Running This Chapter
Cania Overview
Key Locations in Cania
Adventure: The Sorrow Mine
A Thankful Patron
Before Leaving Cania
Tiax's Betrayal
Leaving Cania
The Sorrow Mine Locations
–T1: The Mining Town
–T2: Baron Klendisk's Fort
–T3: Kargan Skul's Home
–T4: Cornelius Brassgrave's House
–T5: The Rendering Sheds
–T6: The Mines
Ch. 11: Hunted by the Dukes
Running this Chapter
Ambushed by the Infernal Warship
Ambushed by Abigor
The Brothers' Infernal Warship
Locations in The Brothers' Infernal Warship
–N1: Top Deck
–N2: Acid Vats
–N3: Hellfire Fuel
–N4: Command and Navigation Bridge
–N5: Brig
–N6: Nest
–N7: Engine Room
–N8: Kitchens
–N9: Mess Hall
–N10: Common Quarters
–N11: Officer's Quarters
–N12: Workshop
–N13: Storage
–N14: Soul Fire Engine
–N15: Fuel Reserve
–N16: Armory
–N17: Kennels
–N18: Watchtower
Baalzebul's Infernal Submersible
–B1: Bridge
–B2: Brig
–B3: Communication Room
–B4: Engine Room
–B5: Kitchens
–B6: Showers
–B7: Common Quarters
–B8: Officer's Quarters
–B9: Storage
–B10: Abigor's Bedchamber
–B11: Torpedo Room
–B12: Depth Charge Room
Ch. 12: Nessus, the Bastion of Asmodeus
Running this Chapter
The Final Stage
Nessus Overview
Adventure: The Oasis of the Lethe
Oasis of the Lethe Locations
–O1: Arrival
–O2: Home of Teskethmus
–O3: Home of Orvedarc
–O4: Home of Isitrix
–O5: Home of Elihandrel
–O6: The Library
Adventure: Malsheem
Leaving the Nine Hells
App. A: Lords of the Nine
Archdevil Lair Actions
App. B: Monsters
App. C: Non-Player Characters
App. D: Infernal Magic Items
Infernal Item Corruption
Infernal Artifacts
App. E: Corruption
Corruption Tracker
Corruption Score
Final Outcomes
App. F: Player Handouts
Infernal Maps
Normal Maps
The War-Slough
The Ineffable Trove
The Elemental Preserve
The Oasis of the Lethe
The Agora of Floating Knives
The Eye Market
Extras
Heroes' Feast: Saving the Childrens Menu
Heroes' Feast
10–10
Nov 21st, 2023
[+]
Heroes' Feast: Saving the Children's Menu
Overview
Adventure Background
The Adventure Begins
Holrow Homestead
–1: Main Hall
–2: Library
–3: Greenhouse
–4: Barn
–5: Nursery
–6: Basement
–7: Cheese Storage Room
–8: Storage Room
Invido Returns
Conclusion
Appendix A: Cheesemonger's Almanac
Appendix B: Kender Stumblenoodles Recipe
Extras
Grim Hollow: Lairs of Etharis
Grim Hollow
1–20
Nov 30th, 2023
[+]
Welcome to Lairs of Etharis
Introduction
Monster Hunting
Horror Triggers Horror
Capturing the Grim
A Little Knowledge Goes a Long Way
Ultimately, the Goal is Fun
You are a Game Master
Monsters, Magic, and More
1: Bone House
Background
Lair Overview
–1. Ruined Cabin
–2. Faevlin Camp
–3. Refuse Pit
–4. Knifewing Den
–5. Bone Manse
–6. Bedroom and Showcase
–7. Storeroom
Conclusion
Creatures
2: Faren's Rest
Background
Lair Overview
–1. The Outrageous Pig (Inn and Tavern)
–2. Stables
–3. Faren's Mansion
–4. Defaced Statue of Faren
–5. Well
–6. Outhouses
–7. Wealthy Merchant's Home
–8. Ambitious Merchant's Home
–9. Assorted Homes
–10. Open Road
Conclusion
Creatures
3: The Leatherhollow
Background
Lair Overview
–1. First Cave (Entrance)
–2. Lavatory Pit & Cages
–3. Barracks
–4. Root Cellar
–5. Spider Lair
–6. Skinweaver's Blinds
–7. Skinweaver Chamber
–8. Tanning Area
Conclusion
Creatures
4: Apostate Temple
Background
Lair Overview
–1. Stylobate Base
–2. Barracks
–3. Storeroom
–4. Armory
–5. Bloodbonded Quarters
–6. Sanctuary Stairs
–7. The Sanctuary
Conclusion
Creatures
5: Gloomrock Caverns
Background
Lair Overview
–1. Caverns Entrance
–2. Grimlock Island
–3. Drake Lake
–4. Slow Rise
–5. Horror Flit Nest
–6. Unsteady Stalagmites
–7. Dawndrinker Glimmercave
–8. Sloped Tunnel
Conclusion
Creatures
6: Boulderwood Path
Background
Lair Overview
–1. Forest Path
–2. Watering Hole
–3. Ruined Wagon
–4. Elder Mount
–5. Hillside Nest
–6. Ancient Altar
Conclusion
Creatures
7: Flamegrit Iron Mine
Background
Lair Overview
–1. Entrance
–2. North Side
–3. Smoking Crates
–4. Trapped Miners
–5. West Cave
–6. General Store
–7. South Side
–8. Bunkroom
–9. Abandoned Excavation
–10. East Cave
–11. Stone Bridge
Conclusion
Creatures
8: Shadowsteel Citadel
Background
Lair Overview
–1. Path and Cliffs
–2. Collapsed Entrance
–3. Undead Guards
–4. Empty Room
–5. Bunkroom
–6. Guarded Negotiations Chamber
–7. Armory
–8. Dead in Waiting
–9. Dining Room
–10. Kitchen
–11. Storage
–12. Sacristy
–13. Ruined Cathedral
–14. Undead Alchemy Lab
Conclusion
Creatures
9: Storm Sanctuary
Background
Lair Overview
–1. Open Pagoda
–2. Air Elemental Statue
–3. Ruined Hall
–4. Ruined Study
–5. Magic Gate
–6. The Sacred Pool
–7. Nesting Cave
–8. Dragon Sanctuary
Conclusion
Creatures
10: Sardonyx Necropolis
Background
Lair Overview
–1. Cobblestone Walkway
–2. Angel of Health
–3. Unmarked Mausoleum
–4. Obelisk
–5. Crypt Niches
–6. Statue of Lady Gilrain
–7. Assorted Graves
–8. General's Tomb
–9. Destroyed Crypts
–10. Niches & Mosaic
Conclusion
Creatures
11: Foulest Truths
Background
Lair Overview
–1. Underdock
–2. Path of Planks
–3. Pumping Room
–4. The Liar's Test
–5. Mauro's Lair
Conclusion
Creatures
12: The Tower of Flicker and Shadow
Background
Lair Overview
–1. First Floor–Grand Hall
–2. Second Floor - Library
–3. Third Floor–Living Quarters
–4. Fourth Floor–Laboratory
–5. Fifth Floor–Summoning Chamber
Conclusion
Creatures
13: Swamp of Fate
Background
Lair Overview
–1. The Hanging Tree
–2. Standing Stones
–3. Ruins of Astranag
–4. Wooded Hill
–5. The Ordeal Tree
–6. Shallows
Conclusion
Creatures
14: Street Prophet
Background
Lair Overview
–1. Fountain Square
–2. Storefront
–3. Chapel
–4. Abattoir
–5. Abandoned Shop
–6. Summoning Shop
Conclusion
Creatures
15: The Thundering Hills
Background
Lair Overview
–1. Cave Entrance
–2. Windy Ravine
–3. Burrow of the Lickscale
–4. Nursery Pit
–5. Lair of the Lindwyrms
Conclusion
Creatures
16: Safe in the Stillborn
Background
Lair Overview
–1. Logging Road
–2. Destroyed Dwelling
–3. Krumm's Estate
Conclusion
Creatures
17: Cave of Rising Sands
Background
Lair Overview
–1. Midden
–2. Tainted Pool
–3. Ill-Gotten Gains
–4. Larder
–5. Barracks
–6. Study
–7. Shrine to Miklas
Conclusion
Creatures
18: Mayhem at the Crossroads
Background
Lair Overview
–1. Floss Memorial Statue
–2. Rusk's Residence
–3. Private Tavern
–4. Yort's Residence
–5. Hostage
Conclusion
Creatures
19: Prison of Good Intent
Background
Lair Overview
–1. Moat
–2. Bridge
–3. Sty
–4. Tree
–5. Dwelling
Conclusion
Creatures
20: Top of the World
Background
Lair Overview
Arrival
–1. Thunder Obelisk
–2. Ice Obelisk
–3. Flame Obelisk
–4. Lightning Obelisk
–5. Central Obelisk
Conclusion
Creatures
App. A: Magic and Salvage
The Power of Salvage
Overcoming Incredible Odds
Salvage and Crafting Rules
New Magic Items
New Spells
App. B: Etharis Creatures
Credits
Extras
Dungeons of Drakkenheim
Drakkenheim
1–13
Dec 21st, 2023
[+]
Ch. 1: Introduction to Drakkenheim
Campaign Overview
Content Warning
Character Creation
Four Quick Facts about the World of Drakkenheim
The Original Campaign
Ch. 2: Running the Campaign
Story Overview
Character Advancement
Origins of the Meteor
Fall of House von Kessel
Embracing the Unknown
Running Personal Quests
Running the Factions
Cast of Characters
Rival Adventurers
Starting the Campaign
The Road to Drakkenheim
Conclusion
Ch. 3: Factions
Background
The Amethyst Academy
Roleplaying Characteristics
The Followers of the Falling Fire
Roleplaying Characteristics
What has Lucretia Mathias foreseen?
The Hooded Lanterns
Roleplaying Characteristics
Knights of the Silver Order
Roleplaying Traits
Queen's Men
Roleplaying Characteristics
Ch. 4: Emberwood Village
Overview
Interactions
Area Details
Concluding the Chapter
Character Advancement
Ch. 5: Exploring Drakkenheim
City Overview
The Haze
Navigating the Ruins
Random Encounters
Delerium Hunt
Ch. 6: Outside the Walls
Overview
Black Ivory Inn
Developments
Buckledown Row
Developments
Chapel of Saint Brenna
–[1] Crematory Garden
–[2] Chapel
–[3] Undercroft
–[4A and 4B] Winch Chambers
–[5] Purification Fountain
–[6] Crematory Entrance
–[7] North Crypts
–[8] South Crypts
–[9] Tomb of Saint Brenna
–[10] Hidden Reliquary
Developments
Eckerman Mill
Rat's Nest Tavern
–[1] Cratered Basement
–[2] Trapped Entrance Passage
–[3] Lookout's Burrow
–[4] Ratling Nests
–[5] Food Caches
–[6] Idol of the Rat God
–[7] Gathering Den
–[8] Seer's Den
Developments
Reed Manor
–[1] Manor Grounds
–[2-8] Manor House
–[9-12] Secret Lab
–[10] Well Cistern
–[11] Meditation Chamber
–[12] Materials Storage
Developments
Shrine of Morrigan
Smithy on the Scar
–[1-6] Spokes Smithy
–[1] Forge
–[2] Smithy's Office
–[3] Campsite
–[4] East Barricade
–[5] West Barricade
–[6] Gun Platforms
Developments
Stick's Ferry
Ch. 7: Inside the Walls of Drakkenheim
Overview
Developments
Cosmological Clocktower
Developments
The Crater
Developments
Kleinberg Estate
Developments
Old Town Cistern
–[1] Underground Cistern
–[1a] Basin
–[1b] Aqueduct Passage
–[1c] Sewer Canal
–[1d] Slaughterstone Stair
–[1e] Smuggler's Tunnel
–[2] Bathhouse Ruins
–[3] Hydra's Lair
–[4] Underground Lake
Developments
Queen's Park
–[1] Grotto Entrance
–[2] Wellspring
–[3] Statuary Chamber
–[4] Underground Pond
Developments
Rose Theatre
Developments
Saint Vitruvio's Cathedral
–[1-3] Tombs
–[1] Western Tombs
–[2] Southwest Tombs
–[3] Eastern Tombs
–[4] Founder's Tomb
–[5] Pool of the Mourning Angel
–[6] Scriptorium
–[7] House von Kessel Vault
–[8] Vault of Ignacious
–[9] Tomb of Saint Vitruvio
–[10] Argonath's Rest
Developments
Slaughterstone Square
Ch. 8: Faction Strongholds
Interaction
Camp Dawn
–[1] Supply Wagons
–[2] Guard Towers
–[3] Rookery Towers
–[4] Stables
–[5] Infirmary
–[6] Pyre of the Sacred Flame
–[7] Knight's Tents
–[8] Flamekeeper's Tents
–[9] Command Post
Court of Thieves
Drakkenheim Garrison
Inscrutable Tower
Developments
Saint Selina's Monastery
Ch. 9: Castle Drakken
Overview
Interactions
Sealed Fate
Castle Grounds
–[1] Gates
–[1a] Lower Gate
–[1b] Cliff Gate
–[1c] Upper Gate
–[2] Lower Bailey Areas
–[2a] Armoury
–[2b] Barracks
–[2c] Carriage House
–[2d] Servant's Lodge
–[2e] Stables
–[2f] Workshops
–[2g] Bailey Gate
–[3] Upper Bailey Areas
–[3a] Overlook Tower
–[3b] Knight's Tower
–[3c] Castle Gardens
Approach
Main Entrance
Throne Room
Dungeons of Drakkenheim
Developments
Closing the Dimensional Rift
Beyond the Dimensional Rift
Eternal Custodian
Coronation Ceremony
Be careful what you wish for...
Lost Seals
Ch. 10: The Fate of Drakkenheim
Resolving Personal Quests
Defeated Factions
Epilogues
App. A: Monsters
Mechanical Features
Roleplaying Traits
Monster Modifications
New Monsters
Legendary Creatures
App. B: Nonplayer Characters
Cavalier
Chaplain
Hedge Mage
Scoundrel
Urban Ranger
App. C: Contamination
Contamination Symptoms
Mutations
Removing Contamination
Death and Dying while Contaminated
Monstrous Transformation!
App. D: Delerium, Magic & Spells
Delerium
Spells
Magic Items
Seals of Drakkenheim
Relics of Saint Vitruvio
App. E: The World of Drakkenheim
People of the Continent
Realms of the Continent
Magic and Spellcasters
Faith and Religions
The Edicts of Lumen
The Cosmos
App. F: Character Backgrounds
Continental Nobility
Mageborn
Devoted Missionary
Survivor
Treasure Seeker
Credits
Poster Map: City of Drakkenheim
Drakkenheim: City Map
Drakkenheim: Deep Haze Map
Lost Mine of Phandelver
Hoard of the Dragon Queen
Rise of Tiamat
Princes of the Apocalypse
Out of the Abyss
Curse of Strahd
Storm King's Thunder

Tales from the Yawning Portal: The Sunless Citadel
Tales from the Yawning Portal: The Forge of Fury
Tales from the Yawning Portal: The Hidden Shrine of Tamoachan
Tales from the Yawning Portal: White Plume Mountain
Tales from the Yawning Portal: Dead in Thay
Tales from the Yawning Portal: Against the Giants
Tales from the Yawning Portal: Tomb of Horrors
Tomb of Annihilation
Waterdeep: Dragon Heist
Waterdeep: Dungeon of the Mad Mage
Ghosts of Saltmarsh
The Orrery of the Wanderer
Essentials Kit: Dragon of Icespire Peak
Essentials Kit: Storm Lord's Wrath
Essentials Kit: Sleeping Dragon's Wake
Essentials Kit: Divine Contention

Baldur's Gate: Descent Into Avernus
Eberron: Forgotten Relics
Theros: No Silent Secret
Icewind Dale: Rime of the Frostmaiden
Candlekeep Mysteries

Ravenloft: The House of Lament
The Wild Beyond the Witchlight
Strixhaven: Campus Kerfuffle
Strixhaven: Hunt for Mage Tower
Strixhaven: The Magister's Masquerade
Strixhaven: A Reckoning in Ruins
Journeys through the Radiant Citadel
Dragons of Stormwreck Isle

Light of Xaryxis
Dragonlance: Shadow of the Dragon Queen
Keys from the Golden Vault
Phandelver and Below: The Shattered Obelisk
Turn of Fortune's Wheel

The Tortle Package

The Lost Kenku
X Marks the Spot
Lost Laboratory of Kwalish
Krenko's Way

A Zib for Your Thoughts
Hunt for the Thessalhydra
Locathah Rising

Infernal Machine Rebuild

The Lost Dungeon of Rickedness: Big Rick Energy
Wildemount: Tide of Retribution
Wildemount: Dangerous Designs
Wildemount: Frozen Sick
Wildemount: Unwelcome Spirits
Return to the Glory

Adventures in the Forgotten Realms: In Scarlet Flames
Adventures in the Forgotten Realms: The Hidden Page
Adventures in the Forgotten Realms: A Verdant Tomb

Adventures in the Forgotten Realms: Deepest Night
Adventures in the Forgotten Realms: From Cyan Depths
NERDS Restoring Harmony: The Candy Mountain Caper

NERDS Restoring Harmony: A Voice in the Wilderness
NERDS Restoring Harmony: A Sticky Situation
NERDS Restoring Harmony: Circus of Illusion
NERDS Restoring Harmony: The Lost Tomb

NERDS Restoring Harmony: A Web of Lies

NERDS Restoring Harmony: Adventure Together
Critical Role: Call of the Netherdeep
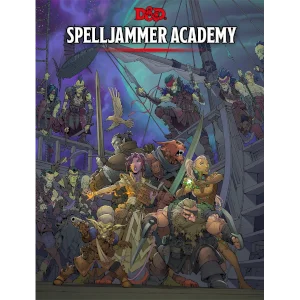
Spelljammer Academy

Giants of the Star Forge
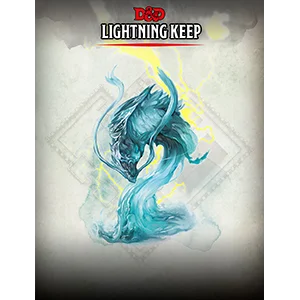
Lightning Keep
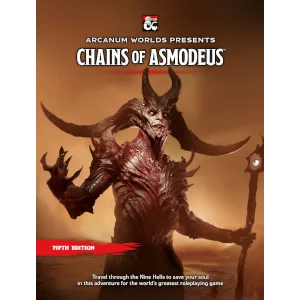
Chains of Asmodeus
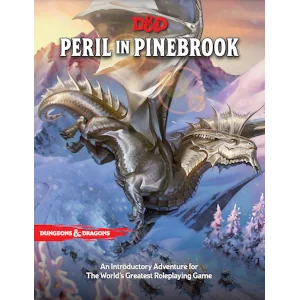
Peril in Pinebrook

Heroes' Feast: Saving the Childrens Menu
Grim Hollow: Lairs of Etharis
Dungeons of Drakkenheim